Wednesday, October 10, 2012

Not just a Neverborn in Ten Thunders Clothing

Wednesday is here and I am back with another rambling set of thoughts. No Battle report this week, I forgot my camera at home last night. I did get two games in, continuing my exploration and refinement of the Ten Thunders with Misaki for one game and Jakob for the other. This will make my 6th game with non-proxy Jakob and true to form, I feel like I am settling into a good crew base and playstyle with him. I figured it would be good to ramble a bit about my thoughts today.

So, Jakob Lynch and his crew are interesting to say the least. Based on my reading in the Wyrd forums and discussions with some of my local players it appears I am headed in a different direction than others. The prevailing early wisdom is to keep to the brilliant theme and models presented in the Storm of Shadows book. There is lots of discussion about playing Jakob as a Neverborn master, and most of the thoughts on using him as a Ten Thunders master start with him as Neverborn. People really like Illuminated and Depleted with him, and a couple folk have discussed his teaming with Tannen. I have moved to taken none of those.

Mike was siding on teaming Jakob up with Beckoners and Ten Thunders Archers, building a ranged focused crew and using Illuminated as a "guard" for the back line ranged models. I have not had a chance to play against this configuration, apparently it has been effective based on the feedback from the others in our group. In one of my games last night I had the chance to play around with an Archer and Beckoner team in a Jakob crew, and while its interesting I did not find it as useful as using 2 Beckoners.

This is a really good time to make the point that there are many ways to build effective crews within Malifaux. More importantly, Jakob has abilities which can benefit many different crew builds. Jakob has a couple key capabilities working toward benefiting a very general crew. Judicious use of Dead Mans Hand allows Jakob to build up a very strong hand. The Hungering Darkness (Huggy) is a threat that must be dealt with, then he can be brought back after being killed (under the right circumstances) creating a key game turning moment. These two capabilities together can allow Jakob to work with many different types of crews, and none are wrong. What I am presenting in this article is simply what has been working really well for me over the past 6 games.

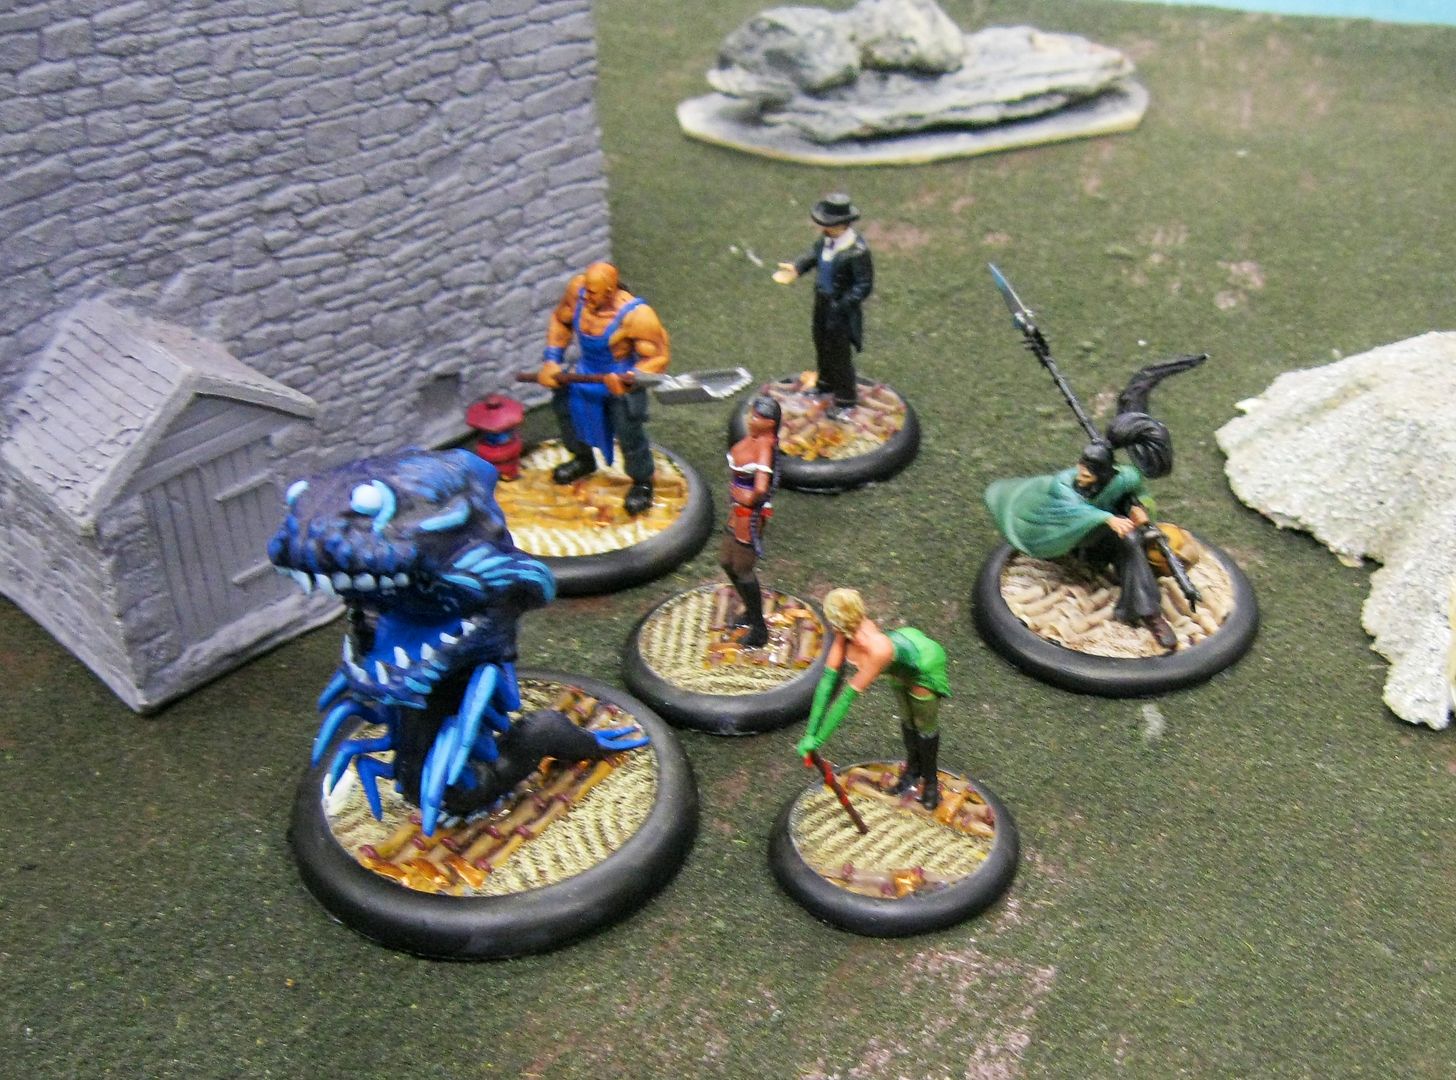
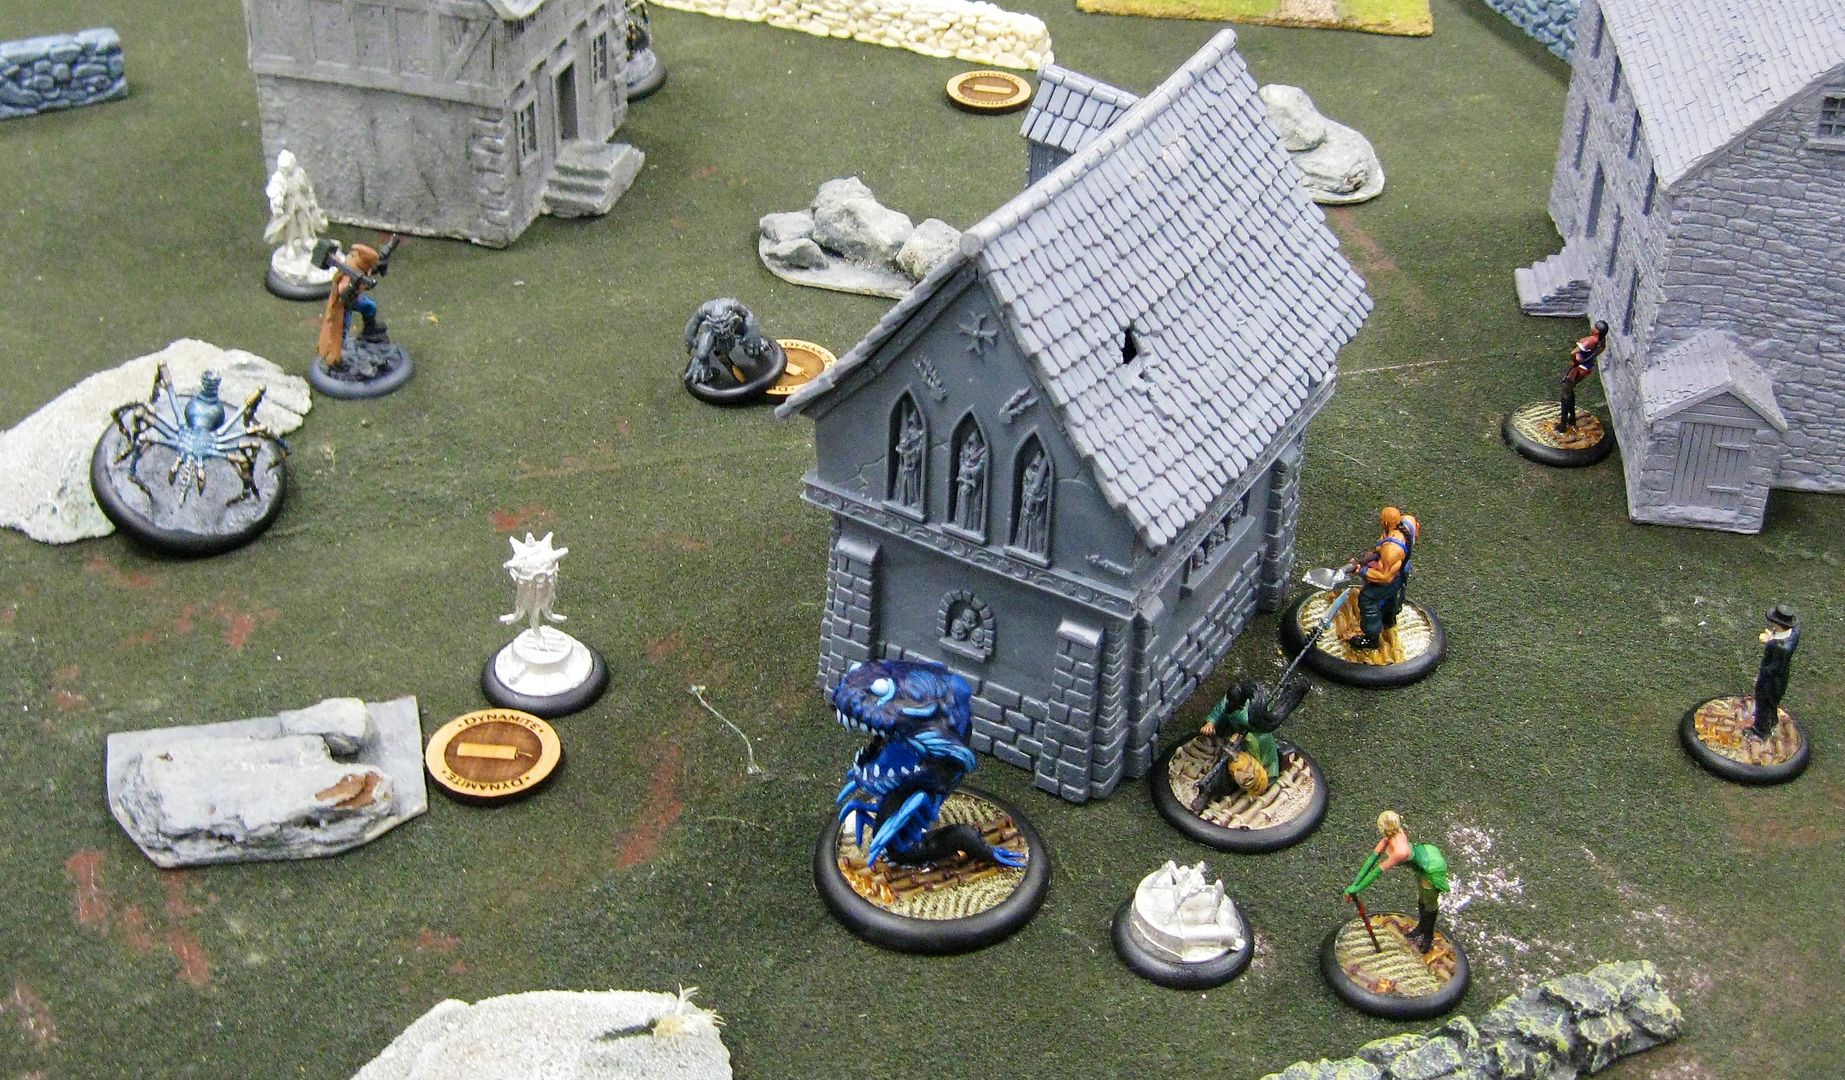
So, what do I like in my Jakob crew? The core of my crew starts to look as follows:
  • Jakob
  • Huggy
  • 2x Beckoners
To this I then look to add, in order of importance:
  1. A second melee/damage threat
  2. Crew support
  3. Board Control
Lets start by looking at my core crew and what they are accomplishing for me. First we start out with Jakob, who is not a very strong piece. I find that the strongest ability I get out of Jakob is Dead Mans Hand, which is really what he is there for. What I am finding most interesting, through my games, is that I am using the spell less than I expected I would. Jakob is typically casting DMH 5 - 7 times a game, succeeding maybe 5 times on average. This is 3 solid turns of casting the spell twice, but I was really expecting this number to be closer to 4 or 5 turns in a game. Jakob has been sticking around Huggy, grabbing companion when possible to DMH prior to Huggy starting his attacks. I fill my hand up as much as possible, use his (0) if necessary to push away from a model engaging him, then toss a low card to grab an AP to walk away. On the very odd circumstance, Jakob will use his extra AP to make a shot with his pistol, but thats really a fall back option for me.

I really need an Alternate
Huggy is one of the key threats in my crew. I push Huggy forward, aiming for middle of the board threat starting on turn 2. I am looking to engage my opponents crew early and force my opponent to deal with Huggy on my terms, keeping an eye out for a solid pair to hold in hand for when Huggy is taken down. Huggy is not acting as my primary source of brilliance, but he does do well in spreading it around. I find that in early turns I am using his casting expert to Head My Voice and force opponents brilliant models to walk or charge forward into his 5 inch bubble. I have been fairly successful at keeping an enemy brilliant model within his 5 inch bubble starting turn 1 so that Huggy is able to drain off their health at the end of the turn.  There has been a lot of discussion about keeping Illuminated nearby Huggy to feed him the end of turn brilliance wound, then regenerate that wound back. There is also a fair amount of discussion about keeping illuminated and depleted around for healing Huggy along with a sure-fire way to bring him back. I find that I have had success healing and coming back into game off my opponents models, not needing the depleted and illuminated. Overall, Huggy has worked out well with a mix of Control (Head my Voice) and melee threat in the game. In addition, the perm-brilliance trigger on his spell is invaluable in achieving his scheme of keeping 2 enemy models alive until the end of the game with Brilliance on them.

Beckoners are the last core models in my current crew preference. Beckoners are my primary means of handing out Brilliance in the game, with Huggy filling the secondary role. I find myself positioning my Beckoners then using their ranged attack to hand out brilliance. Its not a bad strategy overall, as they ignore cover modifiers on their ranged attack. I do like the Beckoners for their other abilities as well. First, I am finding them fairly mobile and survivable overall, which makes them good for grabbing objectives. A walk into the melee threat area of an opposing model opens up the ability to then use Seductive Swagger to grab an additional 4 inches of movement (in a push) before taking a second walk toward their objective. This ends up being a total of 14 inches of movement overall, not too shabby. In other cases they have the great capability of a pseudo-lure, which can also cause a model to move its Charge toward the Beckoner if it is already brilliant. While not the primary function of the model, that spell is a useful tool in the tool-box. Lastly, they have an ability to replicate Slow on a model, with the potential of removing 2 general AP on that model with the right flip. Not bad at all as a utilitarian model.

That leaves us with the rest of the crew. I have mentioned it briefly before, but will dive a bit more into my thoughts on the models I am currently liking in my crew. My first focus after hiring my core is to look for an alternate "Beater" or threat for Huggy. While Huggy is a big threat, I find that its useful to have a second threat on the board for my opponent to worry about. In addition, this second threat can also serve as the killer of an enemy brilliant model if I need to bring Huggy back out after he is killed. I started playing around with Graves, but Graves is really a control model with strong Beater tendencies. He was not enough of a threat and not enough of a beater for my comfort. I have since moved over to Kang and Ototo. Both of these boys come in at 8 points and serve the same role, in slightly different ways. Basically, they both bring big damage with incredible survivability to the table. It really puts my opponent into a bind when they have to choose between eating through Huggy's spirit based defense (halving damage) or trying to take down a Hard to Kill healing model that will mash your face if you ignore it. On top of that, both models have the key ability of Melee Expert, allowing them to move then still attack after moving. This is what was missing from Graves, making him tough to fill the beater role.

Then we move to my second focus, which is some type of crew support. I find myself using Yamaziko more and more for this role. She is a straight swap out (from a cost perspective) for the Illuminated that was not really doing much in my crew. She brings with her Immune to Influence, healing, and some WP buff's which really help the crew. A judicious heal on one of the Beckoners (who are targets) can really set back my opponents plans for dealing with my crew. I find that although I am not overly aggressive with Yamaziko, I am still too aggressive (I think) for making the best use of her. I need to practice holding her back even more than I already do. With Use Soulstones and healing she is fairly survivable but doesn't need to be in the front lines. Her healing ability has a 6 inch range, so she can hold back and still support the crew.

Then that leaves me with the final choice. Additional board control really fits into my preferred playstyle and further compliments what I have in the crew. This level of hiring doesn't really come into play until we get to the 35ss and higher level. For this I will begin looking at Stitched, Archers, and Torekage to fill the slot. Stitched and torekage can block off lines of sight. Torekage can swap around parts of my crew as needed, along with hopping out into combat with the enemy. Archers provide additional ranged punch to my crew, adding to the ranged threat.

Overall I really like Jakob and his crew. I have heard some rumblings that people believe he is possibly the weakest of the new masters in Storm of Shadows, but I do not agree. His crew doesn't look like it, but it certainly has a degree of finesse to playing it well that I believe has not been picked up on yet. I am at the point I would be comfortable bringing Jakob out in a tournament setting, so now I am moving onto the next step in my Ten Thunders masters, which is Misaki. I am 2 non-proxy games in and starting to wrap my head around what she does well and what she does not do well. I have gotten the bulk of my commission from Convy, so will be playing with Misaki and her crew more over the coming weeks. On that note, I have plans to pull together a new set of pictures and will be doing a Book 4 picture week with the new crews I have. I need to set-up the light tent and get the camera back out, but its coming. Also, I cannot give more praise to how fantastic Convy is with his painting. If your looking to get something commissioned, check out 13th Hour Miniatures, his Bronze Crystal Brush was well deserved!!

I would love to hear your thoughts/comments/experiences on how Jakob is working out for you. Leave me some comments here or shoot me an email for the podcast (bill@gamerslounge.coda.net)

Thursday, October 4, 2012

Ten Thunder Misaki Battle Report

I try and get 2 or 3 games in every Tuesday, but I rarely remember to take pictures of all my games. Lately I have been trying to do better in order to make sure I at least get one post onto the blog each week. Battle Reports are fun to post up and a good way for me to go back and see how things have gone in my games. Add that to the far more accurate game log I keep online (look left if your interested) and the bat-reps with pictures work out well.

With all that said, this week I actually took pictures of both games that I played. Yesterday you got to read about my latest Jakob Lynch outing, taking him as a Ten Thunders master. After Slaz and I finished up that game, I grabbed Tim and we played a game. Tim was a little tired of facing Jakob (come on, its only been a couple games), and I wanted to get Misaki on the table. Convy is working on my Ten Thunders commision, having completed my archers and Yamaziko. He is still working on the Misaki box set, so I am playing without Shang and with Minion Misaki as my master model. That said, the Misaki he painted up for me is beautiful and may stick around as my long-term master Misaki model. Pictures will be coming soon.

Set-up
So, we jumped into our game, using the same board I had used in my game vs Slaz. For those who may not have read (or remembered) yesterdays post, here is the board.

I picked out the crew I wanted to play before flipping Strategies, which is rarely a good idea. Playing around with crews like this is one reason I probably lose so many games. I was joking with Tim that I certainly hoped I flipped Slaughter, since I thought the crew would be really good at that. That was not to be as I flipped Supply Wagon, but Tim did end up with Slaughter which would make things interesting. Tim is still getting models painted for his Zoraida crew, so he dropped to an old standby crew to play. We ended up with Diagonal deployment with me ending up in the right hand side while Tim took the left and deployed first.

Our crews were:

30SS Scrap
Bill - Misaki, 2x Ten Thunders Brothers, Ronin, Yamaziko, Kang, 5 stones
       - Supply Wagon, Exterminate (Nephilim), Kill Protege (BBS)

Tim -Lilith, Puke Snake, 2x Tot, 2x Young, Black Blood Shaman, 6 Stones
       - Slaughter, Kill Protege (Kang), Exterminate (Living)

Turn 1
I knew Tim would be out-activating me turn 1, and I also knew that if I wasn't careful Lilith would be able to snatch up one of my models with Transposition and probably kill it off. I wanted to do what I could to minimize the chance of that happening and also wanted to give him a chance to make a mistake that I could capitalize on. I started out slowly, moving my 10T brother behind the house forward under Defensive Stance, passing with my other 10T brother after putting up Defensive Stance, and Moving Kang forward to keep on the Wagon. In the interim Tim had moved his Desperate Merc forward behind the house on his side, stacked up a tot behind it, then the BBS behind that, using blood in the air to group everything together and then cutting itself for a blood. I realized at this point of the game that  Yamaziko could put up a WP buff in an 8 inch bubble which would help resist the transposition if it happened. Damn new models. I had Yamaziko put the buff up, walk forward to position for future Misaki positioning, then braced her spear in case Lilith transpositioned her into a charge position. Tim responded by having the Puke Snake use Earth Quake to move his whole crew slightly forward. My Ronin moved up behind the house and Tim started cutting apart his desperate merc with a Young Nephilim, killing it, healing the BBS, and growing into a mature. Misaki moved up to just in front of Yamaziko and I was out of activations. Tim ran a Young and a Tot to the right across the board, and then swung Lilith around the front of the house, positioned to lure Misaki into a charge on her.


Turn 2
Tim got initiative on turn 2 and moved his Tot behind the small house on the right. I was really tempted to throw Misaki into Lilith to start the turn off, but looking at my hand it was not a great hand, with only one severe and two 9's as my best three cards. I only had one ram in hand (one of the 9's) for decapitate and no masks for pilfer. Tim and I had proxied several matches with Misaki, but had not faced off between these two masters so I was unsure how well I would hold up. I held off and instead moved Kang up to buy myself some time, positining him where the Wagon would end up at the end of the turn. Tim moved his Young over behind the house with the Tot, I shifted my 10T brother nearest Misaki forward, putting up defensive stance again. This was going to be a waiting game. Tim sprinted the second Tot over behind the house, preparing a whole nest of nephilim I would have to go after eventually. He knew I wanted to see some combat and was staging things based on that. Smart play at this point would be to wait for him to come to me, but I really wanted to see what Misaki could do. I used the Defensive ability on the Ronin and walked forward, Tim wandered across the back of the board with the BBS, keeping it safe. I went into defensive stance with Yamaziko, bracing and putting up the WP bubble. I could see how Lilith could make this nasty for me. The Puking Snake cast Illusionary Forest (the token between the wall and the house across the board is the center of the forest). At this point I just could not wait any longer, so Misaki activated and moved toward the Nephilim group, charging the Tot after that. She hit and killed the tot, pulling the Young and other tot closer to her with thier response move. She then used her Melee Expert but missed the young. Lilith responded by moving over and attacking, missing both attacks on Misaki. My remaining 10T brother moved forward in defensive stance and the Mature parked himself on the far side of the house from Misaki.


And a look at the melee going on near the house on the far side of the board:


Turn 3
Turn three was the blood-bath I had been waiting for, with me pulling initiative. Honestly, my hand was pretty bad with a pair of moderates and no severe cards in hand but I was stuck in so decided to go for it. Misaki activated first and attacked Lilith, missing but still putting up Your Mine. This was possibly a mistake and in the future I would go a different way I think. Regardless, I drove on by using my first two AP to kill the Young in front of me, and my second AP to kill the Tot behind the house. Between Reckless and Black Blood I was 3 wounds down at this point but had cleared several Nephilim out of his crew. Tim activated Lilith and started on Misaki. Three attacks later Misaki was out of stones and dead, and Tim was down to 2 stones remaining. Lilith then used Brood Mother to activate the Mature and it diving charged the 10T brother, landing on the far side of the wall but only dropping 3 wounds on the brother. Now I had to figure out how to win this game. My 10T brother closest to Lilith put up Terrifying and did his combat push, moving to 2 inches away from the Mature to avoid Black Blood, attacking the Mature, then finishing his push and using Melee expert to attack and miss Lilith. Tim wandered across the back of the board with the BBS, I responded by moving the Ronin forward and taking a shot at the Mature, hitting for a couple wounds. Tim tried to earthquake with the snake but failed. Yamaziko moved forward to get in position to kill either the Snake or the BBS, Kang left the Wagon to join the fight, leaving the remaining 10T brother to protect the wagon.


Turn 4
Turn 4 gave Tim initiative, so he started out with Lilith attacking the 10T brother, putting him in defensive stance after the first attack, hitting once for 3 dg, then missing. Following that she Brood Mothered the Mature who charged the Ronin and took her down to her Hard to Kill. I activated Yamaziko and chose to heal the 10T brother (a mistake, I should have healed the Ronin), then moved her toward the BBS, just making it into the 3 inch range after a double walk. The BBS activated and walked up to Yamaziko, casting a spell that did damage to her then cutting himself for 4wd's, taking himself to 1 remaining and killing Yamaziko with the black blood splash. The Ronin pushed with her push and attack action, attacking when she was 2 inches from the Mature and then missing with her melee expert attack. The 10T brother pushed out of combat with Lilith, attacking and missing as he left, then could not make it into range of either the BBS or the Snake. The snake moved out to get close to the BBS, casting earthquake which only moved Kang and the BBS. Kang was now in a nice line to charge the Mature so did, but failed his terrifying on declaring the charge. I did not have the cards to cheat, so he fell back to the closest board edge, which was directly toward and past the mature. This left Kang in between the Mature and Lilith, ouch. The 10T brother near the wagon moved to the center of the board to wait for said wagon.


Turn 5
Turn 5 was an ugly turn. I drew another very sad hand, making this the third time in the game I wish I was playing Jakob so I could mulligan. I got initiative and activated Kang, finally passing my terrifying and then letting loose on the Mature, hitting it even on a negative twist and getting a Red Joker/Severe on the damage, Go Go shovel to the face! His second and third attacks were on Lilith to no effect. Tim moved his BBS around to be next to Lilith and gave her Flurry with one of his spells. The 10T brother not protecting the wagon double walked over to the BBS and Lilith, but missed his attack, then put up Terrifying. Lilith activated, used her first AP to kill the 10T brother, then flurried on Kang, killing him. In reply, my Ronin focused a shot to kill the BBS and grab my Kill Protege. The Snake tried to do something I cannot remember, without effect (might have been an attempt at Transposition that failed?). 


Turn 6

Turn 6 started with the Ronin and 10T brother activating on Companion. The Ronin focused a shot on Lilith but missed, and the 10T brother went Defensive stance and danced behind the wagon. Lilith charged the Ronin and killed her. The Snake then cast Transposition, swapping the Ronin and Lilith's positions.


Tim and I should have checked at this point to see if the game ended, but I had mis-marked my turn tracker and we both thought it was the end of turn 5. If the game had ended here I would have had 6 points (4 from Supply Wagon and 2 from Kill Protege. Tim would have had 4, 2 from Slaughter, and 2 from Kill Protege. The game would have been a win to me, but we kept playing another turn.

Turn 7 & 8

I got initiative on turn 7, went defensive stance and moved to within 2 inches of the Supply Wagon, directly opposite Lilith. Lilith moved around the wagon, positioning between the 10T brother and the wagon. She attacked and squeaked through a hit on the 10T brother, ending up doing enough damage to kill him. Her last attack was to hit the wagon once to put some damage on it. We flipped at the end of the turn and the game went on to another turn. With the last turn Lilith wrecked the wagon to bring Tim's total to 6.


 The game ended finaly with Lilith winning 6/2. The Mature Nephilim was large enough of a SS difference to off-set his killing my whole crew, keeping it from being 150% my total. He had killed 39SS worth of models to my 28SS worth.

Misaki: Supply Wagon - 0, Exterminate (Nephilim) - 0, Kill Protege (BBS) - 2
Lilith: Slaughter - 2, Kill Protege (Kang) - 2, Exterminate (Living) - 2

Final Thoughts
I must pay more attention to the turns. Hell, I have to pay more attention to the game as I made some key mistakes at a couple points through this game. With that said, I am not unhappy with how the game ended up. Misaki is a lot of fun, but I need to play her like I would play any other melee masters. There is no need to rush forward early in the game and leave her unsupported. While she can do a great job of killing things, I really do not need the Shock and Awe move to win games with her.

I am certainly looking forward to getting more games in with Misaki. I would like to add in an archer and a Torekage, while dropping out or swapping around some other models. As this was my first non-proxy game with her, I see her coming up more in the future.

Wednesday, October 3, 2012

Jakob Lynch Battle Report


Tuesday is game night for me, and last night was me heading out to the store as normal. I had grabbed a quick hour from work at the end of the day to paint up Kang for use in my Jakob crew. That hour turned into 90 minutes, and I was a little late heading out. When I got to the store, Slaz was there so we set-up and jumped into a game. I have been playing several games in a row with Jakob and a limited set of his crew, and wanted to get some additional models on the table with him. Convy had dropped off my newly commissioned Yamaziko and Ten Thunders Archers, so I was able to test out one of my new Jakob ideas. With all that, I was good to go so we jumped into the game.


Set-up
Our board was set-up as follows:


Slaz flipped our deployment zone, ending up with corners and then we flipped our strategies. I ended up with Plant Evidence and Slaz ended up with Line in the Sand. We tossed the dynamite down the center line of the board (corner to corner), then I deployed in the right hand corner while Slaz deployed in the opposite corner. I had a good idea what I wanted to use, and then could not decide on schemes so I shuffled up my scheme deck and randomly drew. Slaz seemed well in control of what he was planning to do, and we got ready to play our game. He had picked aRamos as his master, a master who has gained a fair amount of distaste in our local group. Knowing this, I was looking forward to our game.

Our crews were:

30SS Scrap
Bill - Jakob, Huggy, 2x Beckoner, Yamaziko, Kang, 8 stones
       - Plant Evidence, Stake a Claim, Eye for an Eye

Slaz - aRamos, Handy, Metal Gamin, 2x Large Spiders, Johan, 6 Stones
       - Line in the Sand, Kill Protege (Kang), Do Everything Myself


Turn 1
The game jumped off with little out of the ordinary. I moved forward and Slaz began his preparation to manifest Ramo's avatar on turn 2. Slaz's newest method for manifesting Ramos is to have Handy give Ramos the extra book then Magical Extension Ramos's Combat Mechanic spell, killing itself (Handy) off for the scrap. Slaz did toss out a small spider and the electrical creation during the turn, allowing a whacky combination where one Beckoner made the spider brilliant, the second Beckoner used Come Hither to make it charge into range, the Jakob used Dead Man's Hand twice to draw some card. After that, Huggy shifted over to the far side of the house and sucked off a wound from the small spider at the end of the turn. All in all, a fairly slow turn of preparation. That was certainly not typical for this game, more the calm before the storm.


Turn 2
Turn 2 started to pick up the pace of the game overall. Slaz grabbed initiative and the electrical creation moved forward to touch Huggy for a wound, then blew up for another wound on him. Kang walked over to the small spider and bashed it to death with his shovel before walking back to the corner of the house. Slaz charged Huggy with his large spider but missed an attack and was only able to put 2 wounds onto Huggy. I started to set-up the turn at this point, having the Purple Beckoner whisper sweet nothings across the board at the Metal Gamin and Johan, making them both Brilliant. This was followed by the Metal Gamin flipping the dynamite and healing himself back to full health. Tinkerbell (green Beckoner) then walked over to the spider, getting in range to use Seductive Swagger and pushed around the spider and out of range, allowing her to then walk into the center of Johan and the Metal Gamin. The spider on the far side walked and flipped the dynamite, bringing Slaz to two dynamite flipped. Yamaziko charged the Large Spider (heading onto a hill but ending with the spider in her 3 inch reach) and used Spark of Youth to put some more damage on the spider. Johan charged Tinkerbell, breaking through her irresistible but then failing to hit due to bring brilliant. Then it was my turn to let loose. First Jakob used DMH twice on the Large Spider, drawing up some cards. Then Huggy moved to the center of the melee, used Head my Voice to have the Large Spider charge the Metal Gamin and take it down a fair bit, then hit the Metal Gamin with the Enveloped in Darkness trigger, reducing it to one wound remaining. Huggy finished his turn by Consuming Brilliance, hitting Johan and the Beckoner but not killing off the Metal Gamin. Ramos then Manifested using his all action, and at the end of the turn Huggy drained the last wound from the Metal Gamin, killing it.


Turn 3
Turn three kicked in with me grabbing initiative. I opened Huggy and hitting aRamos once, getting Brilliant onto him with Enveloped by darkness, but Ramos resisted the trigger and only took the wounds from the hit. Huggy hit the Large Spider, making it brilliant, then used Heed my Voice to force Johan to charge aRamos, hitting but not doing too much damage. aRamos responded by charging Huggy and bringing him awfully low. Tinkerbell took the hint and used her seductive swagger to get out of combat, then walked over to the nearby house to tag it for the first Plant Evidence. The closer Large spider charged Huggy, hitting and killing the big guy off and ending next to the house (small stack of scrap in the picture below). Jakob walked forward (discarding a card for fast) then used Dead Mans Hand twice on the Large Spider, stripping Slaz's hand and leaving me with a pair of 9's, a pair of 6's, and a fair spread of additional cards including several severes. Slaz had his other large Spider walk to and flip the Dynamite at the far side of the board. My purple Beckoner double walked into the middle of the board, making sure that aRamos and Johan would stay Brilliant. Johan charged the Beckoner but missed again, being brilliant just did not work well for him. The turn came back to me and now that Slaz was out of activations I was ready to kill off aRamos. I had Kang walk around the building and use his Melee Expert to smack down the Large Spider, killing it and letting me toss my pair of 6's to bring Huggy back out. I measured my melee range and realized I was a hair out of range to drop a second hit onto Ramos, so I started to walk away. Huggy then activated and went after aRamos with two attacks, and a Heed my Voice to make Johan join in the fun. I brought aRamos down to 2 wounds remaining and felt pretty good about being able to finish him off. Yamaziko then charged aRamos, using spark of youth but ended up flipping the black joker on damage, leaving aRamos with 1 wound after Huggy put the last wound on him at the end of the turn. That was tough, and it would end up being down to initiative on the next turn. Ouch.


Turn 4
Slaz ended up grabbing initiative on turn 4, but was not convinced he could kill me off or get aRamos safe with his actions. Instead he used 2 AP to summon up two Large Spiders, placing them on each side of Huggy, with one in range of Jakob. He then used his Melee Expert to try and attack the Beckoner, failing due to being brilliant. Huggy activated with Jakob, Jakob doing the DMH trick to draw up some cards, (0) to push out of combat, then discarded a card to walk over to the pile of rocks for a turn 5 plant evidence. Huggy used Heed my Voice on Johan to have him kill off aRamos, then killed the spider near Yamaziko, following up by making the other spider brilliant. At this point Slaz looked at the board and called the game. He felt it was pretty clear I would continue to clear off Johan and his remaining two spiders and be able to lock up my 8 points handily while easily stopping his Line in the Sand from happening. Considering that both Huggy and Jakob could drain souls, this would make grabbing Eye for an Eye also easy, netting me a full 8 points with the remainder of turn 4, 5, and 6.


At the end of the game it ended up a win to Jakob, 8/0.

Jakob: Plant Evidence - 4, Stake a Claim - 2, Eye for an Eye - 2
aRamos: Line in the Sand - 0, Kill Protege (Kang) - 0, Do Everything Myself - 0

Final Thoughts
Huggy returning to the game when he did was fairly back breaking for Slaz. This is the second game where careful timing of Huggy returning has locked the game for me. While I find it is not always easy to get a pair in hand in time to bring Huggy back out, when it happens it is a real blow to the opponent. I am not convinced this is what won me the game, but it certainly made the game end much quicker than it would have otherwise. It is also tough to tell how much of the game came down to Slaz not being very familiar with my crew and not being prepared for what I could do.

One of the big things I was looking at was swapping Graves out with Kang. Being able to also replace the illuminated with the equal priced Yamaziko was an unexpected boon to this game. It worked really really well. Yamaziko is not brilliant but certainly replaces and improves on the Illuminated in the crew. Her healing and damage are both very helpful to the crew as a whole. Kang is an ideal replacement to Graves, bring some incredibly nasty hitting power and also being incredibly resilient with his Hard to Kill and his healing. Against an opponent who is bringing non-living models, he will also greatly help out the crew due to the majority of the crew being alive. As for Jakob as a 10T master, I foresee Graves taking a back seat to Kang in the future.