
Thursday, January 30, 2014
Chess 2.0 .... C2E?
If the video above does not start up, here is a link to the page.
http://www.escapistmagazine.com/videos/view/loadingreadyrun/8733-The-New-Chess
This certainly made me laugh, although C2E is not a fully accurate name it is eerily similar to other "updates" to fix bugs and make other games more accessible. They even have the "it's the same game with minor changes" claim in the video. Enjoy!
Tuesday, January 28, 2014
Gamers Lounge Special – Creature Caster
I'm pretty excited for this kickstarter and want to help get the word out there. Jeremy also shared a great deal of insight into the transition from traditional miniature sculpting to CG sculpting. We can all see this is where the industry is headed and Jeremy shed some light on how things are changing.
Go check it out!!
http://gamerslounge.coda.net/2014/01/28/gamers-lounge-special-creature-caster/
Friday, January 10, 2014
Cost Comparison: WWX vs Malifaux vs Warmachine

I wanted to compare somewhat similar games which is how I settled on Warmachine, WWX, and Malifaux. All three are using plastic or plastic and resin figures currently. Malifaux is aiming to replace thier metal line with plastic so I thought that was a good comparison. Beyond that, all three have what I would consider "reasonable" starters which should be able to get you to a playable level of force with only the starter box. They are also all within the Skirmish to Squad based game size, which I believe makes them comparable.
Having my choices limited down and the approach I wanted to use for comparison in mind I set out to gather some information and compare away.
Starter Sets
All three game systems sell single player starter sets. Warmachine and Malifaux contain all plastic models in their starters while WWX contains a mix of plastic and resin. I ranked them cheapest to most expensive with commentary.
 Malifaux
Malifaux has a range of prices on their plastic starters, running from $35 through $45 in price. They all contain generally the same number of models with the count coming to 6 models in the starters. The Guild Judgement starter that I selected has 6 models and is at the top of the price range, coming in at $45. The models are all "man sized" models on 30mm bases and can be fielded in a Malifaux game for 33 points (including SS Pool but not counting the additional upgrades). The basic Malifaux game for M2E is recommended to be played at 50 points, so this comes in a bit shy. It can probably be brought up to snuff by adding in an additional model or adding a couple upgrades overall. However, it is likely to be in the same points limit as other plastic starter boxes. 
Warmachine
Warmachine uses a single price for all of their starter sets, $49.99 (essentially $50). I did find it interesting that through the different starters the number of models in the starter ranged from between three plastic models and five plastic models. All the of Warmachine starters had at least one and often more large base (40mm or 50mm) models and only one to four "man sized" 30mm model in the set. The Cryx starter had the largest number of models in the starter set of all the Warmachine starters, totaling up at 5 models. This starter totals up a 14 point force by the Warmachine system. Warmachine is commonly played at 50 points, leaving a tremendous amount of room to add more models before getting to the general "playable level". Once again, starter to starter box games will generally be at the same point level (within a couple points overall).
Wild West Exodus
WWX uses a single price for all thier currently released starters in the same fashion as Warmachine. This comes in at the most expensive starter set, ringing up to a total of $69.99 (essentially $70). All of the WWX starters have the same number of models in them, totaling 13 plastic and resin models. They are generally man sized (30mm) with the one current exception the Warrior Nation. The 13 models are the same profile across the available factions, including a Boss, Sidekick, Infantry Light Support, 5 Long Ranged hired Hands, and 5 Close Combat Hired Hands. The set pictures comes to a total of $595-points for hiring your posse. WWX is played at a number of defined levels, with $500-points and $750-points laid out as the skirmish levels and $1250-points currently being discussed for the tournament level. This leaves you in fairly good standing to play the game at a skirmish level and all the boxes are fairly well balanced against each other, with Enlightened as the aberration at $450-points for the starter box.Groups of Models
All three game systems sell sets of multiple models for thier game which are produced in plastic. In all cases that I looked at I aimed to compare small based (30mm) models in sets.
Malifaux
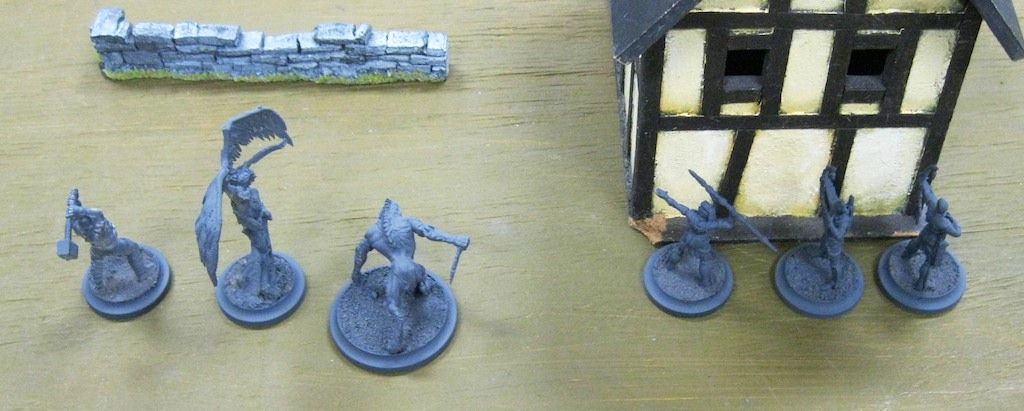
Malifaux has set's of 3 models for some of thier repatable characters in the game. The Rotten Belle's are not only iconic Malifaux models but fit the theme of undead-like models across the three game systems. Malifaux had the cheapest set for a "group of models" box, but also had the smallest number of models. This was a tough comparison as they would be the most expensive if the numbers were similar. For this 3 model set Malifaux runs $21, coming in at a total of $7 per model.
Wild West Exodus
WWX came in the middle of the pack on a "group of models" purchase with a fairly standard price of $45.99 for 10 models. WWX had the most standard pricing and selection across their "group of models" selection, with $45.99 as the price across the factions. The Hired Hands set's for all factions come with 10 models in the box, bringing the per-model cost to the lowest point of $4.60 per model. The set pictured stuck with the undead theme, although the other hired hands set's are more detailed than the undead abominations pictures.
Warmachine
Warmachine had the highest price for a "group of models" purchase, coming in at $49.99. This is also a set of 10 models, bringing the per model total to $5.00 per model. This places them right in the middle when it comes to a per-model cost comparison when breaking up the group of models. Warmachines plastic squads are very detailed and compare equally with both other game systems.Single Model Comparison
There was no simple way to do a direct single model comparison between the three games. Wyrd is currently not remotely started with converting their metal single models over to plastic, throwing the overall price comparison off. Warmachine still uses a mix of metal and plastic across thier range and Wild West Exodous is solidly using resin or plastic for their single models. Looking through the websites for all three games it appears that the general cost of a single man-sized model will range between $11 and $20. The price ranges and selections are fairly consistent across all three games, with nothing jumping out wildly as out of "the ordinary".Conclusion
When comparing the three game systems I have come to the following conclusion (for myself).

Final Thoughts
Overall this was an interesting exercise for me, especially since I started without a strong expectation of what I would find. I hope that it's helpful for everyone reading this as well. I believe that over time players will spend similar amounts on miniature games regardless of the initial costs. The big question will be, what is the "bang for your buck" for that money spent. This is one of the motivators for my departure from GW games, as I no longer felt a positive "bang for my buck" in those games. I think in all three of these systems players will find once they reach a pretty common level they will gain the same "bang for their buck" regardless of the system.Thursday, January 9, 2014
WWX - The games where it all just clicked
 Tuesday nights have been my normal gaming night for years. Tuesdays shifted away from mini games for a while and have been Netrunner night, but have still filled my night out for gaming slot during the week. After months of a combination of board games, card games, and just not making it out (due to life and work) it was refreshing to return to a couple mini-games on the table on Tuesdays. John and I got to the store early and lined up to play games 5 and 6 Tuesday of this week.
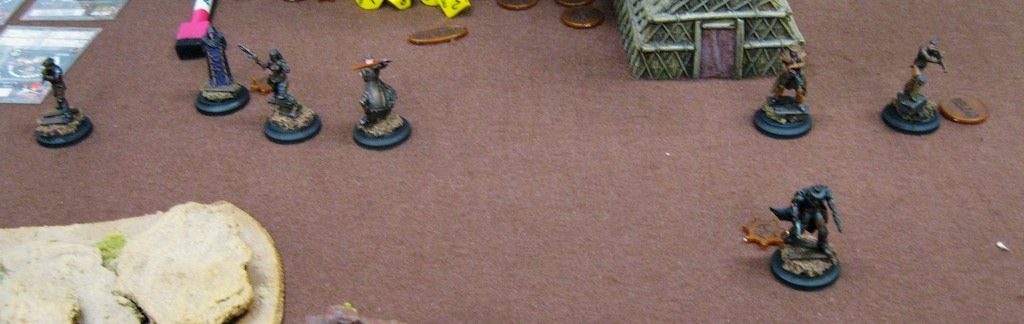
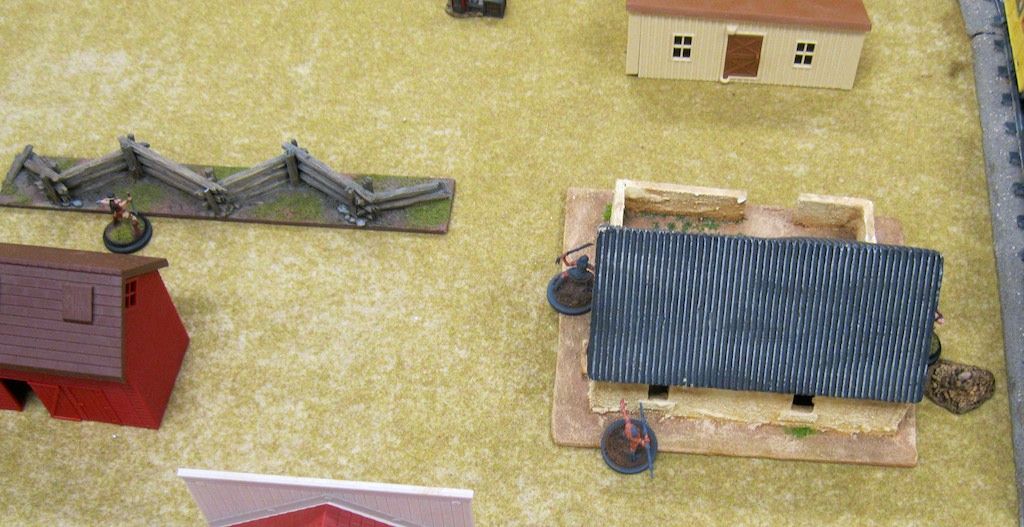
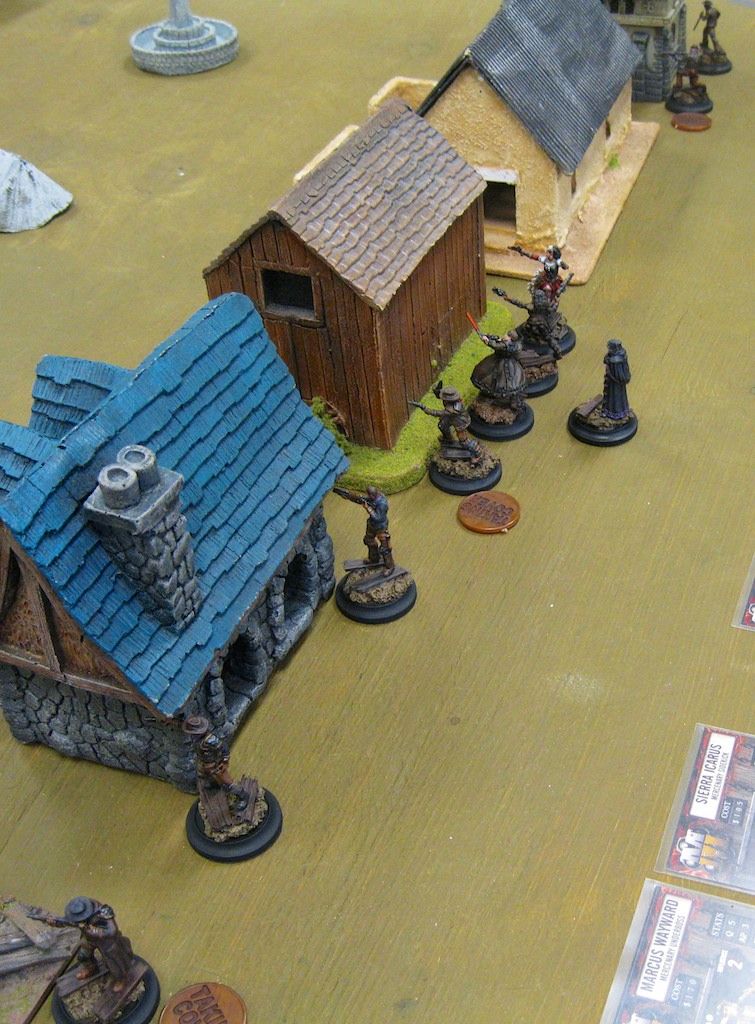
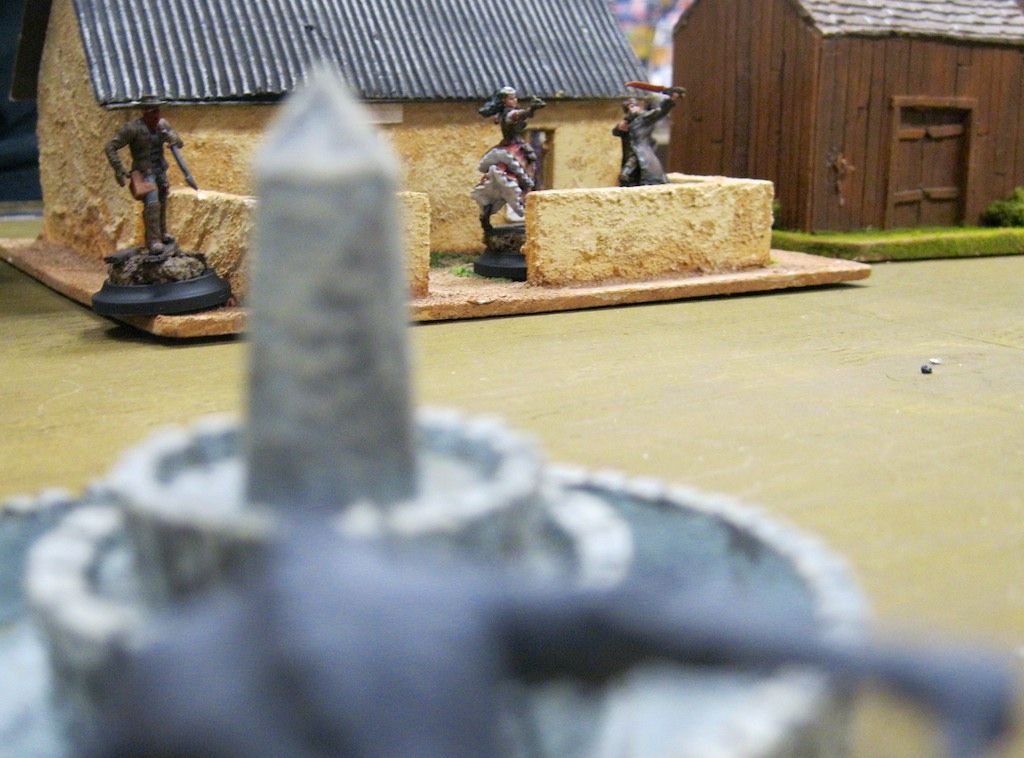
I find it amusing that I have commented several times that it takes me about 6 games to really understand how a new model or new crew works. I'm not sure the reason why, but it's around game 6 that my brain fully clicks and how I play changes overall when I look at games before and after that point. This happened during game 6 and as such I ended up not taking more than 1 picture during the game. Thing's clicked into place across the board for me and the game swept past without me noticing the turn sequence and grabbing my camera. Here is the one picture I took, a nice shot of John's crew with Jesse James:
I did grab pictures of game 5, although not as completely as I would have liked. I thought it would be good to write about that game instead of game 6, partly due to the pictures and partly due to the scenario.
Game 5
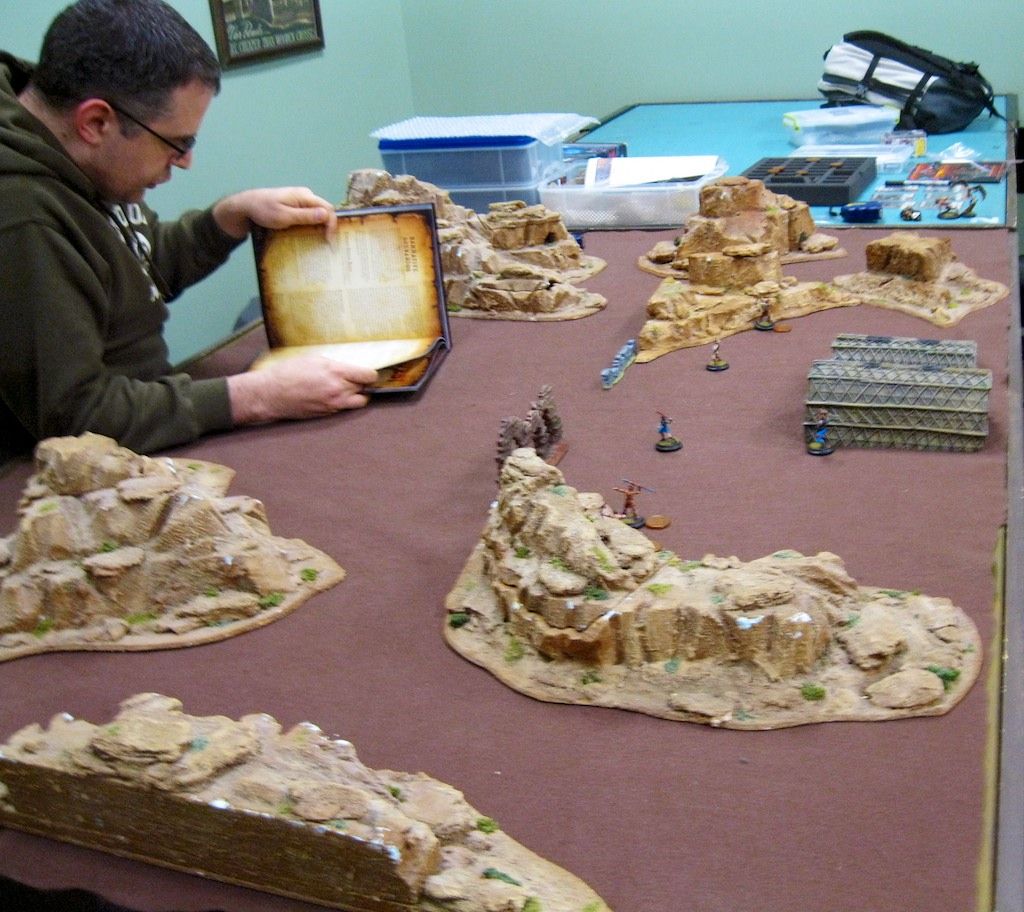
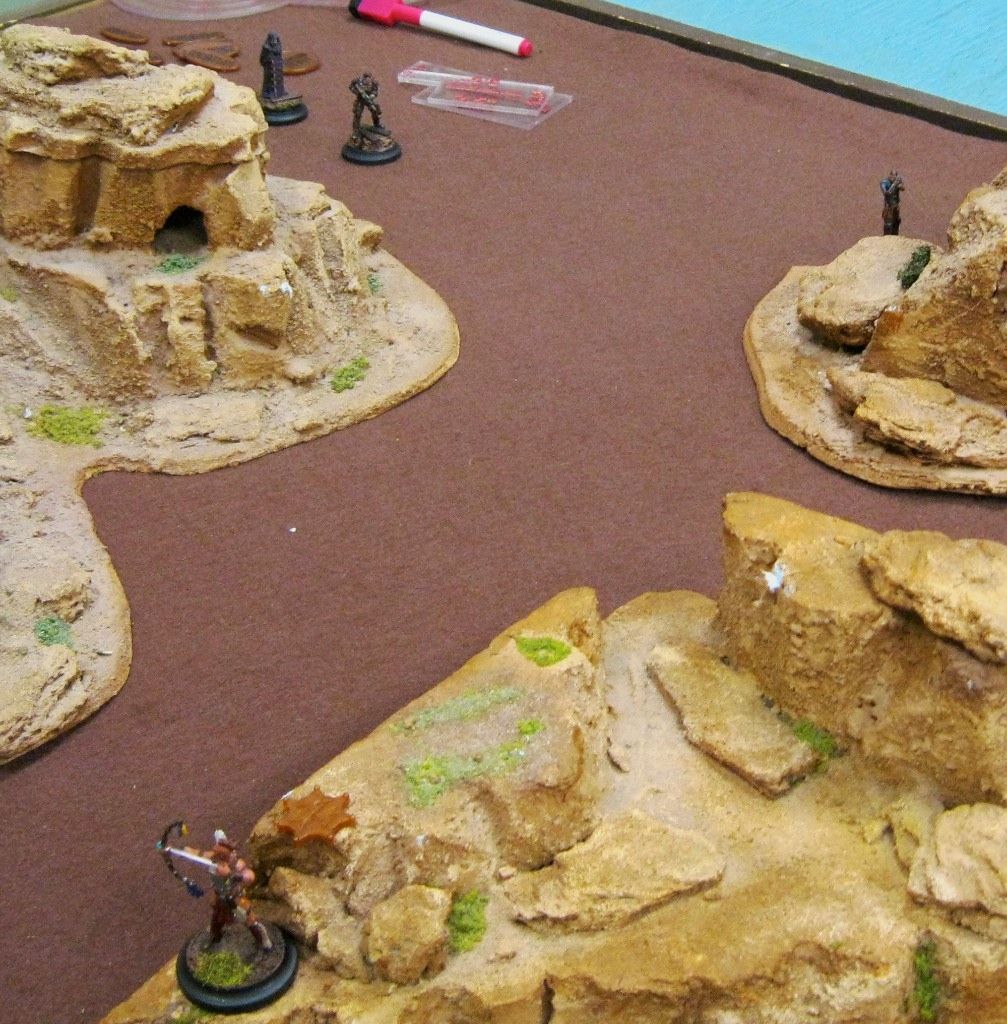
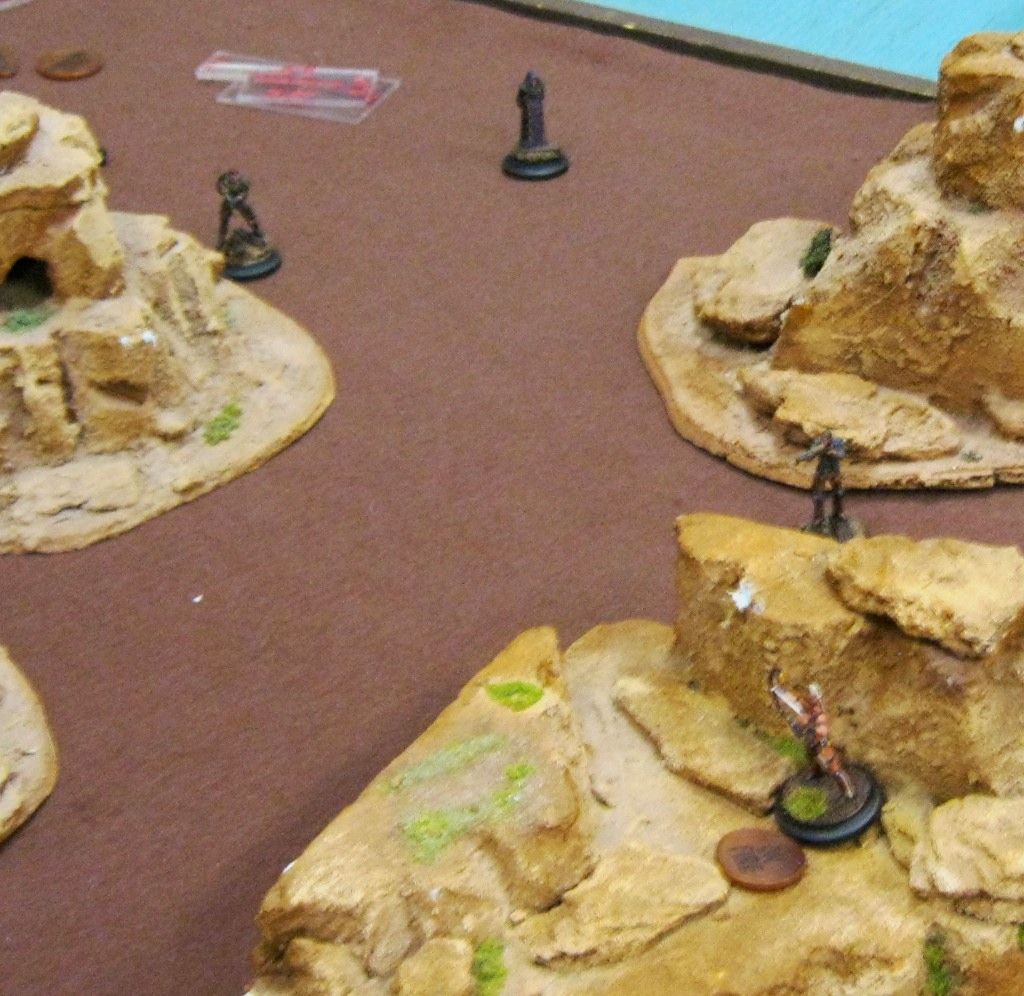
This was an interesting scenario as it uses a couple rules that John and I were not familiar with. One of those was the Sentries rule which has the defender deploying specific models on the table with limited actions they can take. Another was reinforcements, allowing (or forcing in this case) certain models to not come onto the board until later in the game. We set-up the table with an approximation of a base for the Warrior Nation and the Outlaw's as the attackers. I was able to deploy any hired hands or sidekicks as Sentries at the begining of the game, needing to keep my Bosses and Underbosses in reserve. This was not so bad for me as I could deploy everything except Sitting Bull and Sky Spirit.
- Sitting Bull
- Sky Spirit
- Walks Looking
- River
- Marcus Cunningham
- 3x Long Range Braves
- Billy the Kid
- Johny Ringo
- Jane (Firely crew)
- Simon (Firefly crew)
- River (Firefly crew)
- Dark Council Member
- Shotgun Bandit
WWX Rule Note / Commentary: The scenarios in the rulebook all indicate an intention for a 6
Turn 1 & 2
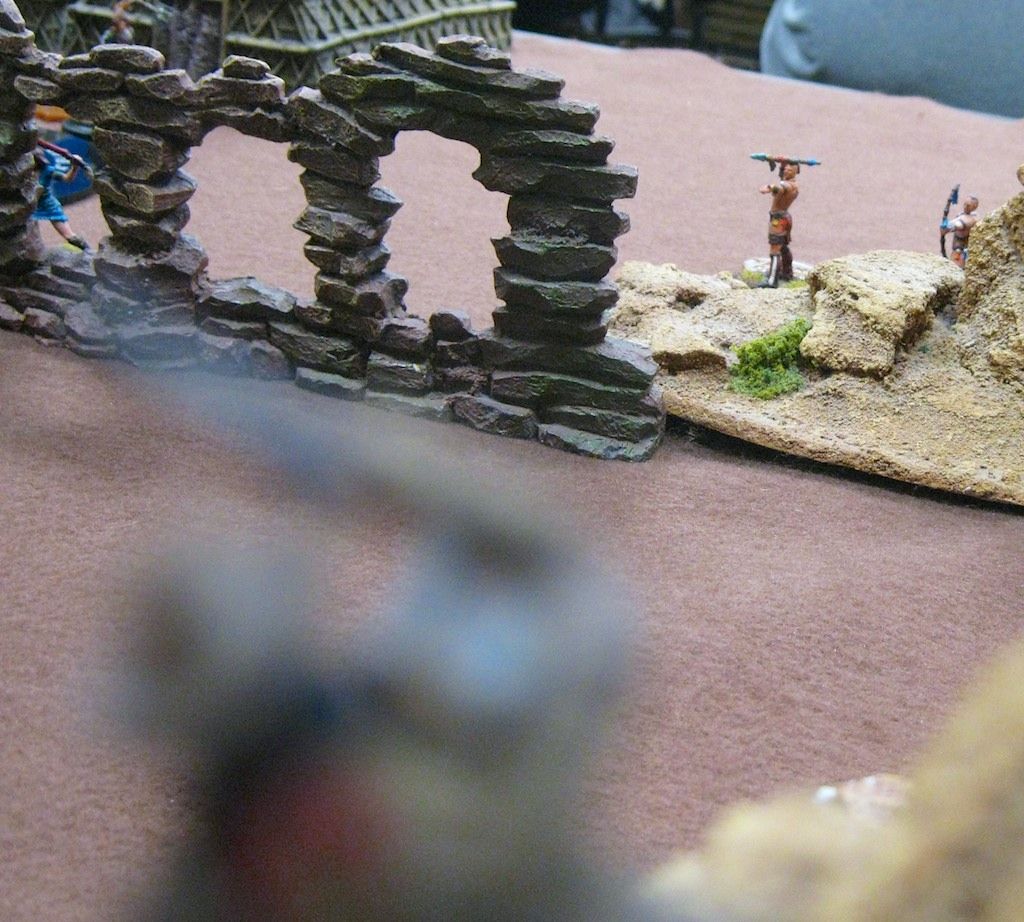
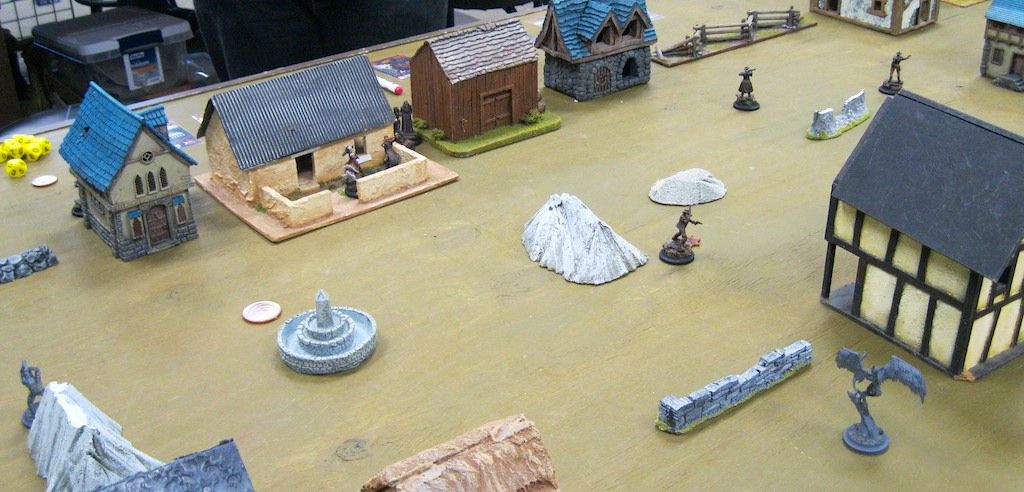
Throughout turn 1 and 2 John moved his models forward trying to get close while staying out of sight. I spent the turns moving my models forward into position and then going on the lookout and hoping to spot him. during turn 2 John finally moved Billy to the top of a hill and I was able to spot him and raise the alarm. Although this was early in the turn for John, it still ended turn 2 and immediately jumped to Turn 3 with my automatically having initiative.Turn 3
On the right side of the board Jane and the Shotgun Bandit moved forward with the Dark Council guy. Neither got into a good position to shoot at my brave on that side of the board, so positioned for next turn. My brave took some ineffective shots and the turn completed. I was concerned about the right side of the board as the shotgun would be a pretty rough weapon to hit my flank, and I have not really dealt with Jane in the past. I was happy to see the Dark Council on that side of the board as it really limited where the extra influence could be handed out.
Turn 4
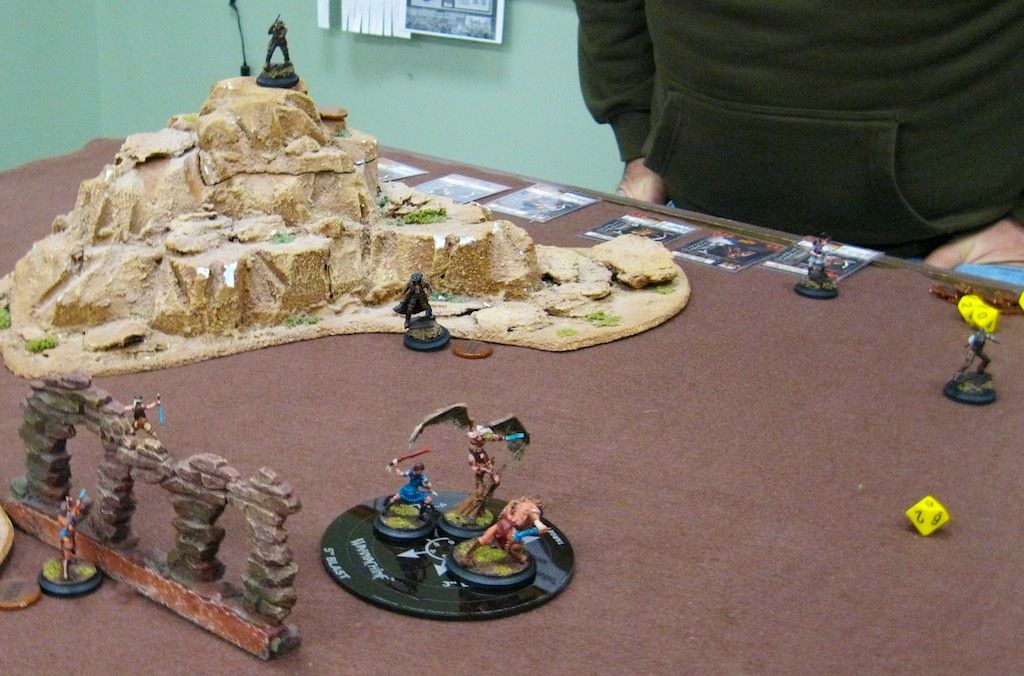
WWX Rule Note / Commentary:We would have done better realizing Ringo's rule earlier in the turn as it would have changed some of how things played. As it was, we both did not realize it until the end of the turn so we just adjust Ringo to where he should have been and moved on.John spent the turn taking shots at Cunningham trying to take him down. Billy, Ringo, Simon, and Jane all snapped off shots and burned through a fair amount of my influence before John's attacks were exhausted. On the bright side for me, I was able to make enough armor rolls to successfully keep Cunningham alive.
WWX Rule Note / Commentary: Feedback from the battle reports and the podcast indicated that John and I were playing a much deadlier game than we should have been. I discussed in the previous battle report our misunderstanding on Lethal Hits. This was the first game where we played it correctly and it made a big difference to how the game felt. The results came out the same but the hit's felt much "softer" than in previous games, making the overall game feel less deadly.
 On the right side of the board I tried to reposition my brave to bring some threat to John's models over there. To be fair, one brave was not a huge threat and even Walk's hiding around the corner did not appear to be a deterrent to the shotgun moving up the board. Jane took some shots at the brave, dumping some damage on his but not killing him.
John did point out that this was the first game we had played to date where nothing had died by the time we reached the end of Turn 4. We both attribute this to our new (and correct) understanding of the Lethal Hit rule and how it plays.
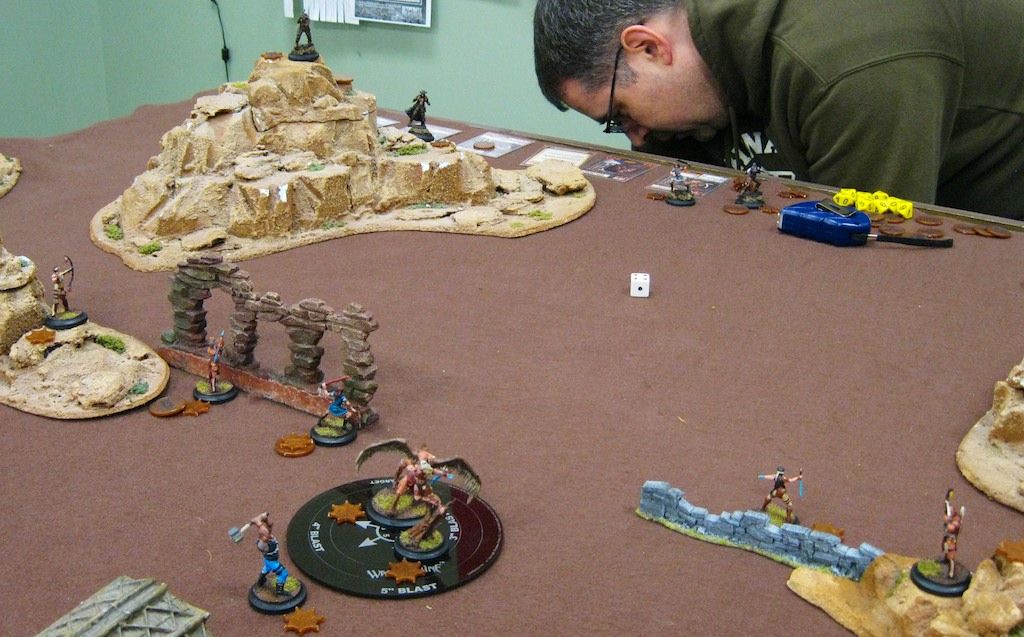
Turn 5

Turn 6 opened with my having initiative again and finishing off Billy with the initial decapitating attack from Walk's. With that wipeout, I grabbed a win.
Final Thoughts
This was an interesting scenario and I can see it being a lot of fun. I think the board would have worked better (and more to John's advantage) if we had used smaller pieces of scatter terrain in place of the larger canyon terrain we used. To be fair, that's what is recommended in the diagram and would have provided more positions for John's models to move forward under cover. I am not convinced the end of the game would have been different, but the early turns would have run a bit smoother allowing John to get a bit closer.Playing with the Lethal Hit rule as intended extended the game out, making it less deadly overall. This is not a bad thing, although neither John nor I felt the game was "Too Deadly" previously. It allows some of the attacks to be resisted more, but the results of the attacks ended up to be the same. I find it most interesting that the game felt "more swingy" or "more erratic" than previously. The previous Lethal Hit rule we used meant that a single swing roll (rolling a lethal hit or a life saving dodge) was the biggest swing on the dice. Now the difference between rolling an armor save of a 2 vs a 7 makes a big difference on every armor roll. This makes more rolls in the game feel the swing of the wide number range on a D10.
I plan to talk a little about models and tactics moving forward on the blog. John and I talked a little bit about Sitting Bull and our experience compared to some internet comments about Geronimo and the comparison of the two. We both feel that Sitting Bull is a simply nasty boss, with truly nasty attacks and his Wolf Blood ability pushing him over the top. I need to get some experience playing Geronimo, but I am not sure I will find him to be as competitive as Sitting Bull. I have not yet had a reason to use Sitting Bulls Frenzy ability, allowing for additional attacks. His bite seems to be enough to kill many underbosses, sidekicks, and hired hands and then grant me a full activation of those models to deal damage to the opponents crew.
Lastly, we are still playing on a 4'x6' board but I see that moving down soon. Many of the scenarios need the full board to work but there are a handful which do not. I believe most (possibly all) of the competitive scenarios can be easily moved down to a 4'x4' board without impacting the balance.
Tuesday, January 7, 2014
WWX Game 3 - The one where Bill wins a game!


I fielded the same posse I have been bringing to learn all my games with. It's working for me, and is especially delivering to my expectation of being fairly balanced and good for learning. You can see pictures of the posse in the previous blog post.WWX Rule Note / Commentary: The scenarios in the rulebook all indicate an intention for a 6' x 4' table to play on. John and I are playing at the $750-point level of game as we both prefer skirmish style games. Neither of us have vehicles and our only light support are the infantry style light support. We have kept to the 6'x4' table size so far but are finding with each game that the games are playing out within a 4'x4' space very comfortably. I suspect I might take a hand at rewriting some of the scenarios in the future with the board moving down to 4'x4' as one of the changes.

John tried out a different list for this game (and the fourth game). This time he brought out his own copy of River, Billy, Johny Ringo, and a whole load of hired hands. His 750 Outlaw list was something along these lines:
- Bill the Kid
- Johny Ringo
- River Flowing
- Sniper Bandit
- Shotgun Bandit
- 3x Close combat Bandits
- 4x Long Range Bandits
WWX Rule Note / Commentary: Since this game we found out that the tool we have been using to build our posse's actually had the wrong price/hiring cost for River. The tool was using the price on the website, which does not match her higher price on the release card. River actually costs $125-points to hire instead of the $95-points. This put John over on his list, but no worries there as my lists are over as well.
We deployed split across the table, with Billy, Ringo, and River deploying on the left side of the train and John's sniper deploying on the right side of the train. The Dark Council member and a load of hired hands joined Billy on the left of the train while 4 of the hired hands deployed with the sniper on the right. In response I fielded my Dynamic Duo (River and Walks) on the left with the three braves while the rest of my posse (Cunningham, Sitting Bull, Sky Spirit) deployed on the right behind a building and out of sight.
Turn 1


Turn 2

Cunningham went first which dropped the smoke and pulled out the "on the lookout" shot from the sniper. The shot missed and I was able to move forward them burn some more influence to place the smoke back into an advantageous position. Continuing my simultaneous activation, Sky Spirit jumped back to the center of the smoke and unleashed a long range shot at the sniper, killing him. He then proceeded to take his ROF 3 shot and spread the damage out across two hired hands. Sitting Bull activated at the end of the sequence and moved forward, engaging two hired hands on the right side of the board. He proceeded to bite the head off one of the hired hands who (due to Wolf Blood) activated and shoot and kill one of the hired hands on the left side (near Sky Spirit). Sitting Bull then shifted slightly and bit the other hired hand with his full AP of attacks, killing her and having her unload her full activation of shots into Billy. I was very satisfied with the turn at that point.WWX Rule Note / Commentary: Dark Council members are effectively immortal but have a limiting rule built into their function. They must activate first, which limits the "acting model" activations to 2 non-dark-council models on the first turn opposed to 3.
John moved up with Billy and took some shots which were not terribly effective, and kept Johny Ringo hidden behind the train. Copying a trick/thought I had on the left side of the board, he placed River "on the lookout" to respond to Sitting Bull next turn.
WWX Rule Note / Commentary: We have since discovered that the game is far less dangerous that we have been playing. We were playing that a "Lethal Hit" could only benefit from the armor roll if that armor roll was a "Life Saving Dodge". We have discovered this is not in fact correct, even with a "Level Hit" a model still gets their armor roll, the "Lethal Hit" only negates in-built armor on the card.

At the end of turn 2 John pointed out to me that the game was essentially a foregone conclusion. Looking at the end of turn death toll had the appearance (and liklihood) that John would be unable to recover. Despite controlling activation turn 1 and 2, the Hired Hands just did not stand up to my Character heavy posse. 1 death on my side to 6 on his were just bad odds this early in the game.

Turn 3

Three turns and the game was locked up, with my gaining a win through wiping John out. Even if we used the objectives, I controlled all three objectives definitively and would have won that was as well.
Final Thoughts
This was a bloody game and not much went John's way. The game is not as bloody as it appears here however, as we were playing with far deadlier "Lethal Hit" rules than intended. This was due to both John and I misinterpreting the meaning behind the "Lethal Hit" rule. I think the game would have the same result even playing that rule correctly, it just would have taken longer to get to the same conclusion.Sitting Bull can be a really nasty model if he can get into your crew and kill models with his bite. The bite is pretty tough and he gets enough attacks to be able to bring down models. Even taking over an activation of a Hired Hands's is going to be effective to push out some additional damage. I like this ability as it's something I can work a bit of "trickery" into and try to plan for creating wow moments in the game.
I also like being able to use "On the Lookout" for melee models. It's going to be most effective for "living spirit" and similar ruled models, but may also be effective for general melee models. The trick will be hiding the "on the lookout" model so they can interrupt movement and engage the opposing model, then making sure the "initial engagement" attack is effective.
I am still concerned about the intention for the game to be bigger, as in army size bigger. I can see this competing with Warmachine/Hordes pretty easily as a squad sized game. This, combined with the ease of play at the skirmish level (6-10 models) put's it at a nice place in my opinion. It's that army scale size sneaking around the background that has me concerned. I would like to see the board size moved down to 4'x4' and the missions moved to objective wins with some mix of kill objectives. I will fairly caveat this comment saying I have not yet played a game with vehicles in it. I may find I enjoy the games when vehicles (light support and heavy support) are included, but I am skeptical.
Overall I am becoming more happy with the game the more I play. There are some small rules clarifications that are coming up but nothing I would not expect from other games. I feel this is actually clearer and more straight forward than other games, which is both a positive and a negative for me.
Monday, January 6, 2014
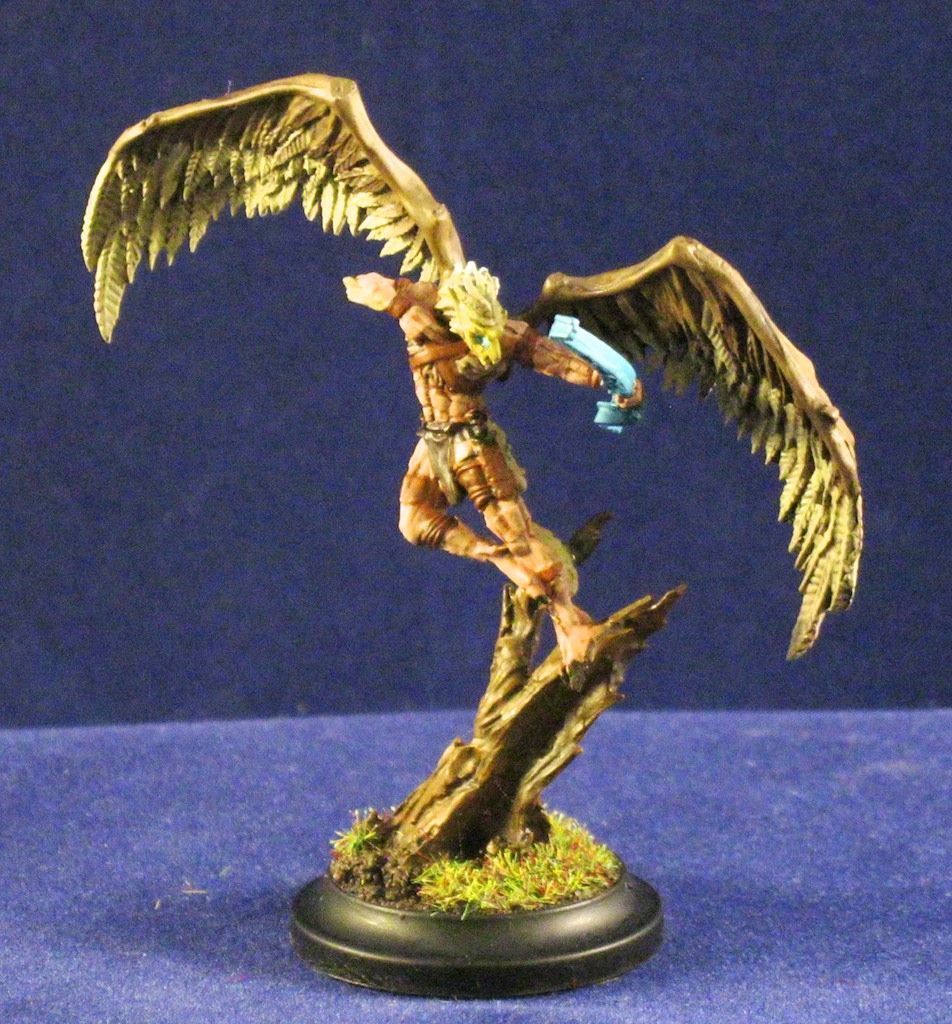
WWX - Warrior Nation Models
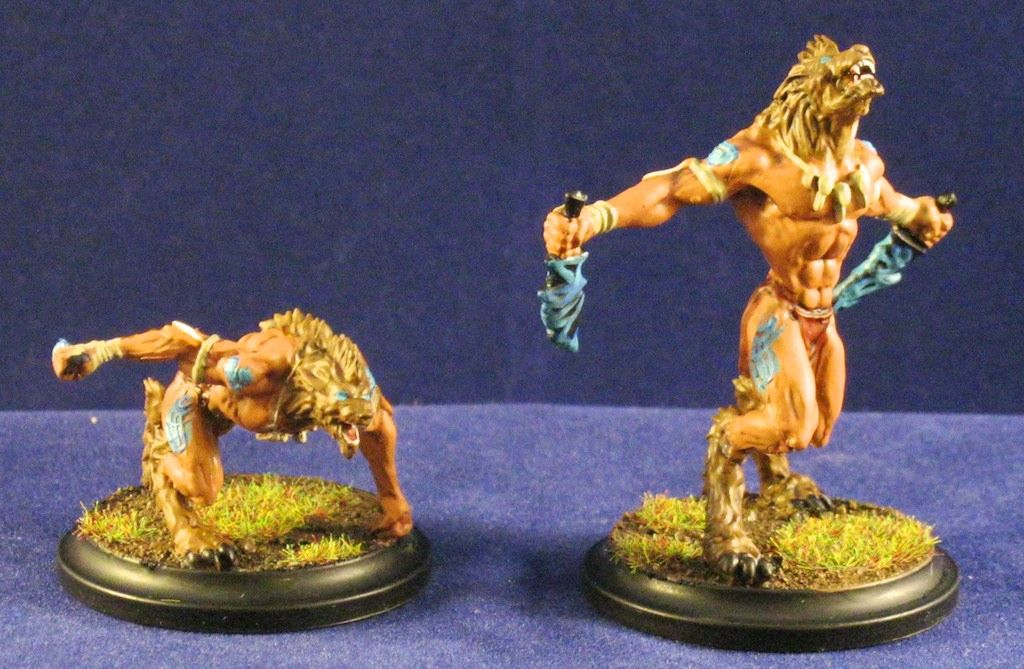
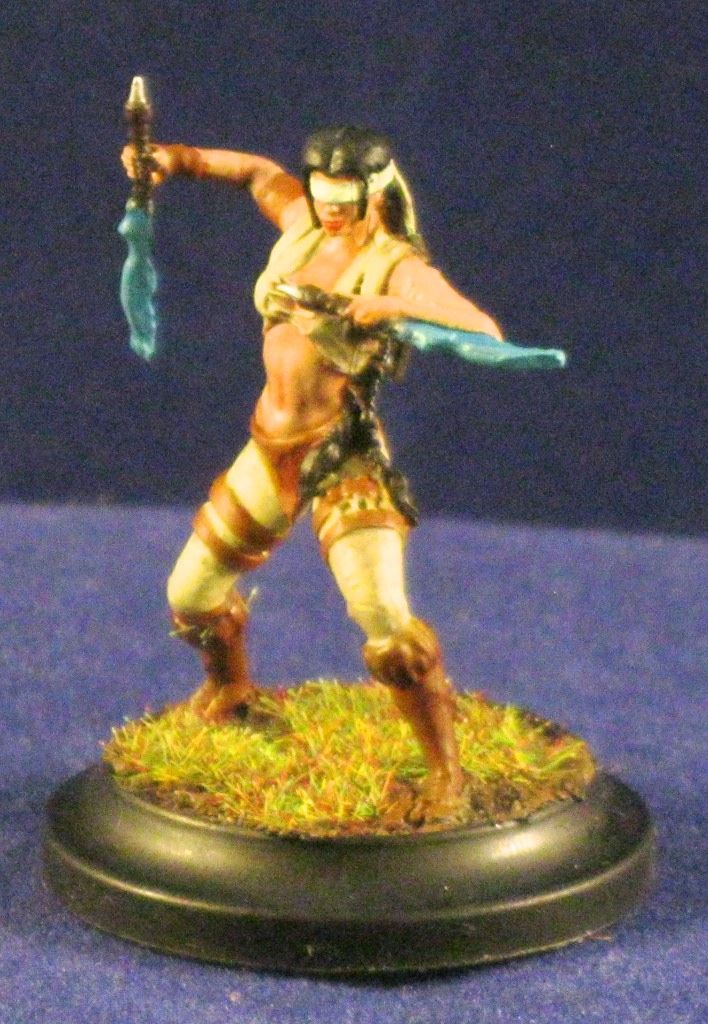
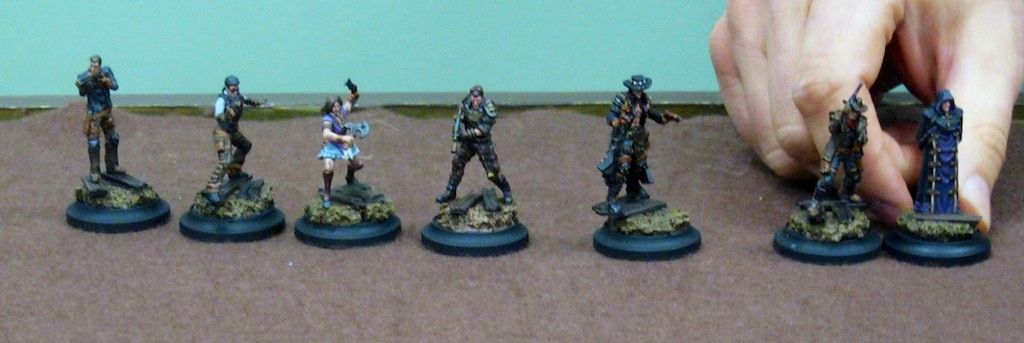
 I field two different Mercenary models in my Warrior Nation crew. Marcus Cunningham is the model that was created by the kickstarter "Mystery Backer" and then provided free of charge to all the kickstarter pledges of a certain level or above. I was in that group and looked forward to the model. Cunningham was a utter pain in the ass to assemble, coming in four pieces consisting of body, 2 separate arms, then the hammer and hands. This means that in order to get him together correctly it becomes an exercise in balancing the arms and hammer with the body in super glue while waiting for the whole thing to dry, hoping it stays aligned. I was really hoping to dislike the models rules so I would not be compelled to play him. Despite my frustration building (and then repairing him when his hammer snapped off), Cunninghams rules are actually very good and the model looks pretty cool once painted. I was a bit worried about the blue jeans coming out with the same look I achieved using GW paints. I was happy when I saw they actually end up a bit richer in color and I am very happy with their look. For those wondering Cunningham was part of the Warrior Nation who fought against his spirit guide while mid-way through the shape-change into a Rhino. Now he's a mercenary stuck mid-change.
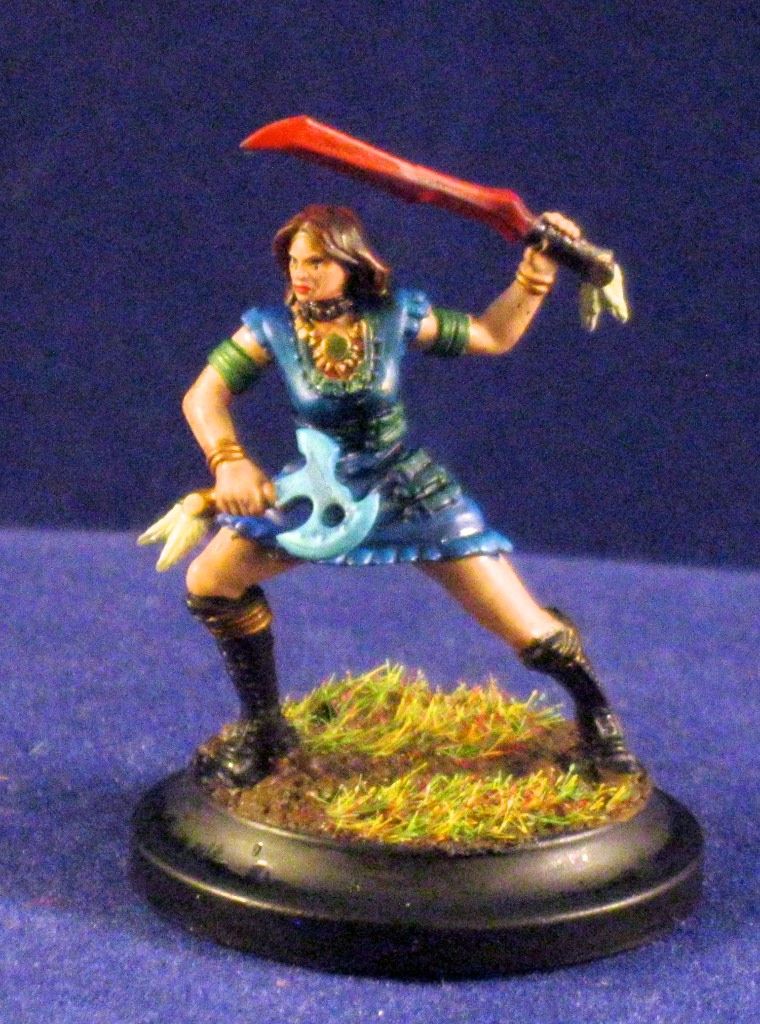
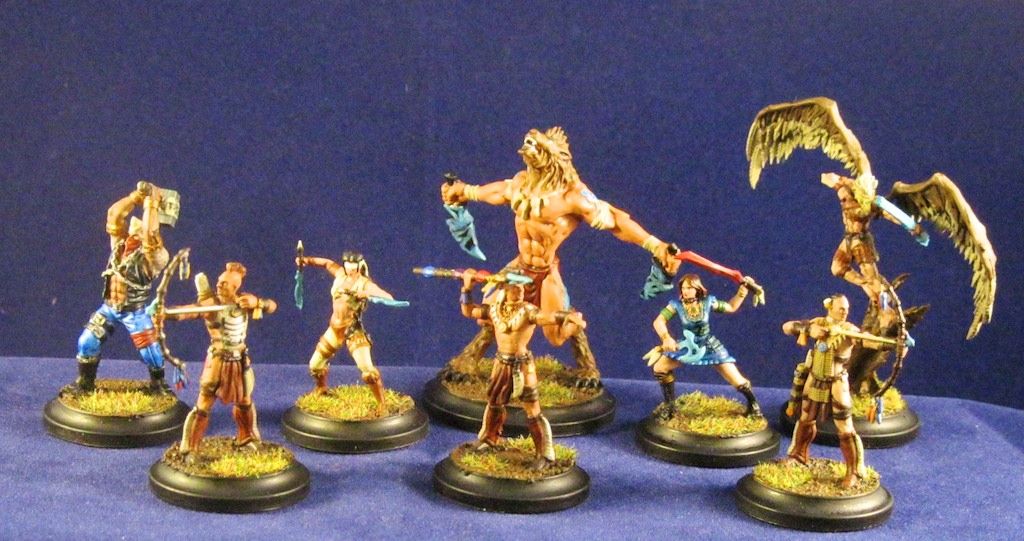
Overall I am happy to have a painted posse to put on the table regularly. Now that I have a basic set of painted models I can drop back to my "only play painted" self-commitment I have help to for a fair while. Here's a final look at the whole posse together, with the alternate Sitting Bull from above.

Friday, January 3, 2014
Wild West Exodus - The one where Bill and John learn to play

John and I both discuss this and our second game, along with our views on WWX at that point (2 games in) on Gamers Lounge Ep. 81. It can be found over on the Gamers Lounge website.
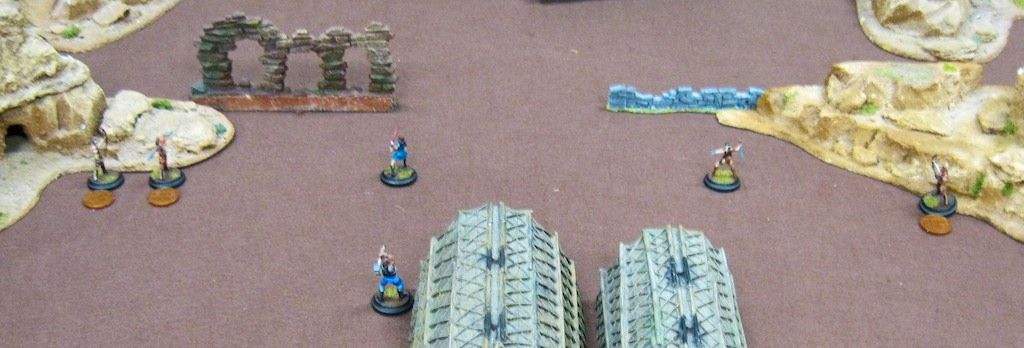
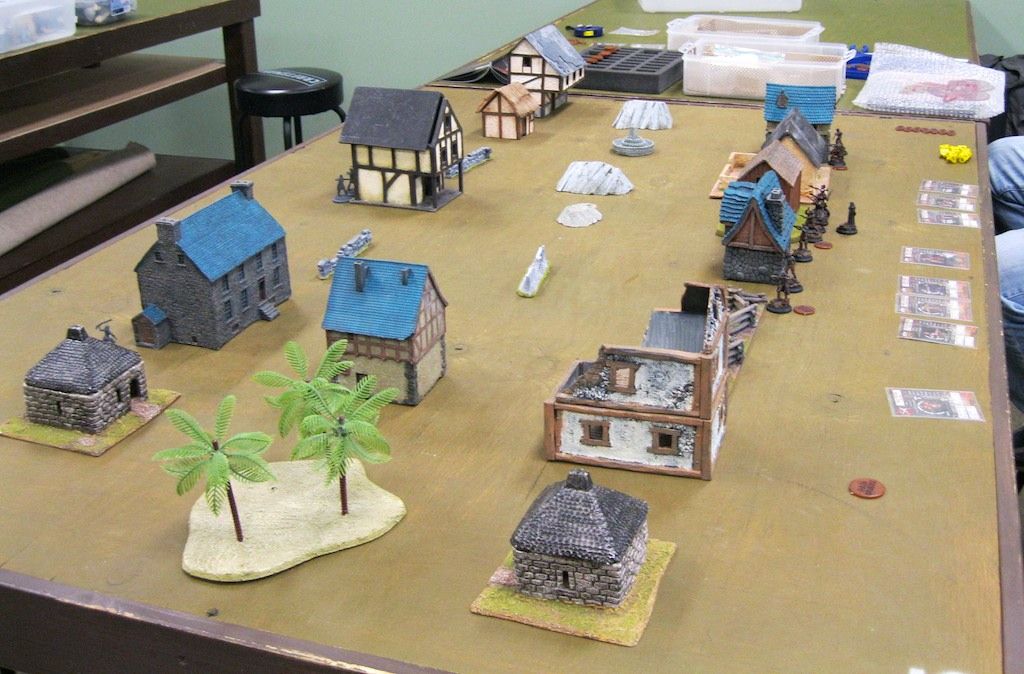
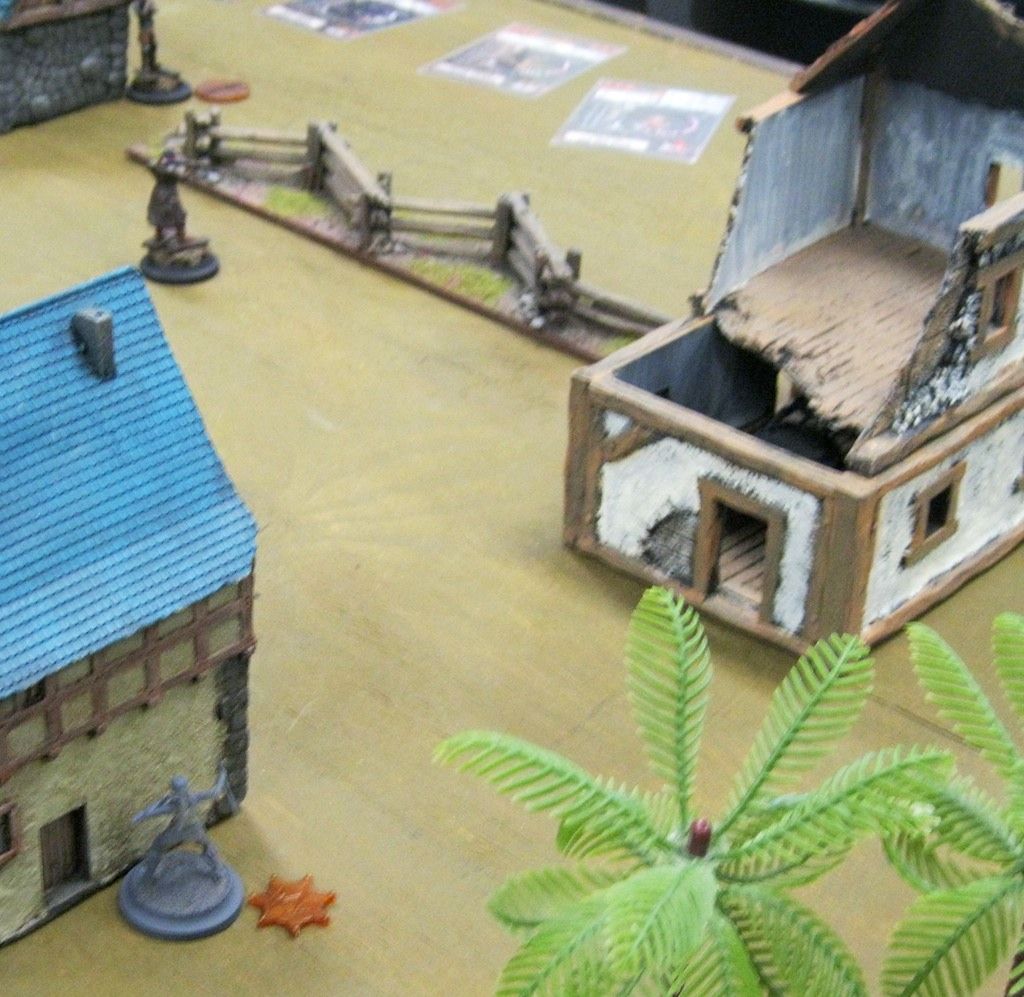
As neither of us had played the game, and only John had actually read the rules, we decided to start with "Competitive Scenario #1 - Shoot Out". John and I had the run of the store so grabbing enough terrain for the 6' x 4' board was no problem. We tried to emulate the scenario diagram as closely as possible. Here is the board we ended up with:
John showed up with his outlaws. He had a good idea what I was bringing, specifically in the case of two melee models who are "invisible" at long range. With this in mind he did a little tailoring of his list to give him an advantage (shotguns). He also wanted to field his Firefly crew models, so he brought along:
- Billy the Kid
- Mal (Mercenary Firefly model)
- Inara (Mercenary Firefly model)
- Zoe (Mercenary Firefly model)
- Shotgun Light Support
- Dark Council Member
- 3 or 4 Hired hands, mixed between long range and close combat
I brought along my Warrior Nation, the list I decided I would start learning with. This is the list I have used for all of my initial games, and is the list I am working on getting painted up first. The idea with this list was to provide a solid and fairly balanced mix of close combat and ranged. Added to that I wanted to add in some of the special rules in the game to get a feel for how they worked out.
The list I brought along was:
- Sitting Bull
- Sky Spirit
- Walks Looking
- Marcus Cunningham (mercenary)
- River (Mercenary Firefly model)
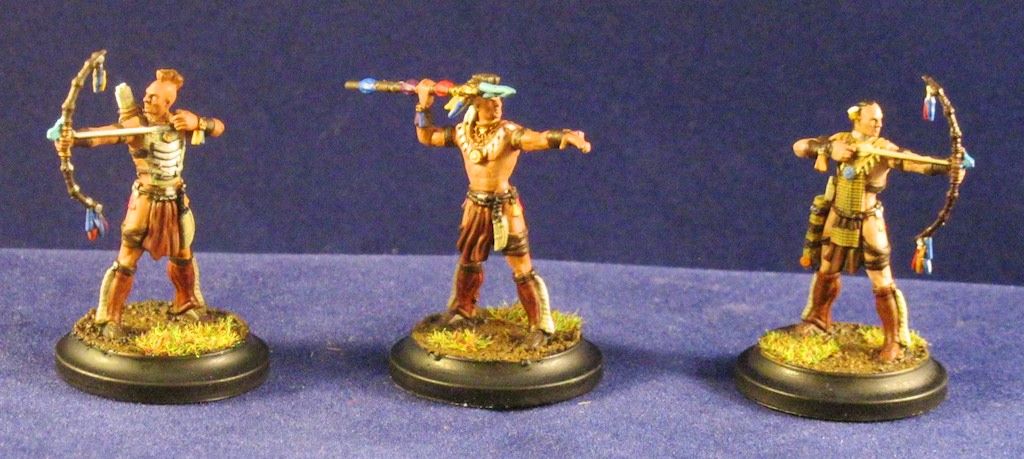
- 3x Long Ranged Braves (Hired hands)
This put John with more models to field, but only 7 influence overall plus the floating influence that the Dark Council model can hand out. I, on the other hand, should have had 11 influence but ended up only grabbing 8 due to a miscount on some of the early calculation I had done.
Deployment
The game was setup with two rows of building lining what would effectively be a street in an old west town. There were a variety of obstacles and other minimal cover down the middle of the "street" but overall it was pretty open. You can see from the pictures above how we deployed, with John setting up a bit of a firing line and me setting up to run into said firing line. It was exactly like that, as a couple rules in WWX influenced my plan. (I swear I had a plan).WWX Rule Note / Commentary: First, when deploying in WWX you can choose to deploy your models as if they had taken the "Taking Cover" action (where applicable) prior to the start of the game. Additionally, in this scenario the player who sets up second ends up going first. This meant that with the small number of models I not only had the advantage of seeing where John deployed his models, but also had initiative on the turn.
My plan was to move my ranged braves up to the nearby fence and get them in position to cover the street. Following that I would move Sitting Bull and Cunninham into the street, trying to cross into engagement with John's models as quickly as possible. I wanted Sky Spirit to back up my shooting braves and have the Mean Girl Duo (River and Walks Looking) head across the board on the far right flank, then sweep into John's crew from that flank. See, it was a brilliant strategy!!!
You should be able to pick out how tough it is to break deployment habits from other games simply by looking at how I ended up deploying my models. Fail.....
Turn 1
It's been a week or so since I played this game, so much of the turn by turn sequences in the game will be more highlights than not. John and I both moved forward and took positions in cover closer to the street. We traded some shots here and there, but nothing substantial. John did drop an irradiating shot on one of my braves, then proceeded to shoot the same brave again and set him on fire. I was expecting a devestating round of death and it ended up not as bad as I expected. Through the turn John burned a fair bit of his influence to protect against shots from Sky Spirit while I spent none of mine. Sitting Bull and Cunningham moved forward to take some positions in cover and prepare for round 2.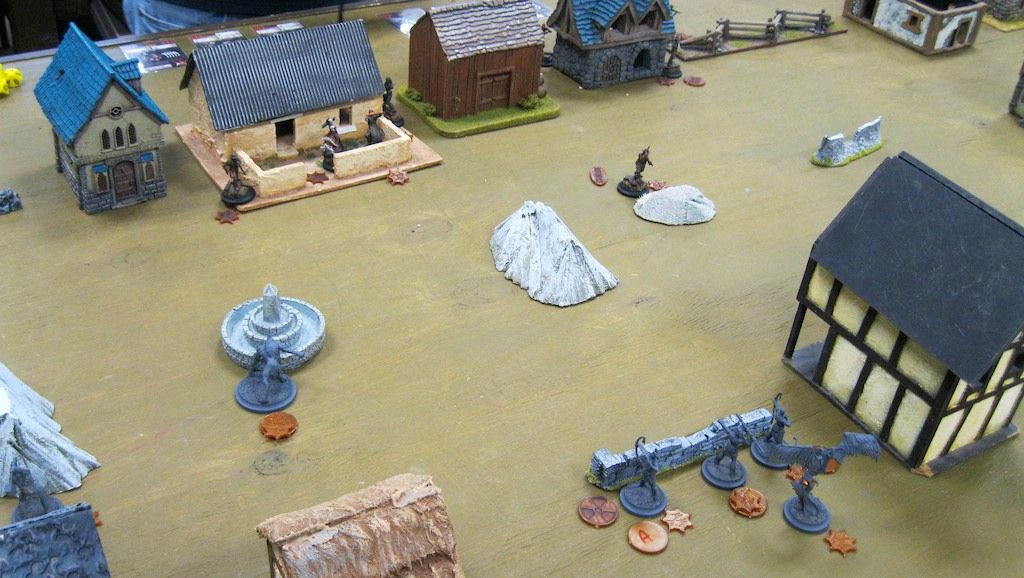
WWX Rule Note / Commentary: I would come to learn about the value of smoke bombs in future games. Cunningham has smoke bombs and these are critical to allowing the Warrior Nation close combat monsters to move up the table and be effective. When you combine this with Sky Spirit's Spirit Aim ability it becomes huge.
WWX Rule Note / Commentary: Speaking of Sky Spirit, you'll notice his positioning in the picture above.... namely right out in the open. Sky Spirit has an ability called Spirit Aim, which effectively means the positioning above is completely useless and a bad tactical choice. Spirit Aim allows Sky Spirit to target without having LOS and with no negative modifiers to his shot. It took me 3 turns to realize how to use him right. There are some key elements of WWX that work different from other games and can be misleading when your playing it.
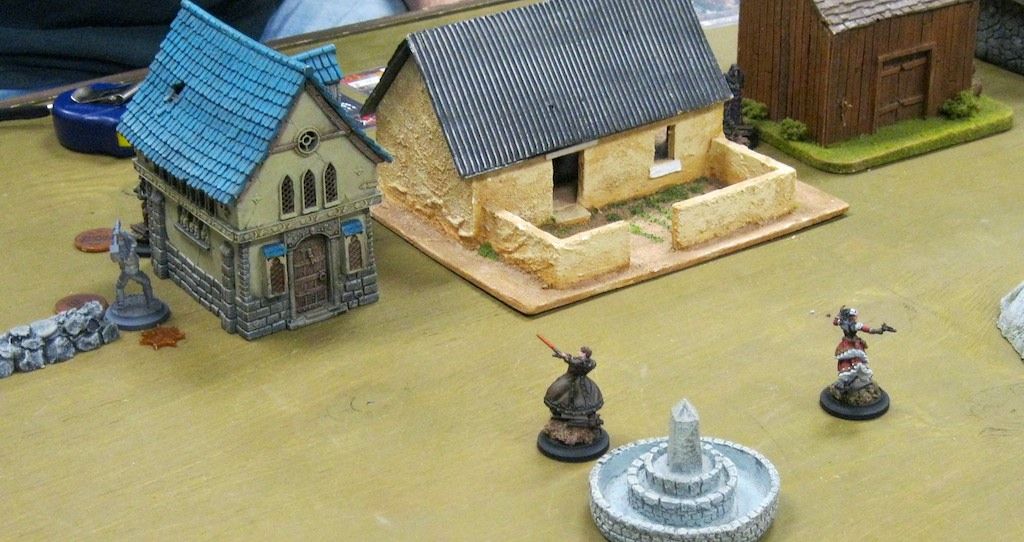
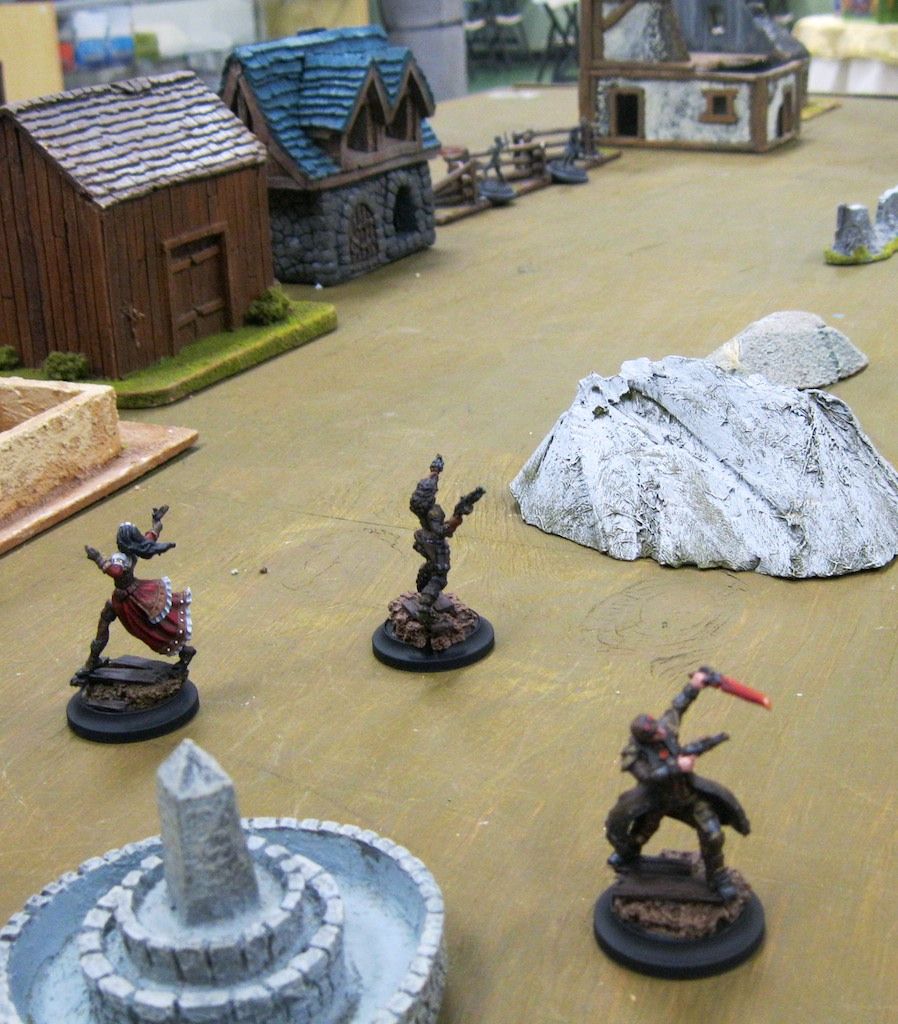
I grabbed a quick picture from Sitting Bull's POV at the end of the turn:
Turn 2 & 3
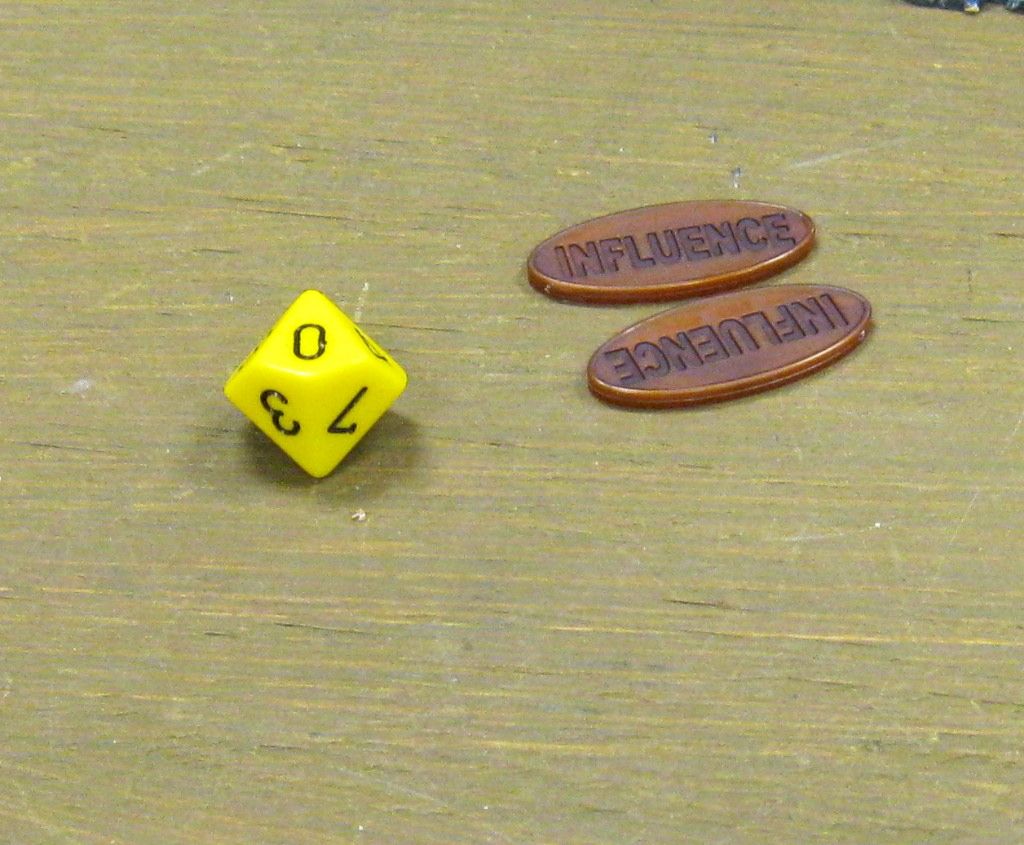 Each turn after the first starts with the initiative roll. Each player rolls a single dice for initiative and is able to use any remaining influence from the previous turn on that roll. Influence does not refresh until after the initiative stage.
 John and I went into our first initiative roll with no idea how to use influence and ended up using it wrong. Basically I had not used any influence on turn 1 so had 8 influence to add to the roll while John came to the roll with only 2. John started with a 10 while I started with a 2. We then proceeded to trade influenced rerolls back and forth until John was out and I eventually won the initiative roll.
WWX Rule Note / Commentary: The way that John and I used influence on the initiative roll is completely the wrong way to do it in the game. After the game we asked the question on the WWX forums and had the developer help us learn how to do it correctly. Basically, each player can add their remaining influence to the initiative roll. After deciding how much influence to add, both players roll initiative. The player losing initiative can then reroll their dice as many times as they have influence, until they decide to stay on a roll. Once they choose a roll to stick with any remaining influence is lost. At that point the other player can re-roll up to the total influence they added to the roll. Once they choose to stay with a roll they also forfeit any remaining influence. If the initiative rolls are tied at that point then both players re-roll until the tie is broken, with that roll being the final result.
Moving into turn 2 and through turn 3 we were both a bit surprised at how quickly the encounter and action escalated. Sitting Bull charged forward and engaged Mal, Inara, and the hired hand. I had no grasp whatsoever on how the attacks actually worked with Sitting Bull and ended up rolling only 1/3 of his attacks overall. Despite this, I still hurt Mal and killed off the hired hand. Cunningham moved around the big rock on the left and tried to position for some turn 3 engagement, considering his slow speed. He did start to use Smoke during turn 3 to try and stay alive. Walks Looking ran into the street on the far right flank and tried to stab a hired hand, but missed and ran away to hide. John was far more successful on his turn, utilizing Zoe's ability to power up Mal and Mal's melee ability to kill off Sitting Bull. Billy ran out into the middle of the street and unloaded his shotgun into my hired hands, which combined with the variety of other shots to wipe them off the board.
Turn 4

John used a very cool synergy with his models, activating Zoe and Mal at the same time and using Zoe's ability to give Mal an "immediate activation" which he used (with only 2 AP) to move out into the street and get LOS on Cunningham. Because the "immediate activation" did not count as his activation, he was then able to continue with his own activation, using 3 AP to shoot at Cunningham and knock him down to 3 life remaining and setting him on fire. This ended up being very effective.
Turn 5 & 6
Final Thoughts
I really enjoyed my first game of WWX. I found the rules to be fairly simple overall and very straight forward. Even in the situations where John and I ran into confusion it was pretty simple to make a guess and come up with a quick method that worked (and seemed to be a possible interpretation of the rules). I do not find WWX to be as complex as Malifaux Classic, although I find it to be more complex than 40K and WHFB. I enjoy complex games where the models can impact the game in dynamic ways, along with games that encourage combination of model abilities for increased synergy. I would say that WWX is very similar in complexity to the PP games (War Machine and Hordes), although I am unsure where I place it in relation to those games (slightly more or slightly less complex).I can certainly see this as an enjoyable game, which is good since it's my primary mini game for the time being. As it's the new shiny I can see playing this more than WM/H currently. That may shift over time but for right now I am excited to see where things go.
I plan to post a briefer synopsis of my game 2 on Dakka Dakka, then post a similar to this post on game 3 later next week. Comments and Questions are always welcome!
Subscribe to:
Posts (Atom)


