

I have been looking through the tracking and logs for the DTP blog lately and have learned a number of things. I started this blog to keep track of my progress on building the Dead Tau Project and the variety of pieces that made up that project. At the end of the day, I started this for me and it is nice that the blog has been well received by the blog-o-sphere as a whole. Over time I have joined 2 "Blogroll groups", with From The Warp being the first and more recently the Bell of Lost Souls Alliance.Now, the BOLS alliance is too new to my blog to really get good statistics for. FTW has been nice, coming in 6th place over the past month for referral traffic. One thing that really interested me was that Blogger sits comfortable at spot #3 for referral traffic. Most interesting, at least to me, was that first and second place are actually locked down by Google Images. This means the majority of people come to the Dead Tau Project by searching for images that are on my blog.
On to the Main Post!
Anyways, all that is just interesting trivia. What I really wanted to do with this post was provide a quick tutorial on how I constructed my Warp Spider models. I mentioned the trivia above because I noticed that in the last week or so many readers to my blog have been checking out one of my first posts from February 2008, titles An Update on Crafting. I wondered why this was and came up with two theories. Its very likely some new readers are starting from the beginning of my blog, and they might be interested in how I constructed the bases for the DTP. I thought it was more likely to do with the pictures I provide of how I construct my Warp Spiders. With this in mind, I thought I would provide a new and updated post with a quick tutorial on how to build a Warp Spider.
I love the Warp Spider Aspect Warriors in the Eldar army. It is one of the primary drivers for my choice of Eldar as my army. My original Eldar army had a squad of spiders using the original models. I still keep one of those models on my painting station, as it was one of the first models I painted. I will save a picture for another day, as it is fairly horrible.
When I decided to start up the DTP, one of the first squads I planned to create was Spiders. My choice to custom build the Spiders was heavily influenced by a Hobbyist who posts(ed) on Warseer under the name Dark Apostle. His custom built spiders looked fantastic and still looked like Warp Spiders. This was my plan and I immediatly head out to grab the bitz.
So, today the bitz market through GW has changed a fair amount. When I built my spiders the project was fairly expensive on a per-model basis. Now, it is even more so. Your shopping list will be the following:
For a squad of 9 spiders:
- 9 Eldar Guardians
- 9 Warp Jump Generator backpacks
- 9 3rd edition Dark Reaper gun arms
- 5 sets of Warp Spider Exarch gun arms
- 1 Eldar Guardian
- 1 Autarch Warp Jump Generator backpacks
- 1 set of Banshee Exarch Mirror Blades
- 1 set of Warp Spider Exarch gun arms
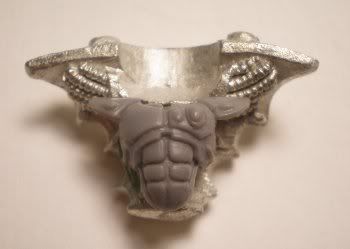
The second step will be to start assembling. Using a bit of internet magic here (and without permission so I will gladly take down Dark Apostle's pictures if asked) You assemble the front of a Guardian body with the WJG backpack from the spider Exarch. Make sure to do this before attaching the legs, although if you use a guardian box 2 of the guardian bodies come fully assembled.
Here is a close-up of the assembly:
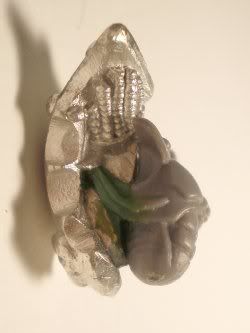
Once that step is complete and the glue has dried, you may want to do a bit of green stuff touch-up on the back:
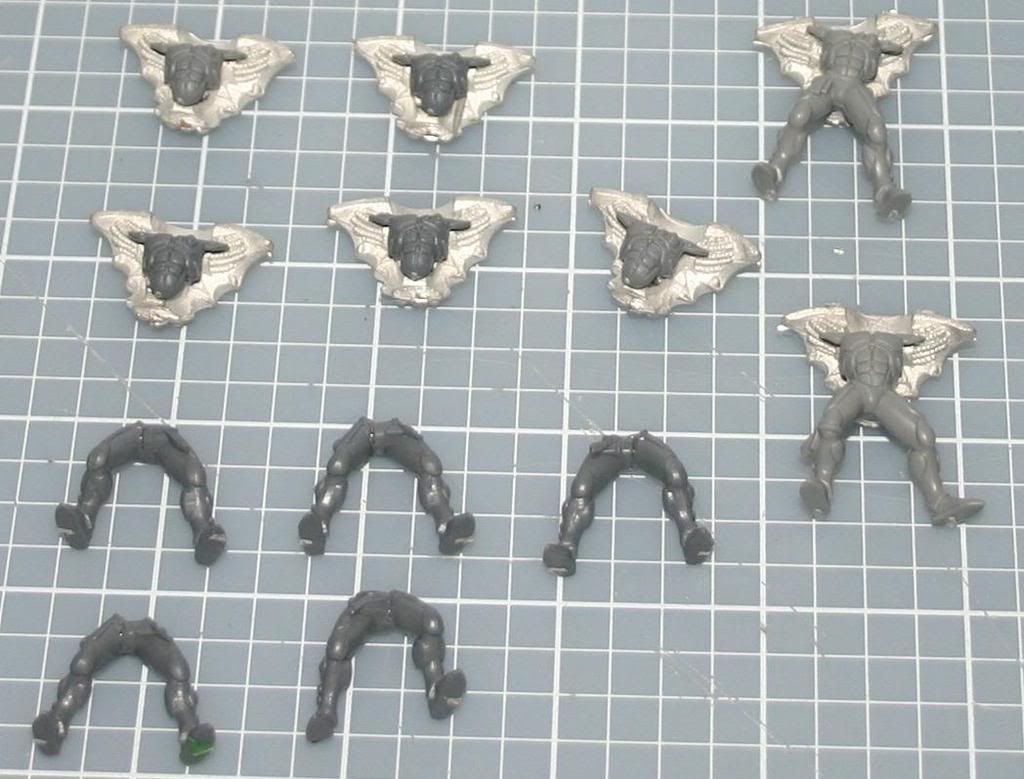
Your final assembled bodies should look like this:
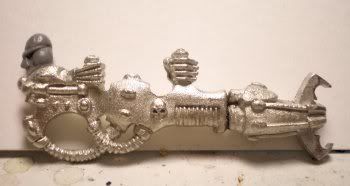
The next step is to assemble the guns. Here is a close-up. As you can see, the Missile end of the Dark Reaper gun is cut off close to the stock, and the Spinner end of the Warp Spider gun is cut. Then these are pinned together and glued. Lastly you need to use your hobby knife and trim down the shoulder of a Guardian right arm to fit the Dark Reaper arm attacked to the gun.
At that point, the Spider should pop together with some additional glue and you can position him on your base.
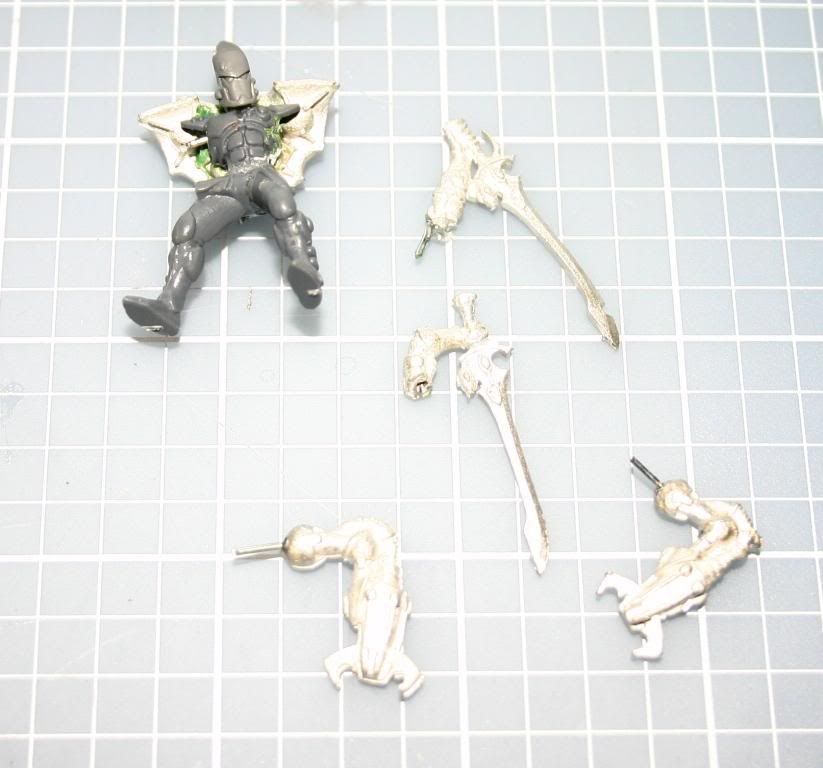
Here is a quick snap-shot of the pieces for the Autarch, in addition to a quick look at an assembled body. For the Autarch, you should pin all 4 arms that fit to the body, then clean up the gaps with green stuff.
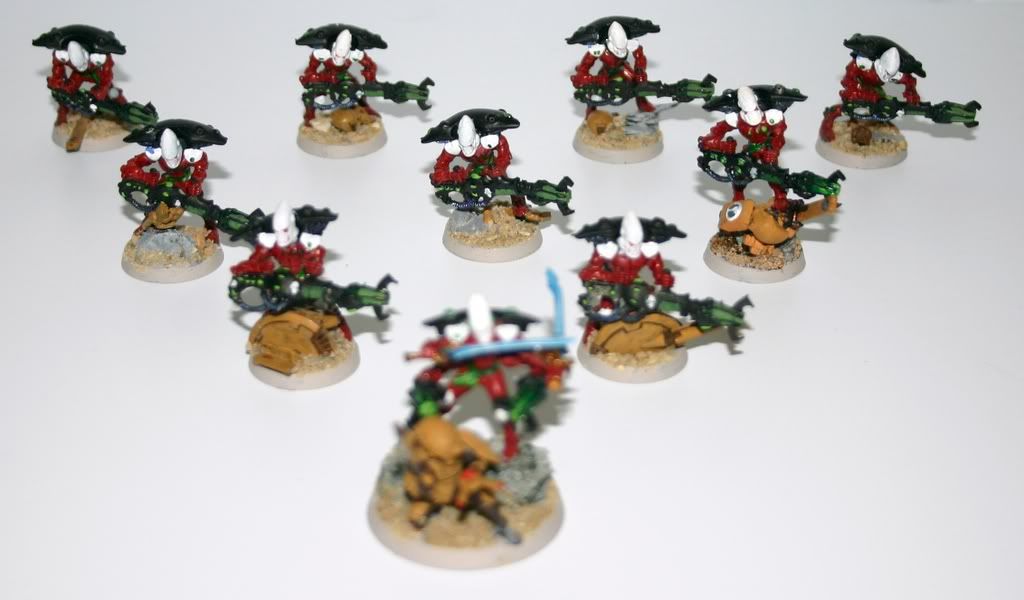
Once all those steps are complete and the green-stuff has set, its time to prime and paint your models! Here are two looks at painted Warp Spiders build this way.
First we have my squad:
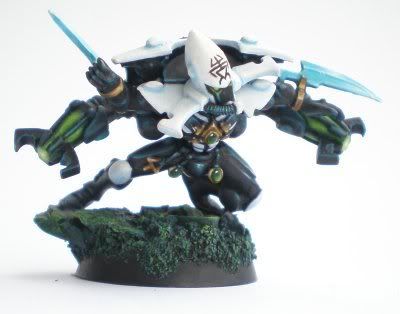
And then Dark Apostle's incredibly painted model:
I hope this tutorial was helpful!


HAHA! It worked. You now have pics in the blog roll. Congrats.
ReplyDeleteAlso great article. I a surprised how complex that conversion and how much better it looks.
"Leesburg."
ReplyDeleteLeesburg??
ReplyDeletehttp://fromthewarp.blogspot.com/2010/02/tuesday-top-ten-56.html
ReplyDeleteI did not realize Iw as on the Tuesday top 10.... thanks!
ReplyDeleteAnd that's very funny. I see where it came from and fixed the display.... lol