Showing posts with label tutorial. Show all posts

Monday, October 5, 2015

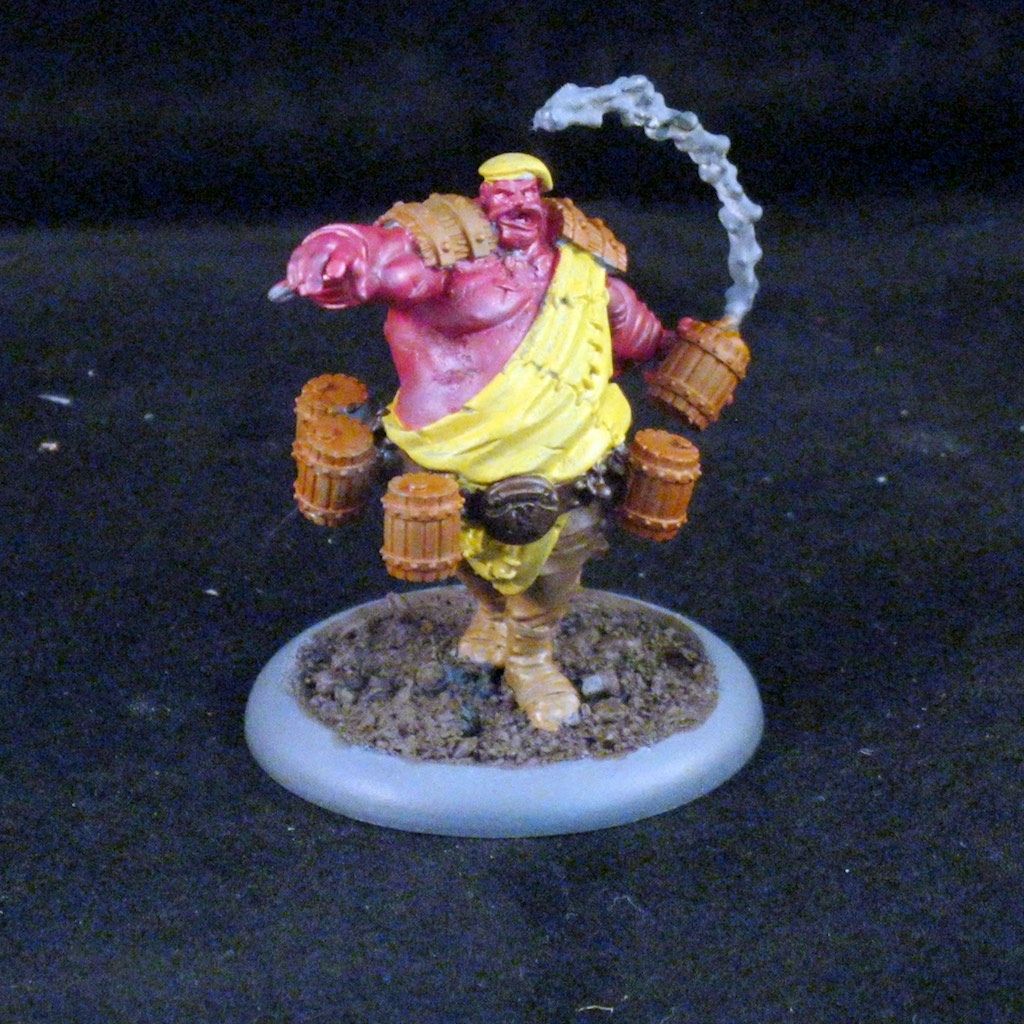
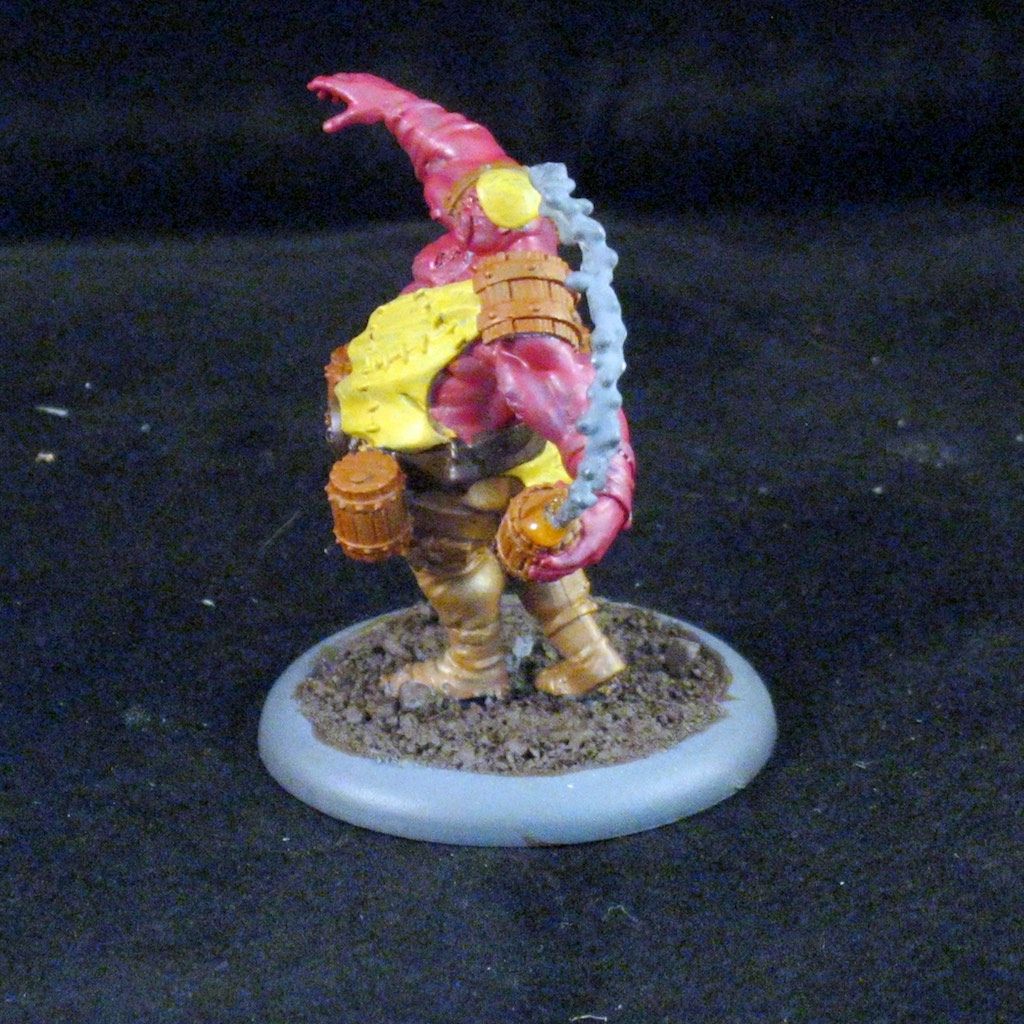
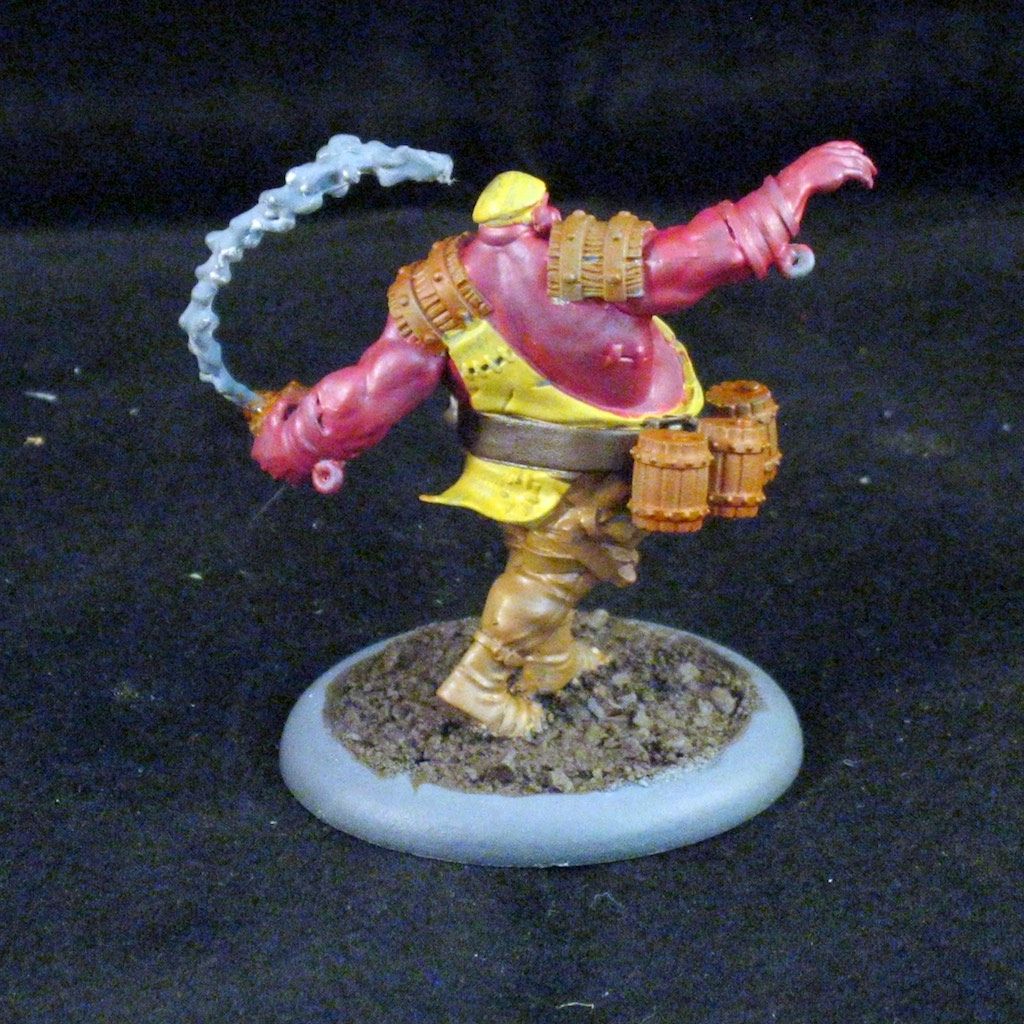
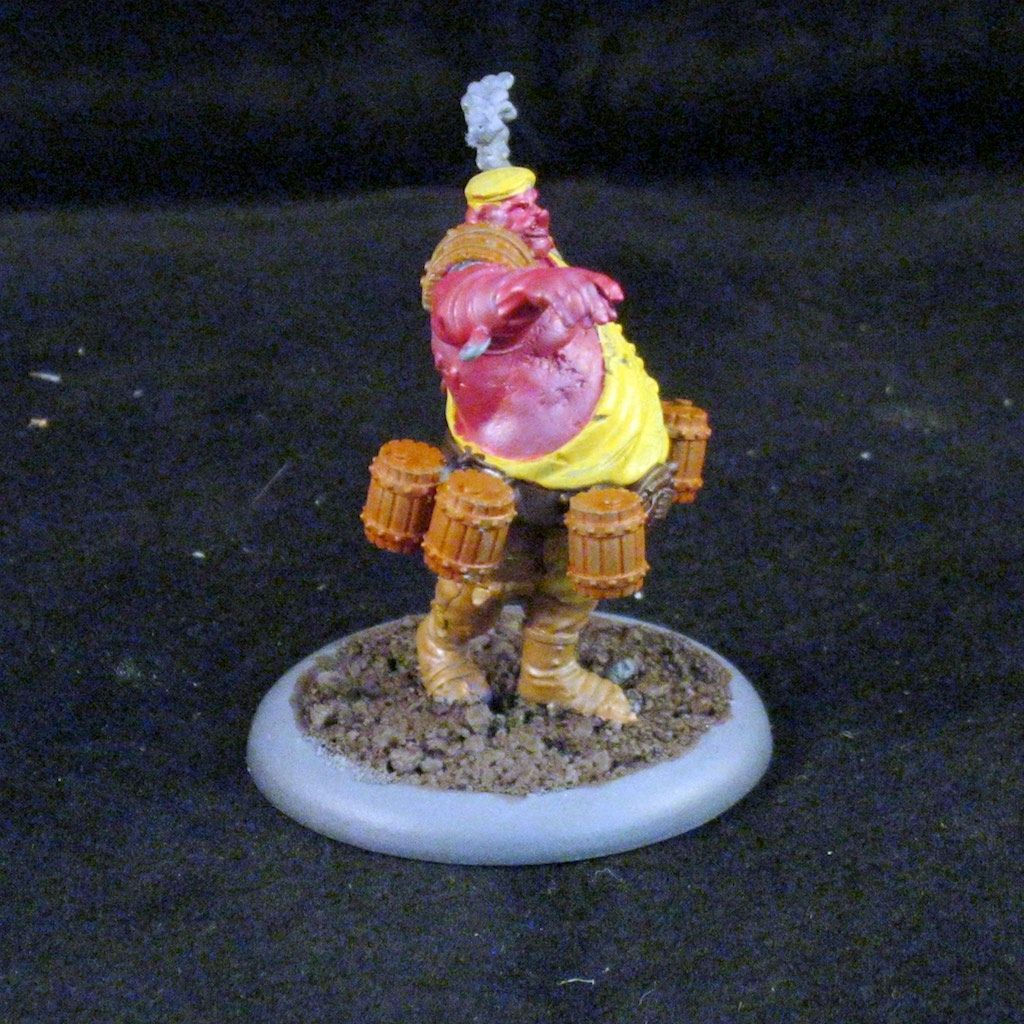
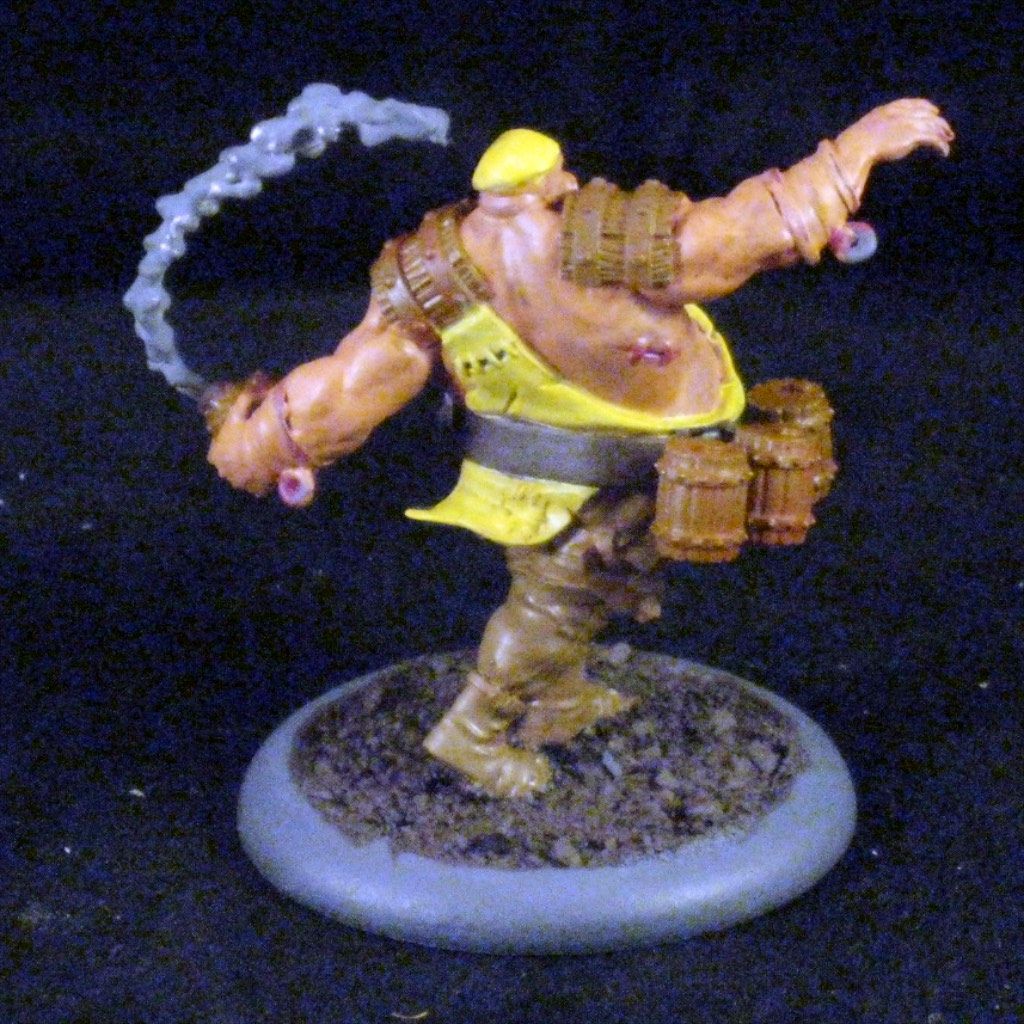
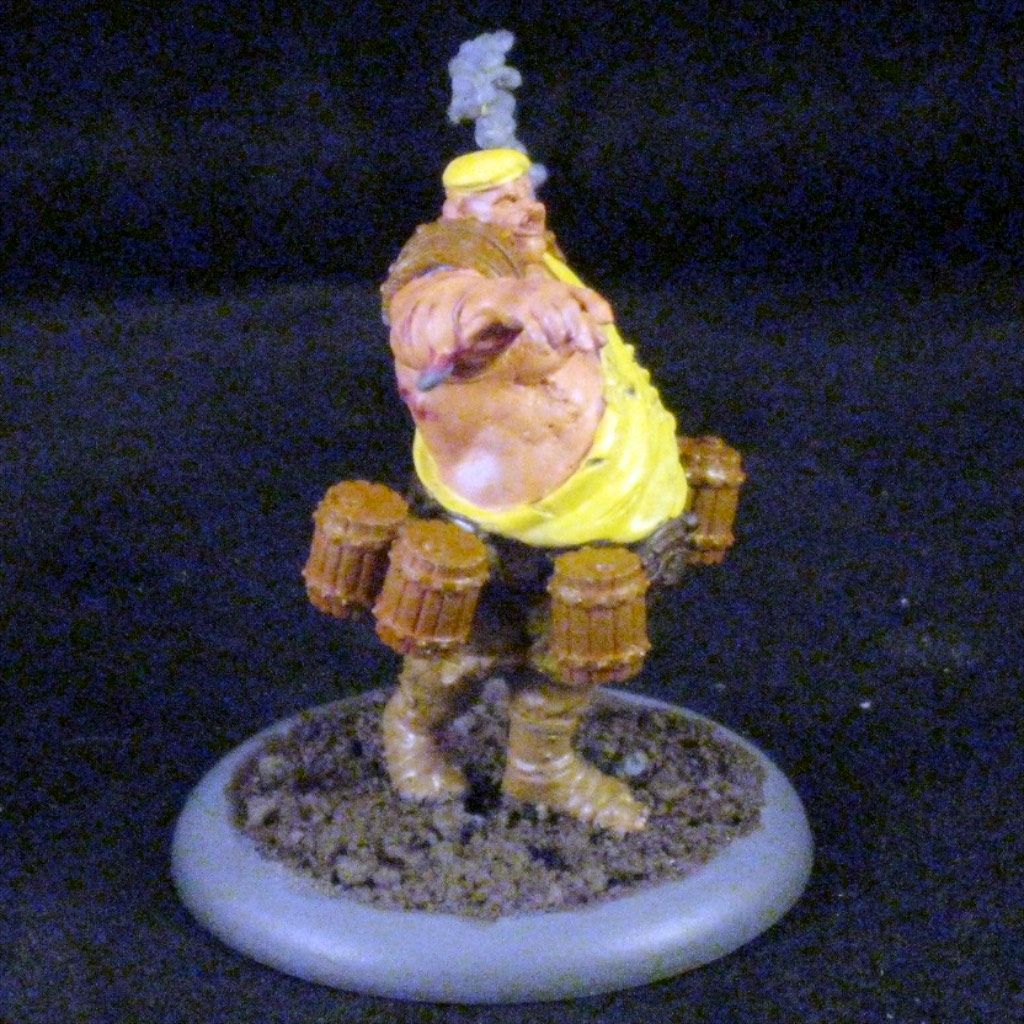
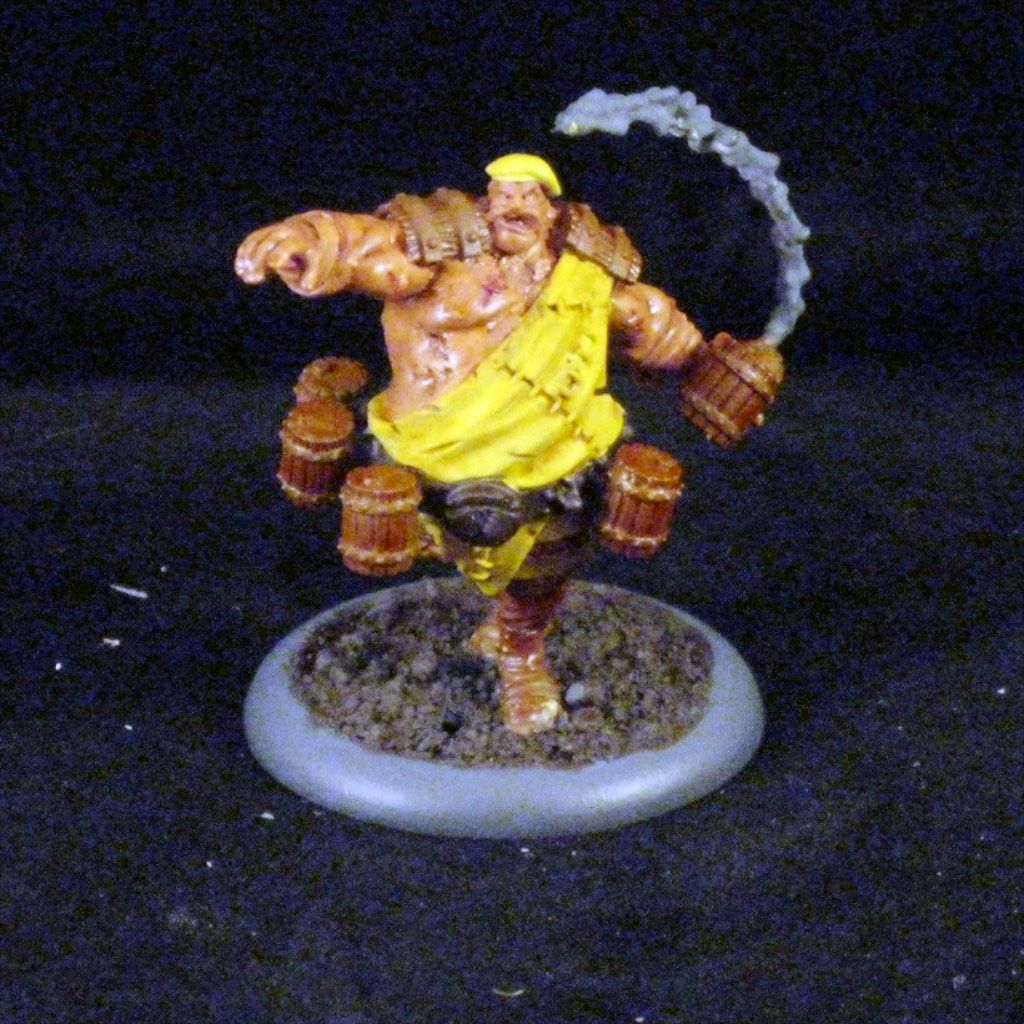
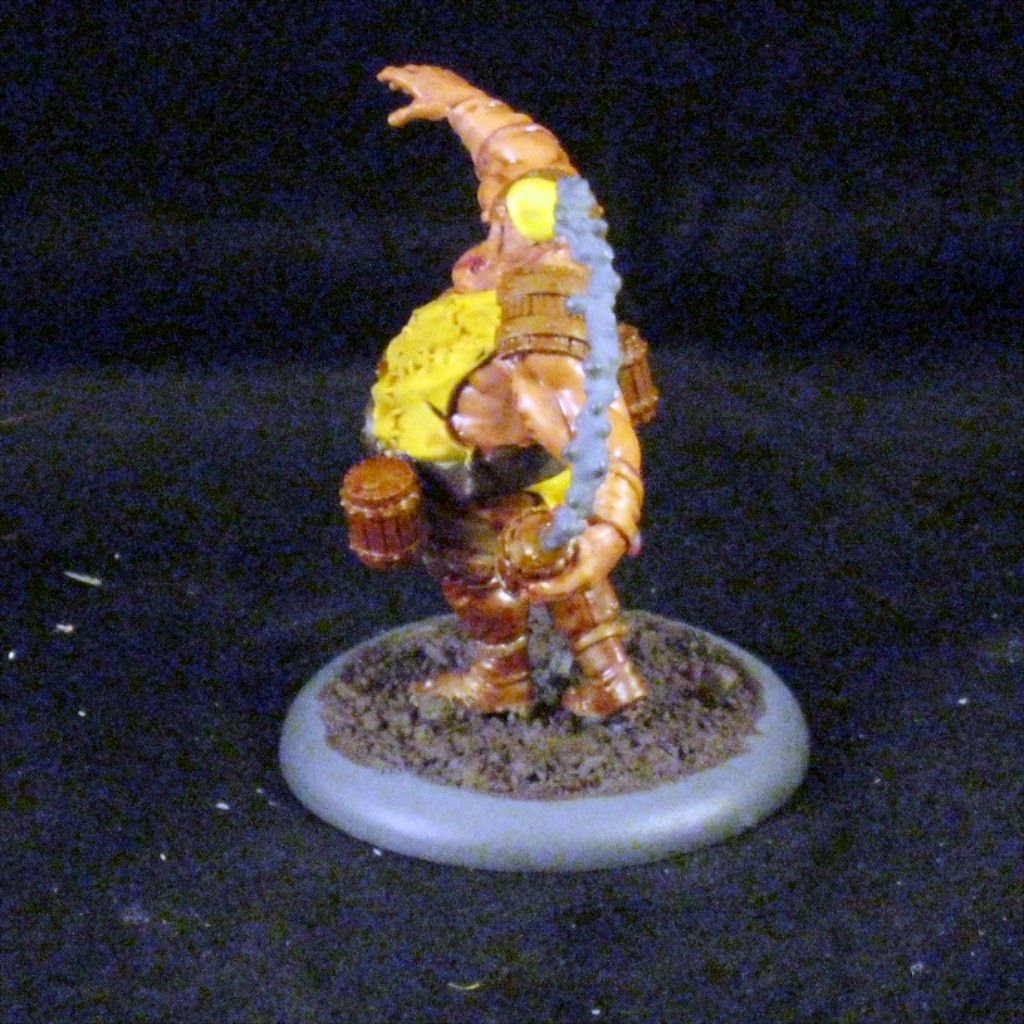
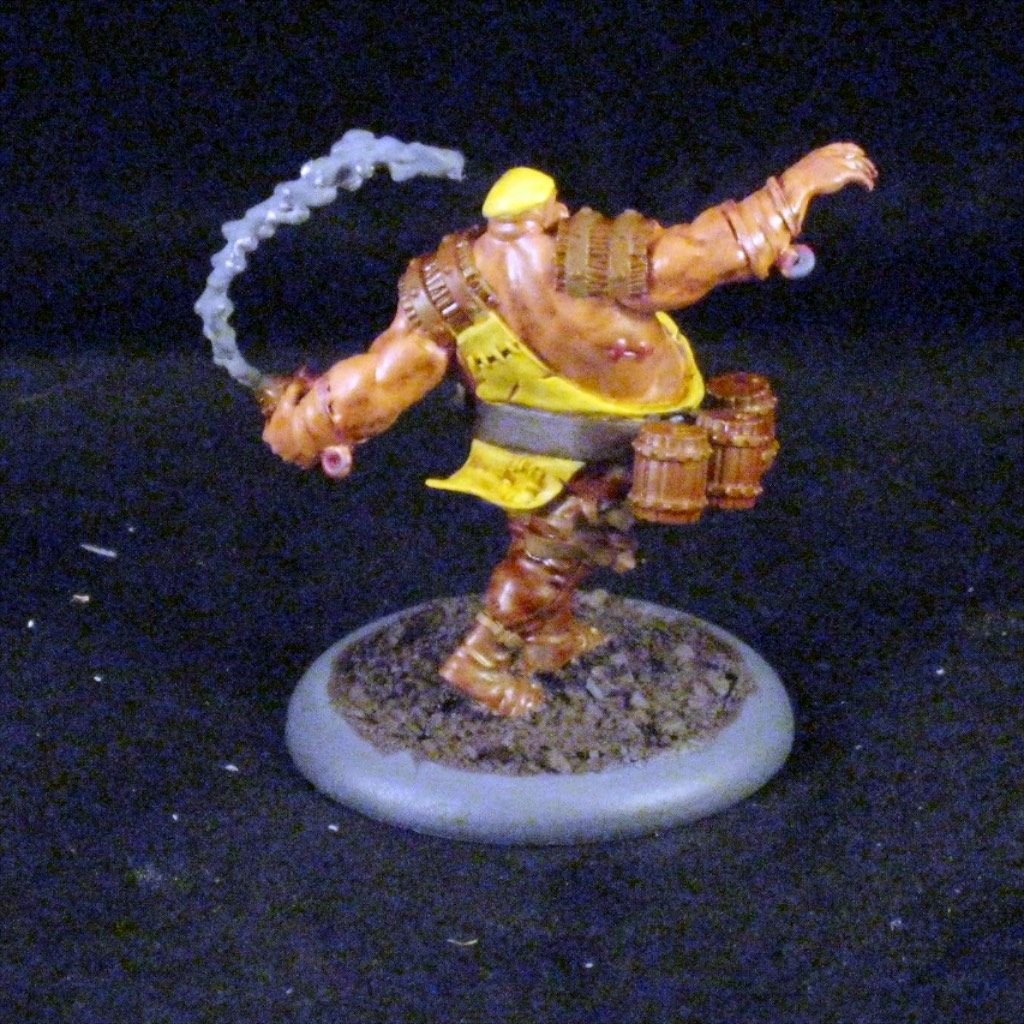
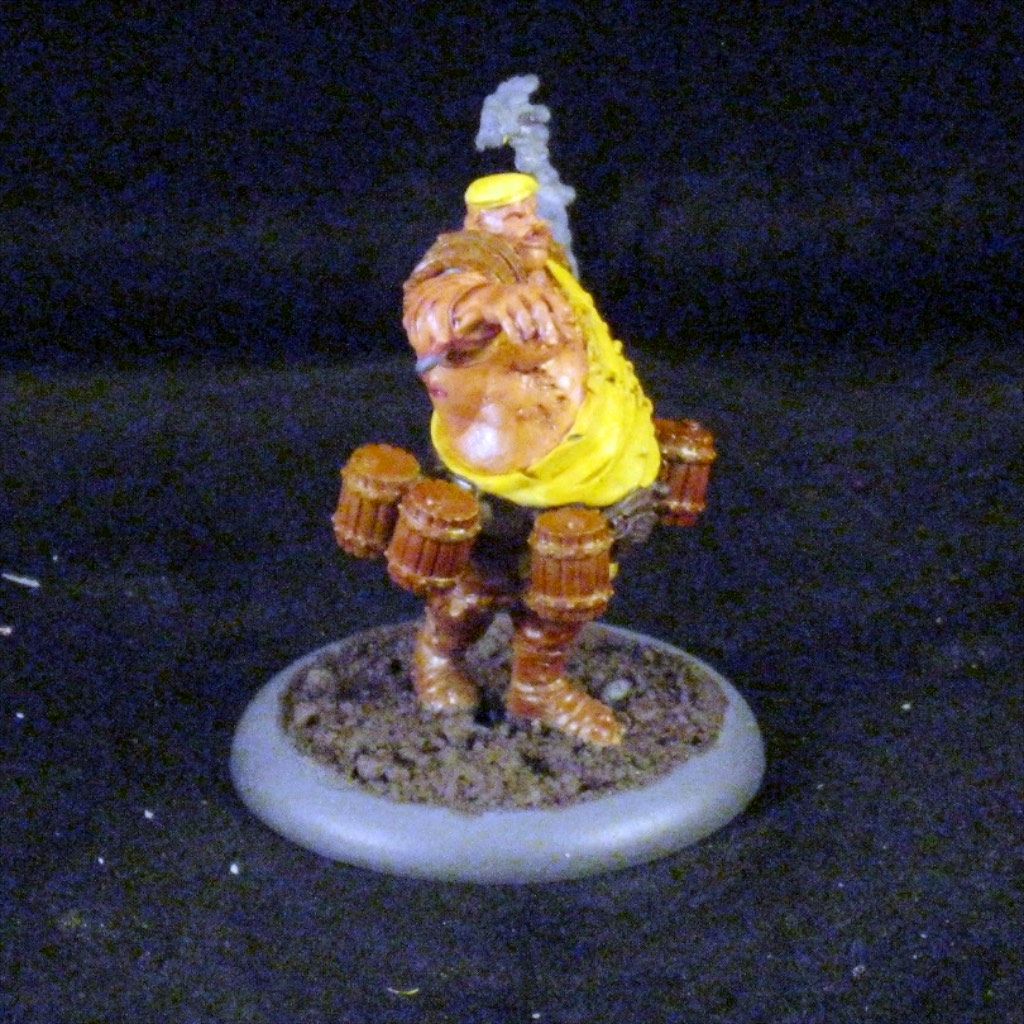
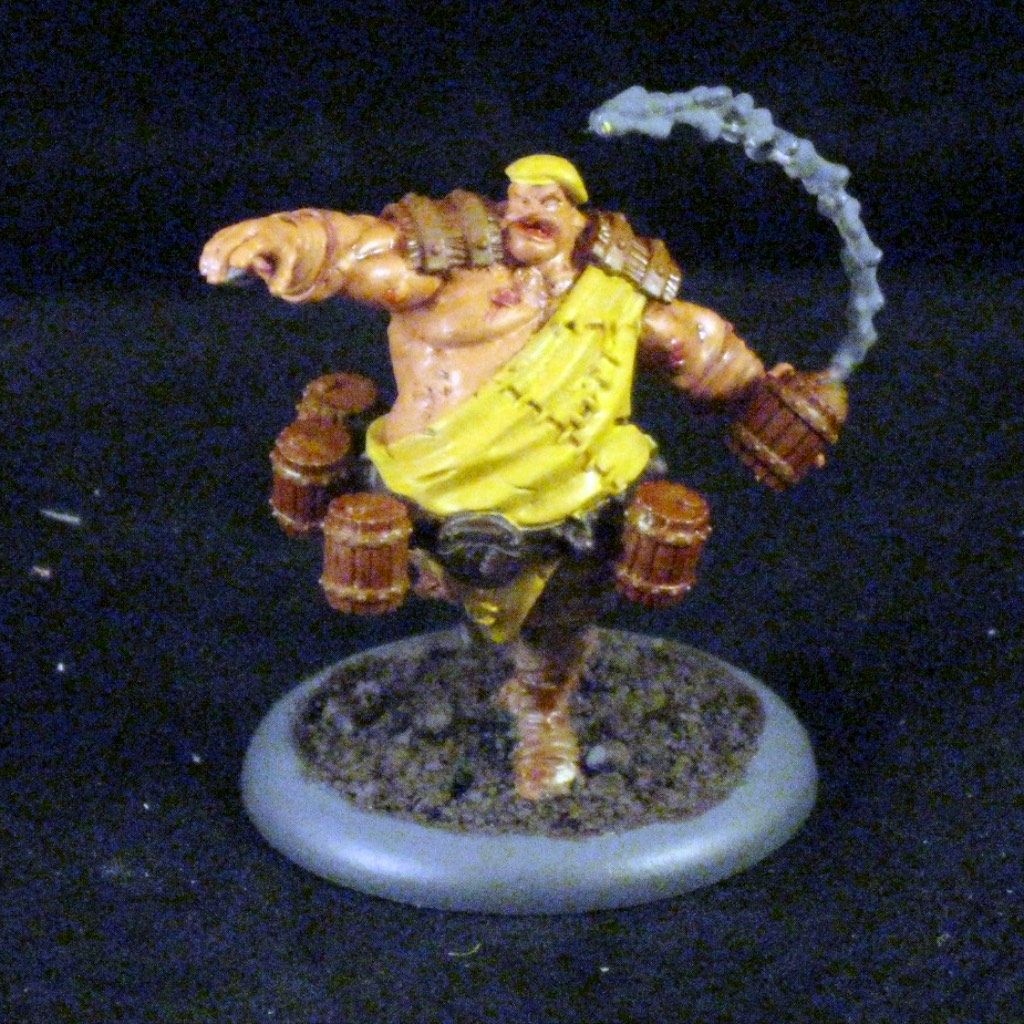
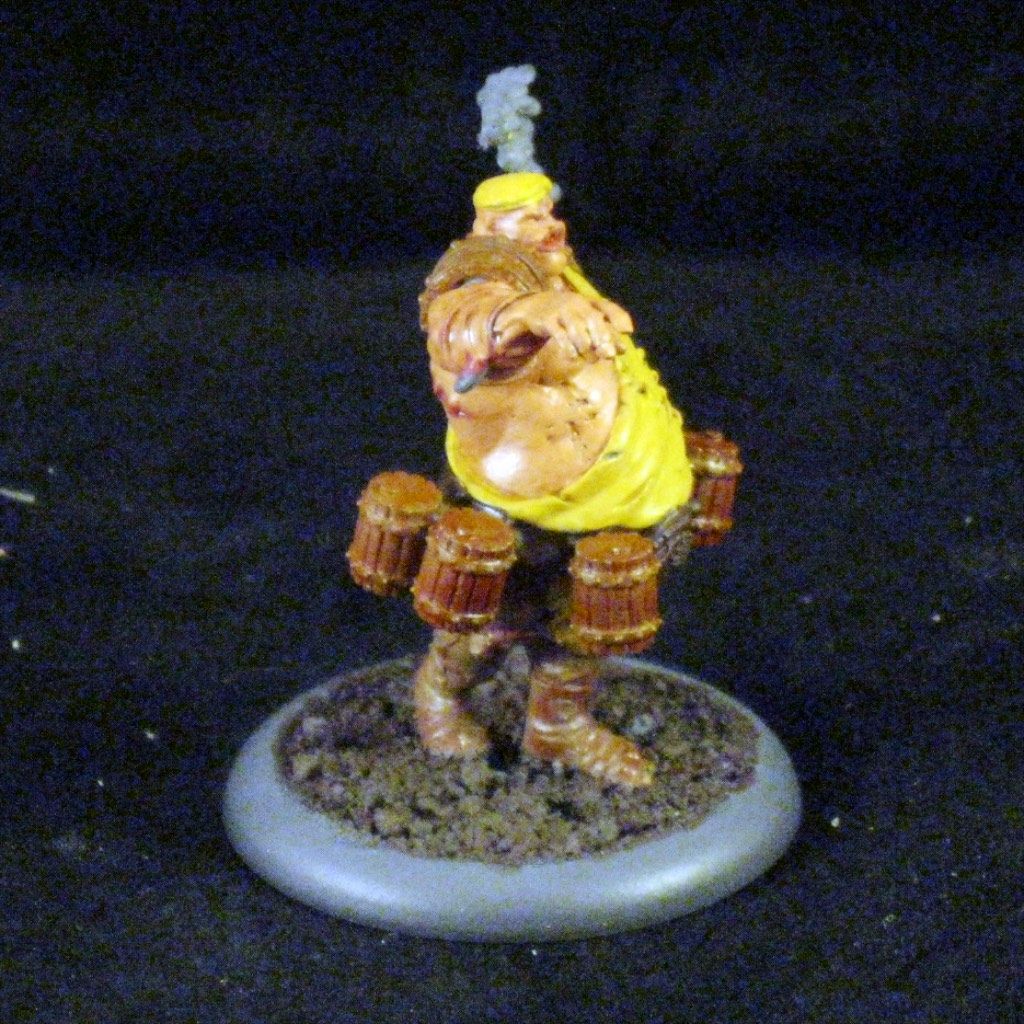
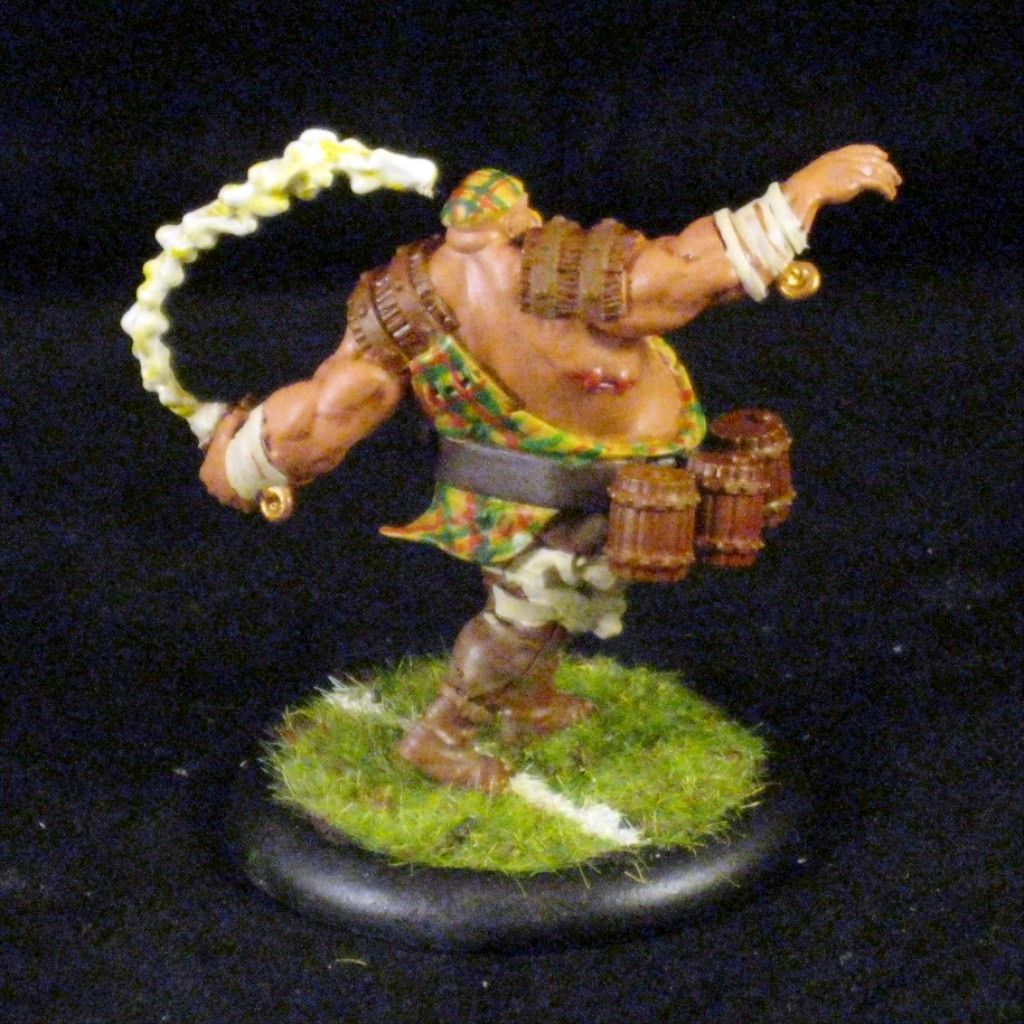
Painting Tutorial - Guild Ball Brewers player Stave

I thought this would be a fun article to share with readers, although I am going to provide a big disclaimer at the beginning. I paint to achieve a table top standard, and am by no means a top painted. I've had lots of conversations with top painted such as Jay and Convy, and realize where my painting skills fall short. Considering that, if this tutorial helps you then I am happy to share. If you find ways to incorporate what I did here and improve upon it, please share as I am interested in new techniques!

 Background

I was browsing the painted models section of the Guild Ball forums and came across a wonderful post by Hobbybutterfly. In this post he  walked through painting up one of the Union team players, Fangtooth. He used a technique which I found to be intriguing, where he started the skin with a base coat of red instead of a flesh color. I typically start with a darker flesh tone then highlight with a lighter flesh tone when I'm painting skin, so the idea of starting with another base color blew my mind a bit. I liked the way his Fangtooth looked in the pictures so tried the same technique for my own. I did not leave as much red showing in the recesses of the skin, but was really happy with how the colors worked out. I felt that it gave a nice red tint to the skin tone along with really bringing out the bruises and cuts on Fangtooth.

Keeping this in mind I decided to use a similar route for my Brewers. Looking across the Brewers team there is a fair bit of skin with lots of bruises and bandages on the players arms, chests, and backs. Keeping in mind the theme of the team, I thought it would also be a good choice to stray a bit more toward purple, hoping to provide a deeper bruise coloring but also reflect the ruddy "I'm a drunk" look the Brewers deserve. The only model I will refrain from starting with a base red is Friday, where I plan to stick to my typical darker skin/lighter skin theme.

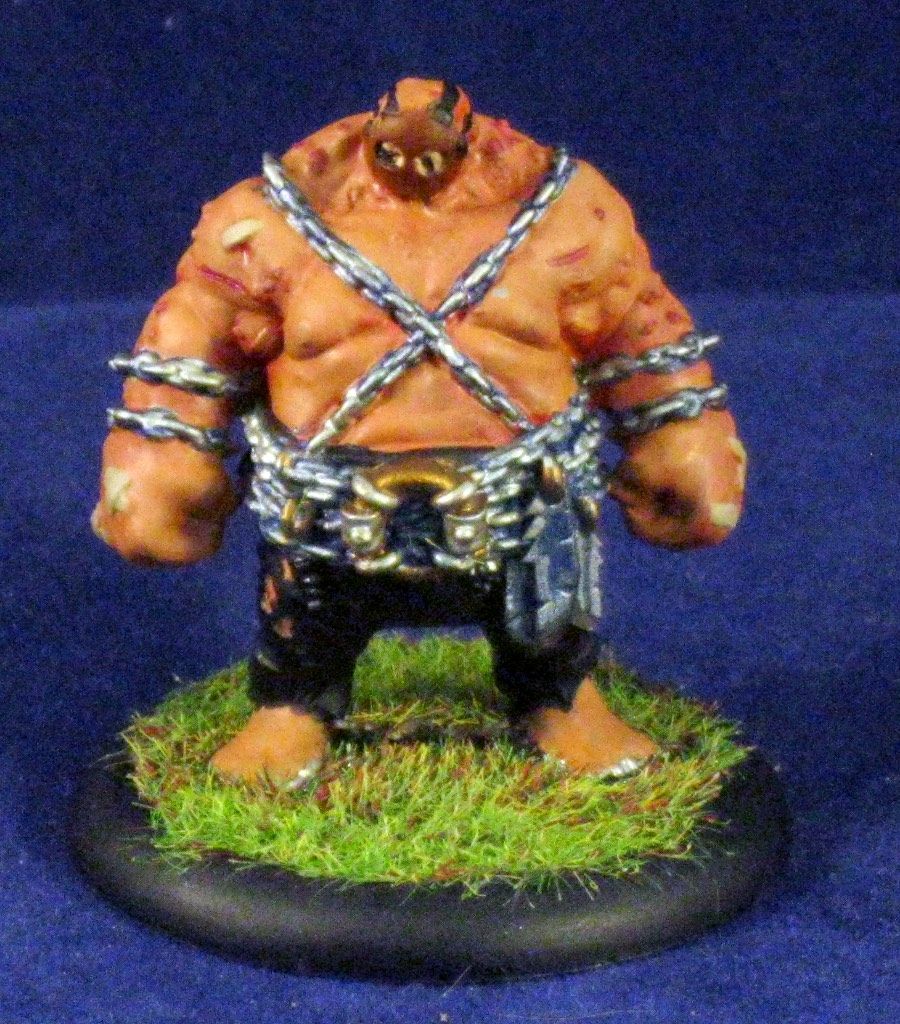
I decided to go ahead and put together a little photo-essay of my painting on the big guy, Stave, for the blog. All my paints for this (with one exception) are P3 paints for anyone trying to reference them. On the primer, I use a matte grey automotive primer to prime my models as I find it's very cost effective ($6 a can), has great spray control, and is actually fairly thin so I don't lose detail.

Step 1 - Base Coats

I start out by applying the base coats for all of my colors. I am a bit of an inconsistent painter overall, not always following through with each stage/layer together, but often putting down multiple layers on an area before moving to another. (i.e. I'll finish up the cloth before moving to the skin, etc) In almost all situations I tend to put down my base coats together to block out what colors I'll use while painting a model.

On Stave you can see that I left a couple areas primer grey and did not paint those up until I did the final details on the model. Specifically the bandages/cloth wrapping Stave's wrists and the eye-bolts on his wrists. I ended up painting those on my final detail pass (as you'll see below.

Base Coat paints
  • Cloth = Rucksack Tan
  • Skin = Sanquine Highlight
  • Wood = Bloodstone
  • Leather = Boostrap Leather
  • Belt = Umbral Umber 


Step 2 - Mid-tones

I let the base coats dry on the model before moving onto laying down the mid-tones. This step is where I begin to apply a lighter/brighter color of paint to the model to create shadows and depth by applying over the base coats.  While painting the skin I tried to paint around the cuts, leaving the purple/red showing so that it would come through as a bruise or cut. I left a bit of a wider area than I wanted to end with, then used a clean brush to "push" the edges of the paint I just applied toward the center of the bruise, "feathering" the edges a bit. The effect is a bit hard to see in the pictures, and I'm honestly not sure how well it comes out at the end. I went back and reapplied sanguine highlight to any bruises or cuts that I inadvertently painted over during this step.


Mid Coat
  • Cloth = Moldy Ochre
  • Skin = Khardic Flesh
  • Wood = Blood Tracker Brown
  • Leather = Gun Corp Brown


Step 3 - Washes

I discovered washes years ago when GW brought out their initial line of Citidel washes. I have to admit that washes are one of the tricks I learned ot use early, not only to make my model look better with only a little effort (by bathing the model in a wash) but also as a technique to strengthen and provide depth to my colors. I apply washes after my mid tones to help blend together the base (shadow) and mid, and also to provide a bit more depth to the shadow. This also changes the mid-tone color a bit, sometimes allowing me to go back and highlight with the same mid-tone color, causing an easier transition.

Washes
  • Cloth = (Citadel) Seraphim Sepia
  • Skin = Flesh Wash
  • Wood = Brown Ink
  • Leather = Brown Ink 


Step 4 - Highlights

Applying the highlights is where I start to get a bit frustrated when I'm painting a model. Typically my process is to apply my base coats and then go do something with another model while I wait for the base coats to dry. This happens fairly quickly and I can then move onto mid-tones and washes. Applying the washes while the mid-tones are not completely dry is not a bad thing, as it provides a bit of blending if you do it carefully. This actually helps the overall look of the model so I can move through those two steps fairly quickly. I have not had the same results applying my highlights while the wash is still wet. This means I have to wait longer for my washes to dry (frustrating) before applying my highlights. Then, the highlight step is where the model really starts moving to being finished, but I want to rush to get to the final detail step and be done. 

Considering that, you can see where I've gone through and painted the high points of the models. I'm really looking for the top edge of creases on the cloth and muscle ridges on the skin. I blend a bit closer to the depth's on the skin to even out the overall skin tone along with covering most of the flat areas of the leather pants, leaving the depths and stitching colored by the wash, mid, and base coats.

Highlight
  • Cloth = Rucksack Tan
  • Skin = Khardic Flesh
  • Leather = Gun Corp Brown

Step 5 - Final details

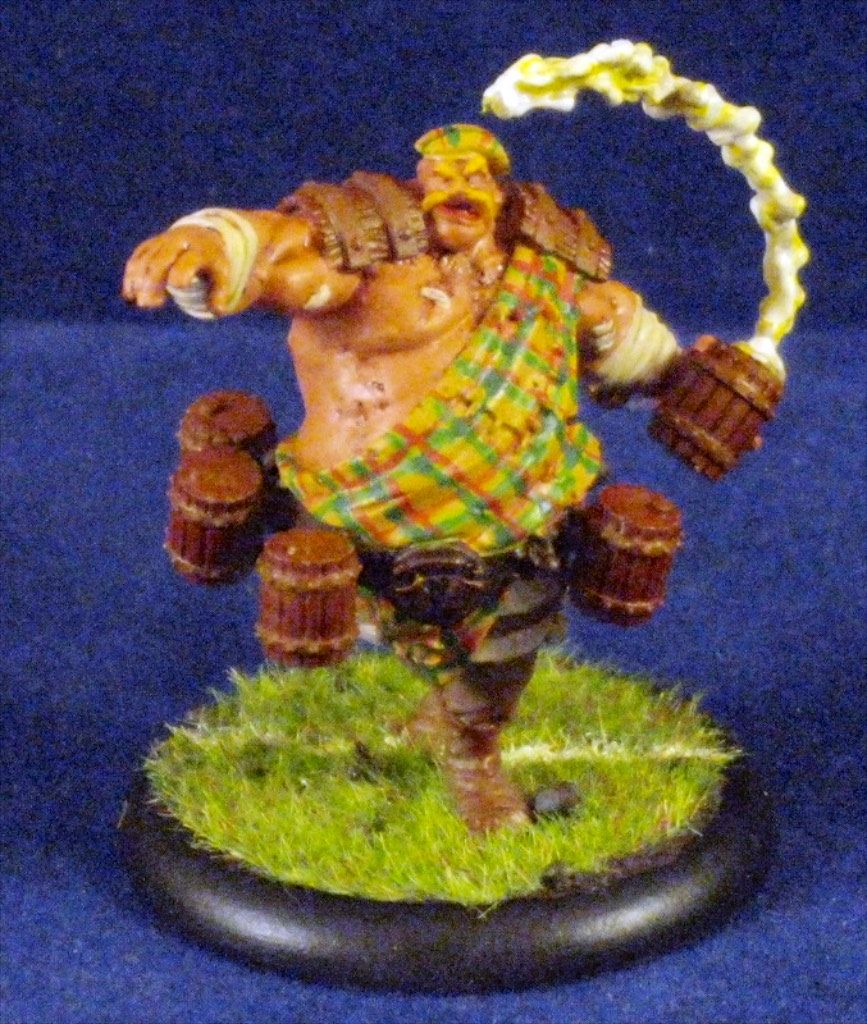
During this step I go back and give the model all the final details I have not yet covered. In the case of Stave I add in the Tartan, cloth bandages, metal eye-hooks, beer foam, and facial hair. I also give it a once over and touch up any areas I may have caused a mess on while painting the highlights. I did notice after completing and photographing this step that I had missed his patches and the stitching on his tartan, which I went back afterwards and touched up.
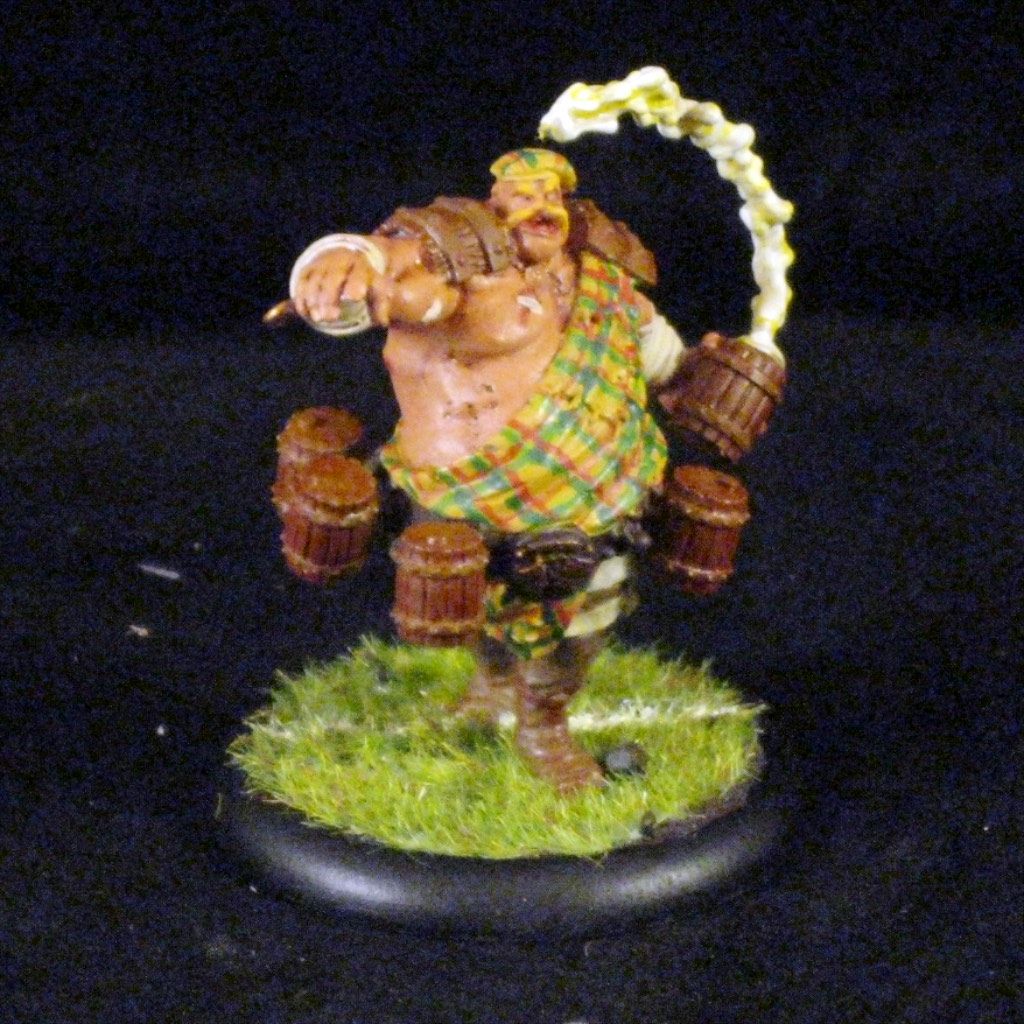
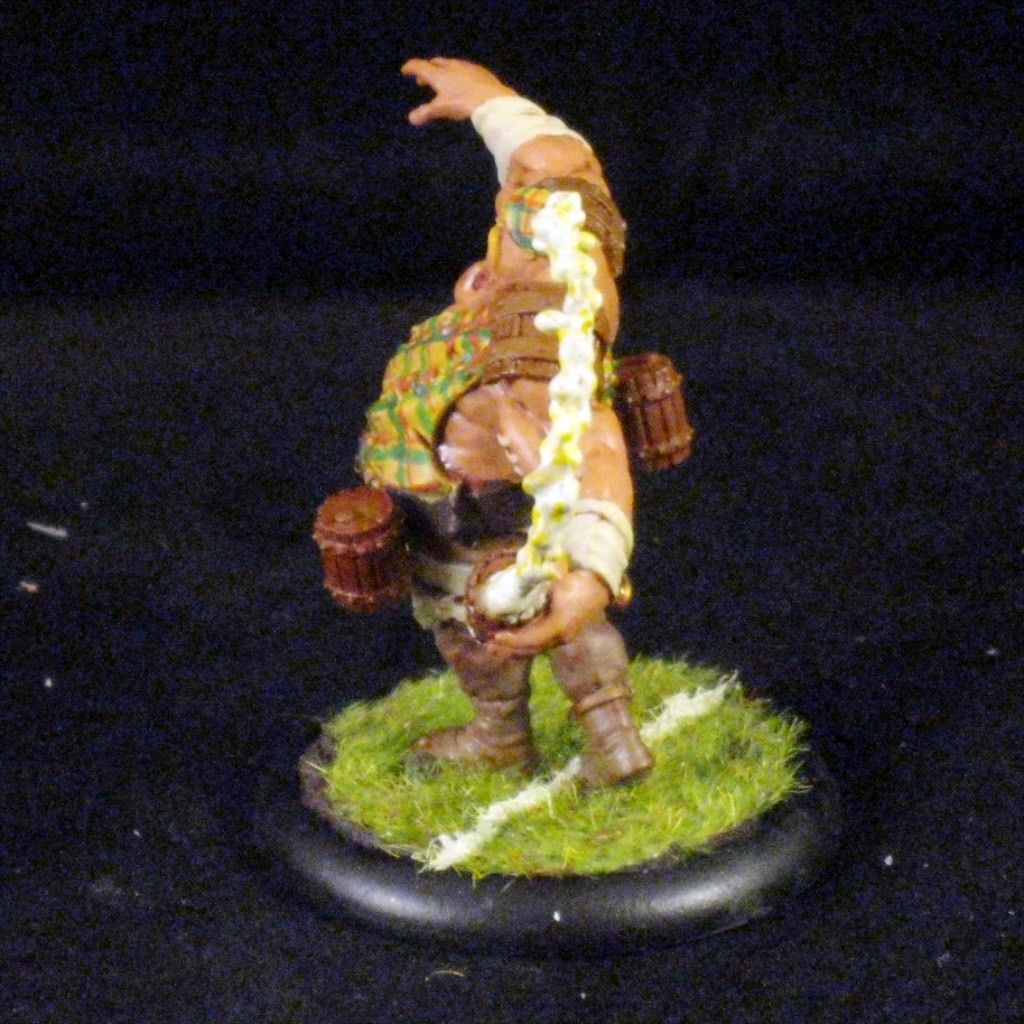
I want to also thank my Guild Ball Tonight cohost Phil for providing a great video on painting Tartan on these models. The Tartan pattern I used follows his technique in the following video.

I hope that you've enjoyed this tutorial and that it inspires some ideas for you to go and paint up your own models.
Tuesday, April 24, 2012

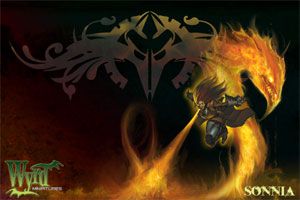
Sonnia Criid - an Overview

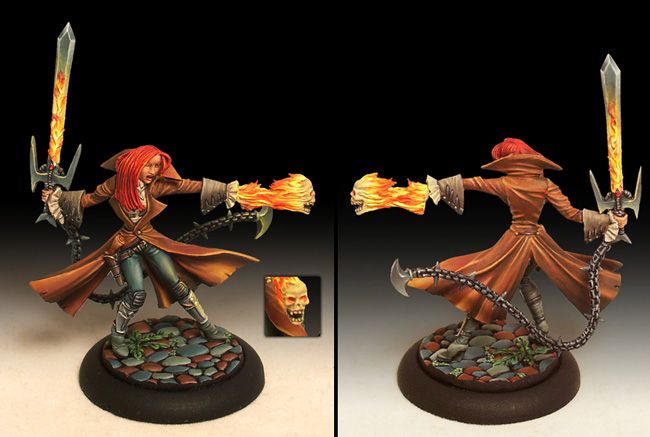
Sonnia Criid
Sonnia is one of the Masters that Guild has in thier repetoir to take. There is a lot of information already out there on playing with Sonnia, on blogs such as Wasted Warrior and also on sites such as the Pull My Finger Malifaux Wiki. That would leave you wondering why I would be writing this blog post, especially if I do not intend to recover what has already been covered?

I recently took Sonnia and her Avatar form as one of my primary crew choices at Adepticon 2012. I wanted to put together some of my thoughts on what I saw in her and why I feel she is one of the more competitive Guild masters currently. I thought that this would be a good way to present the information.

Master Description
Sonnia is one of the few guild masters that requires a bit of finesse to use. I see many players pick her up and stay completely focused on her "Throw big balls of fire" ability. While this is a very good ability, I think it is the least of what makes Sonnia a good master. Many people overlook the fact that Sonnia is the only "summoning" master guild players have access to. She can actually increase the number of models on the table through the game. In addition, Sonnia has an incredible control ability in being able to negate spells within a 3 inch bubble effect. Here are my views on Sonnia Criid in her Master form.

Strengths
  • Violation of Magic - Sonnia can, via a cast spell, summon an additional model to augment her crew. See Witchling Stalkers below. Violation is not a Ranged Strike spell, so can be cast into combat and is not impacted by cover. While it is only 1 point of reliable damage, the damage does scale for some models in the game based on the targets cast.
  • Advanced Counterspell - with this ability and a tome (or 2 cards) in hand, Sonnia can shut down the casting of a spell prior to it being attempted. In addition, she can do this for anything within 3 inches of her that has been targeted. This ability is great, and a very good reason to hold onto low tomes in your hand. As many models accomplish their cool tricks with spells in Malifaux, this ability is very strong.
  • Absorb Magic trigger plus her Sword - This automatically triggers on a melee strike, and has some great effects. At a minimum, Sonnia will heal 1 wd and draw a card while the target will be forced to discard at least 1 card.
  • Flame Burst - Its the spell most people look at for Sonnia, but I put it at the bottom of her list of strengths. You will tend to use it a lot. On a successful cast she will automatically trigger explosive burst, which lets her place her blasts up to 2 inches away from the target. This is a great way to spread the damage out across an enemy crew. At the end of the day, its a damage spell with 2 or 3 blast markers on the moderate and severe damage.
Neutral
  • Df 4, Wd 10 - she has a fairly average master defensive stat line.
  • Flame Wall - she has a spell to put some flaming pillars on the board, which is nice but situationally useful.
  • Inferno - this ability is ok, but you will often be using her Confiscated Lore spell to cast her spells
  • Magic Seeker - I see you asking why I put this in the neutral column and not in the Strengths. Honestly, while the ability is amazing, I rarely have seen it get a lot of use. My balance of how often it is used vs how good it is leaves this as a neutral ability.
Weaknesses
  • Card and SS dependance -  Sonnia is very dependent on both cards and SS for her to work well. She does not come with the required suit to cast her spell, but has an ability (Confiscated Lore) that lets her discard a SS to get the tome. In addition, she needs cards in hand to counter spell incoming spells. This can leave you with few stones or cards for other actions during the game.
  • Walk 4 - I do consider this a weakness. In Malifaux, movement is important. Sonnia only having an average walk is a weakness she shares with most of the guild.

Using a Totem with Sonnia
I tend to find myself not using totems with Sonnia. She has some available to her, but I think her avatar is a much better choice for 2 spare SS. Her personal totem (Purifying Flame) looks very nice but has not real value in picking it up. Sonnia's spells require tomes, so the Gov. Proxy is only partially useful. The Student of Conflict may be good by handing out Fast, but if I am spending 4 points in a Sonnia crew, I think a Witchling Stalker or Death Marshal better fills my needs.


Using her Avatar
Cherufe, Sonnia Avatar. I find that I rarely put Sonnia on the table anymore without attaching her Avatar. Sonnia's avatar is one of the few avatars I can see manifesting early in a game. Real skill in using it, however, comes up with gauging the best time to manifest. Due to some of the things you lose with the Avatar, you may benefit from manifesting later versus earlier.

What do I gain?
When you manifest you gain the following:
  • +1 Cast and two suits to choose from - that's right, Sonnia becomes better at casting and gets to choose between Rams and Tomes. This makes her spells much easier to cast along with making them tougher to resist.
  • Pyres - Pyres are amazing. Pyrse and her ability to push them around the board provide a combination of area control, LOS control, and reliable damage. These are all very strong.
  • Pulse Damage - aSonnia gains a pulse spell for a (0) action that gives out damage in a fairly wide area. This spell is not a game finisher, but is a nice way to hand out some damage
  • A tough melee attack with a Morale duel - through a combination of her melee attack and a new trigger (Horrific Burns), aSonnia can throw around targets she hits in melee and force Morale Duels. This can be useful in specific situations.
What do I lose?
aSonnia does lose some abilities over her basic master form:
  • Ranged damage spells. Sonnia now has her pulse to hand out damage, but does not have any explosive ranged spells like her Fire Burst.
  • Healing in Melee - Sonnia loses the ability to heal with her sword, along with the ability to make models discard cards. Her new weapon can hit very hard, but does not have the same versatility as hr original sword.


Crew's to Hire

General Guild Crew
Sonnia and Justice fill a specific place in the guild when it comes to hiring crews. To that end, I wanted to take a little bit to talk about it. While Hoffman really wants to take a fair amount of constructs, and Perdita really likes her family, Sonnia and Justice can really work somewhat interchangeably with a fairly standard guild crew build. This can be better stated as both Sonnia and Justice can operate as "super solo's" separate from their crew.

While it is worth mentioning, I find that there is an incredible amount of synergy when I build some specific models around Sonnia in the crew. As such, here are some of my thoughts.

Sam Hopkins
Sam comes with Sonnia's box set and appears at a high level to synergise well with her. Unfortunately this does not often turn out to be the case. He does not really add much to her crew. Even his Mage killing abilities (Arcane Hunter) don't actually help Sonnia out. Sonnia can already handle the high cast opponents models, so I recommend (and often do) leave Sam at home.

Fire Gamin
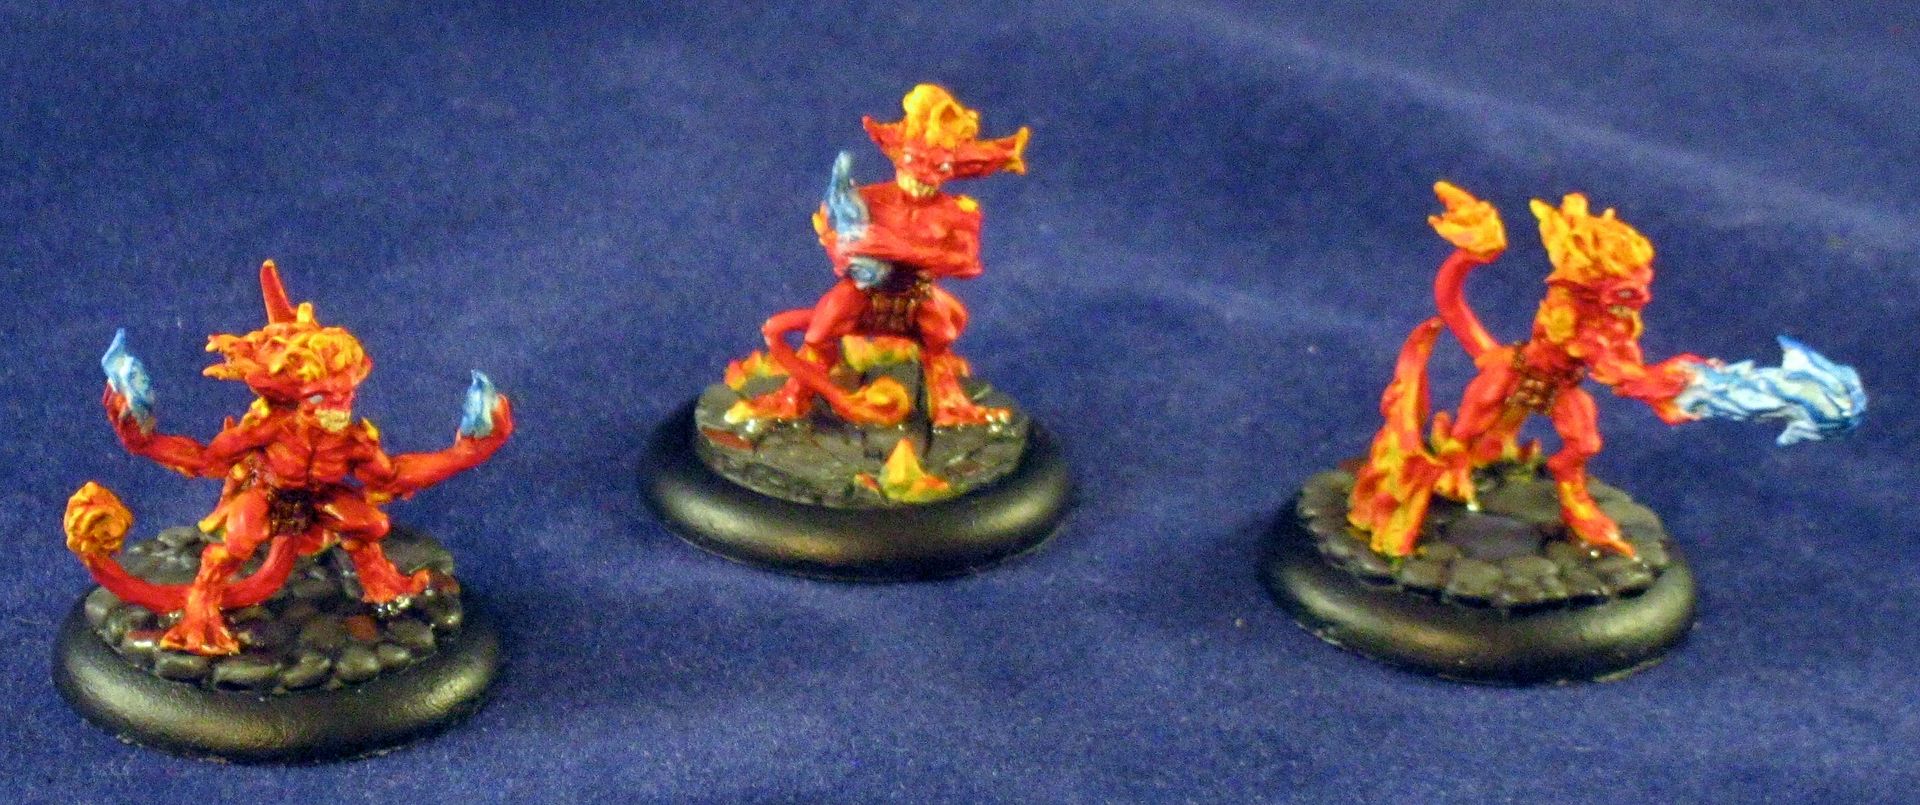
I thought while I was talking about models I do not take, I would mention Fire Gamin. Do I like Fire Gamin? yes. Do I take them? not in a competitive list. I do not see Fire Gamin making it into my competitive lists because they do not add anything to a crew that I really need. They can help out with burning tokens for when aSonnia manifests, but they are not really necessary. I do take them for fun games, but very rarely in my tournament lists.

Witchling Stalkers
Possibly the best 4 point minion in the game. Witchling Stalkers are amazing in melee combat with a CB 6 sword that automatically triggers critical strike. Add to that thier ability to slow down casting with their sword. What am I talking about?
Weapon, Shattered Runed Blade: Magical. Models
wounded by this weapon must discard a Control Card
when declaring the target of a spell until the end of
their next activation or the Action immediately ends.
This is a really good ability and comes automatically on thier sword, although it is often forgotten. Add to that thier aura of "I hate Magic" and they are an excellent model.

It is important to mention the other ability that Stalkers bring to the table, an ability that makes them invaluable to any guild crew. That is the spell "Dispel Magic". With this spell they can remove effects from both friendly and enemy models. This is a very handy utilitarian spell to have on the board to remove such things as Paralyzed, slow, poison tokens, etc.
Witchling Handler
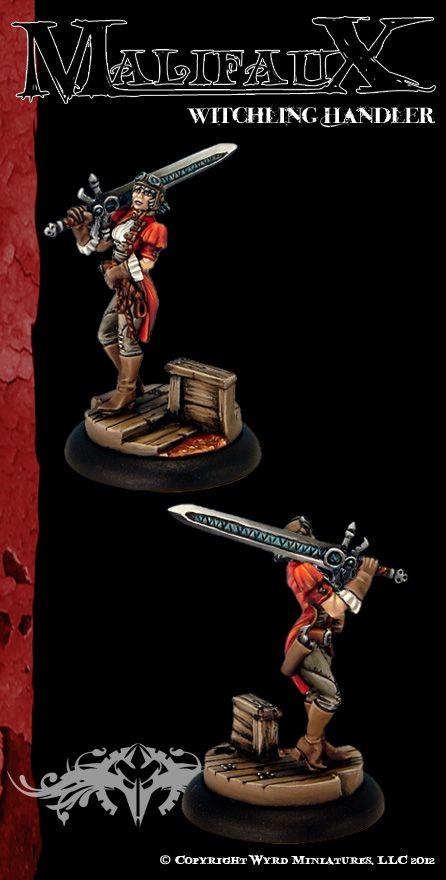
The Handler is a book 3 model that augments the Witchling Stalkers. I find that she works very well in my Sonnia lists, specifically because I tend to get at least 2 stalkers on the board during the game. The Handler has a nice aura to block triggers and hamper casting spells. She also has a great sword to swing that negatively impacts spell casting. The largest boon I see to adding a Handler is two-fold. First, with her ability Word Written she can push a witchling stalker 4 inches toward the closest enemy. This is very cool since it does not require LOS to the Stalker and has no range (basically covers the whole board). Her second ability comes in having Stalkers close by her. When she and a Stalker both engage the same model, she gets bonus's to her attack. When a stalker is near her it gets bonuses to its Wp and Df. This is a reason to keep at least 1 stalker near her at all times.

Santiago
Santiago beings some very reliable shooting to a Sonnia crew. In addition, when paired with a Guardian he becomes a great model to leave within 3 inches of Sonnia's 3 inch pulse from Inferno. Sitting in this pulse will bring him most of the way down to triggering his "Is that All you Got" ability, raising his CB on his pistols along with giving him a free walk. Santiago's trigger happy trigger is very good for a mid-range gunfight and a great addition to Sonnia's crew.

Exorcist
When facing undead or spirits, the Exorcist finds its way into my list every time. While most of Sonnia's crew does not need the magical weapons the Exorcist can hand out, his Magical Crossbow and his "Head-shot-like" trigger on his spell are very helpful. He also has a great spell in "Turn Undead" which can push an undead or spirit crew out of position and open then up for charges or ranged attacks from the rest of Sonnia's crew.

Guardian
Utility in a robot, the guardian fits well with Sonnia's crews. I do not find myself often protecting Sonnia with the Guardian, instead tieing him to either Santiago or the Exorcist. With the Exorcist the guardian allows for the "Driven by Purpose" by soaking up the 1 wd. When tied to Santiago, the guardian does a great job of catching wounds once Santiago drops to his Hard to Wound level. In both cases, if the guardian does not need to heal up, he can also put up a "I hate magic" bubble similar to the Stalkers, which can be a great help.


Desperate Mercenaries
These are in all of my aSonnia lists, and most of my Master Sonnia lists. There are not many mercenaries Sonnia would prefer to take and the Desperate Mercenaries are fantastic for half-priced stalkers. Its a basic recipe, where Sonnia will pop up inferno and the Mercenaries will stand nearby to soak up the flame for 3 damage at the end of the turn. This brings them to 1 wound which not only improves their CB, but also primed them for the 1 dg from Violation of Magic.


Guild Hounds
Guild is a fairly slow faction overall, and thus needs its hounds. Guild Hounds are critical in any game where you strategy requires movement. Strategies that fit this are those like Destroy the Evidence, Line in the Sand, and Treasure Hunt. Guild Hounds are a basic requirement for crews performing these strategies. I recommend taking 3 of them, as it is very easy to kill off 1 hound (turning them insignificant if there are only 2). Hounds can also be useful to bury scrap and corpse counters when facing crews that use these.

I hope that helps out those of you interested in playing Sonnia. I will add the following for those just starting her out. A question was asked on the Wyrd Board: "I have Sonnia Criid, now how do I play her?" This was my reply:
A couple suggestions I have for starting with Sonnia and her box set.
  • Put Sam Hopkins on the table and play 2-3 games with him. He may work out for you and you will probably get the high damage off a couple times. Do not get frustrated when/if he starts getting killed quickly, thats just time to take him off and move to something more resilient. Get him out of your system quickly then come back to him later if he worked well for you.
  • Blow things up. Start throwing around big big explosions of fire. This is another good thing to get out of your system in early games. Sonnia's flame blast spell is fantastic and a great spell, but is only one facet of her capabilities. Blowing up lots of stuff early on will help you focus on the other things that make her strong.
  • After your 2-3 game when blowing stuff up starts to lose a little shine, throw Sonnia straight into a melee! Go ahead, just throw her up the board and get into a fight. This is a great way to learn about her sword and how resiliant she can be.
  • After you do all of the above, you should be somewhere between 6 and 10 games. At that point, start getting down to really learning the rest of how intricate Sonnia can be.Start checking out her other abilities and working on some strategies and schemes that are not typical.
Overall, Sonnia is a fairly complex master and a whole lot of fun. I think she is probably more complex than most masters, so takes a bit to get used to. On top of that, her Flashy stuff is really a draaw, so its tough to look past it until you have used it a lot.

Oh, and take her with at least 7 soul stones in your pool. Any less and you will be crying at the start!

If this was helpful, I will work on getting similar write-ups for other Malifaux masters posted. Hell, even if this was not helpful I still might knock out a couple more.


Thursday, February 2, 2012

How does that Ranged Stike Sequence work again?

Ranged Strikes and Shooting into Melee

So, we have some new players starting to pick up Malifaux in our local group. This is an exciting time as I get to watch a whole new group of people get excited about the game and start to grow in their understanding of the rules. Its also a really helpful time as both an Experienced player and a Henchman. New Players come to the game with fresh eyes and specifically without the baggage that those of us who have played for more than 18 months have. They question things and get confused about parts of the fairly complicated rules in Malifaux. Now, I want to remind everyone that Malifaux can be a complex game as you play more. It falls very solidly into the "Easy to Learn, Hard to Master" style of game, even when compared to other Miniature War Games. The basics are very straight forward and you can play a good dozen or so games with just understanding the basics. Then you start to add the not-so-basic rules in and look at the complexities that come with creating combo's. Inevitably, a Malifaux player eventually builds up a strong set of combos, complexities, and tricks which add to the basics, then they run into a question that stumps them. I have found that some of these questions tend to be around mechanics in the game which seem to be very simple, but can have added complexity when fully explored. To be fair, my experience is this almost always comes after hearing a newer player say something along the lines of:

"That seems a bit unfair, is there some way I can use the rules to make that combo stop working that way?"

I often want to remind those players that Malifaux is a game of complex combo's. Sometimes those combo's seem unfair but as you spend time analyzing them they become more of a challenge or puzzle. I firmly believe there is nothing in the game of Malifaux that cannot be mitigated or overcome by something else in the game.

With that said, a lengthy discussion erupted recently about how the Ranged Strike Sequence works when shooting into a melee. Specifically, our local player could not wrap his head around the fact that the randomization of the shot onto a model in melee but outside LOS did not invalidate the shot. With that said, I did my homework and pulled out the whole sequence from the rules manual. I figured it might be helpful to share this with other players who read the blog, especially those who are newer player.


With that said, its off to the Rules Manual!!!

Strike Sequence (pg 42 in book)
1. Declare Target, then Check Range
2. Strike Duel
    a. Flip starting attack and defense totals
    b. Change Starting Totals or Pass
    c. Determine Final Duel Totals
    d. Declare Triggers
    e. Determine Success
    f. Apply Duel Results

RM Description: (pg 42)
A model must be within the attacker's LOS to be declared the target of a Strike. If there are no Targets within the attacker's LOS, the Strike fails. A model cannot target itself with a strike.

Once the target in LOS has been declared the target of the Strike, ensure that the target is in range by measuring the distance between the two models. All range measurements in Malifaux are made from the attacking model's base edge to the closest point on the target mode's base edge. If the distance is shorter than or equal to the attack's Rg, the target is in range; proceed to 2. Strike Duel below. Otherwise, the target is out of range, is not a legal target, and the Strike fails.
So, if we break that down and take it step by step, it goes as follows:

Step 1 - Declare Target, Then check Range.

For this step we can go to page 14, under the heading Declaring a Target. When I get there is says:
When an effect requires a target, the following should be determined in order:
1. First, check that the item in question is in the targeting model's LOS.
2. Then, check for any special situations that may allow or precent the item to be targeted.
3. Finally, check for talents/Spells that may allow/prevent targeting.

Lastly, we have a special situation for targeting called Firing into Melee on page 44. Its says:
Models may make ranged Strikes and CAst ranged attack spells into melee combat. Because the combatants in a melee are not standing still during the first, blah blah blah

The attacker declares the target of the ranged attack, and then flips one Fate card for the target and each model in the target's melee range as well as any enemy models engaged with the target, regardless of LOS to those models. Flip two fate card for models with a ht of 3 or more. The model with the lowest value card becomes the new target of the attack. In the case of models tied for the lowest card, the attacking model may choose its target from those tied models.
So the "Firing into Melee" sequence would be:
1. Identify the original target is in Melee combat
2. flip a fate card for each model in the melee range and any enemy models engaged with the target
3. Target changes to model identified by the lowest fate card
4. continue on

So, now we have a larger sequence that goes as such:
1. Declare Target, then Check Range
    1a. Declare Target
        1a1. First, check that the item in question is in the targeting model's LOS.
        1a2. Then, check for any special situations that may allow or prevent the item to be targeted.
            1a2a. Identify the original target is in Melee combat
            1a2b. flip a fate card for each model in the melee range and any enemy models engaged with the target
            1a2c. Target changes to model identified by the lowest fate card
            1a2d. continue on
        1a3. Finally, check for talents/Spells that may allow/prevent targeting.
    1b. Check Range
2. Strike Duel
    a. Flip starting attack and defense totals
    b. Change Starting Totals or Pass
    c. Determine Final Duel Totals
    d. Declare Triggers
    e. Determine Success
    f. Apply Duel Results


Ok, lets see if we can put this whole deal into practice, and toss in a couple special rules. Everyone seems to like picking on Hamelin the Plagued since the UK Masters, so lets keep with that. Hamelin has the following special rule:

Hamelin's Rule:
Bully: This model cannot be targeted by Ht 1 or Insignificant models.


So, a Fire Gamin (ht 1) shooting a tot in melee with Hamelin would go like this:
1. I want to shoot the Tot
    1a. I still wanna shoot the Tot
        1a1. I have LOS to the Tot
        1a2. Damn, the Tots in Melee
            1a2a. Yup, he's in melee with Hamelin
            1a2b. Flip Flip damn, I flipped lowest for Hamelin
            1a2c. Now I'm shooting Hamelin
            1a2d. Ok, lets shoot Hamelin
        1a3. Damn, Hamlin's a bully and I can't shoot him
    1b. Screw this, it doesn't matter any more... I just blew an AP
   
 And that it. I know its a lot to digest but this really ends up happening very quickly.
   

Friday, May 28, 2010

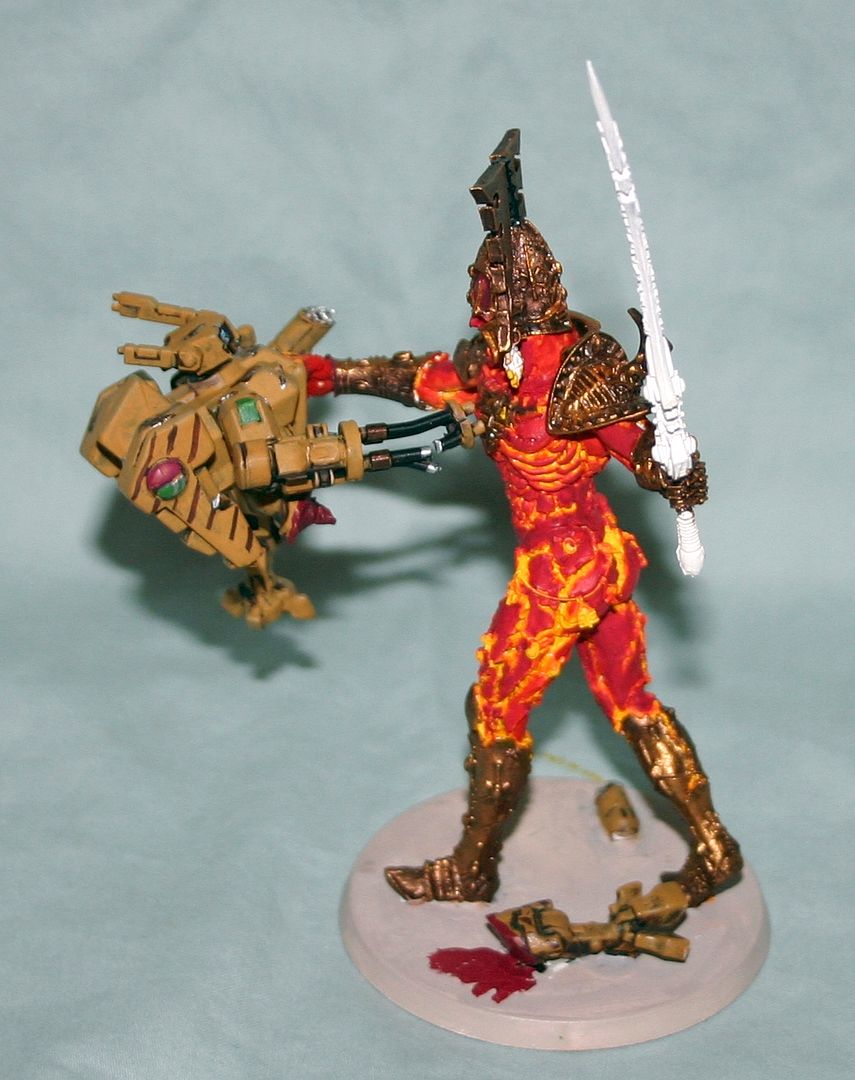
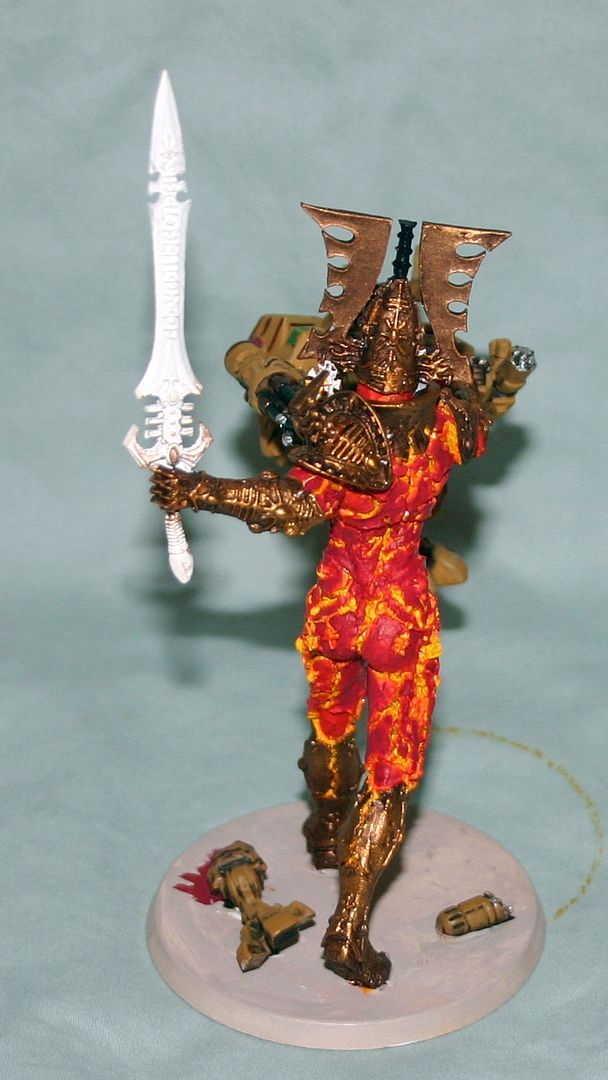
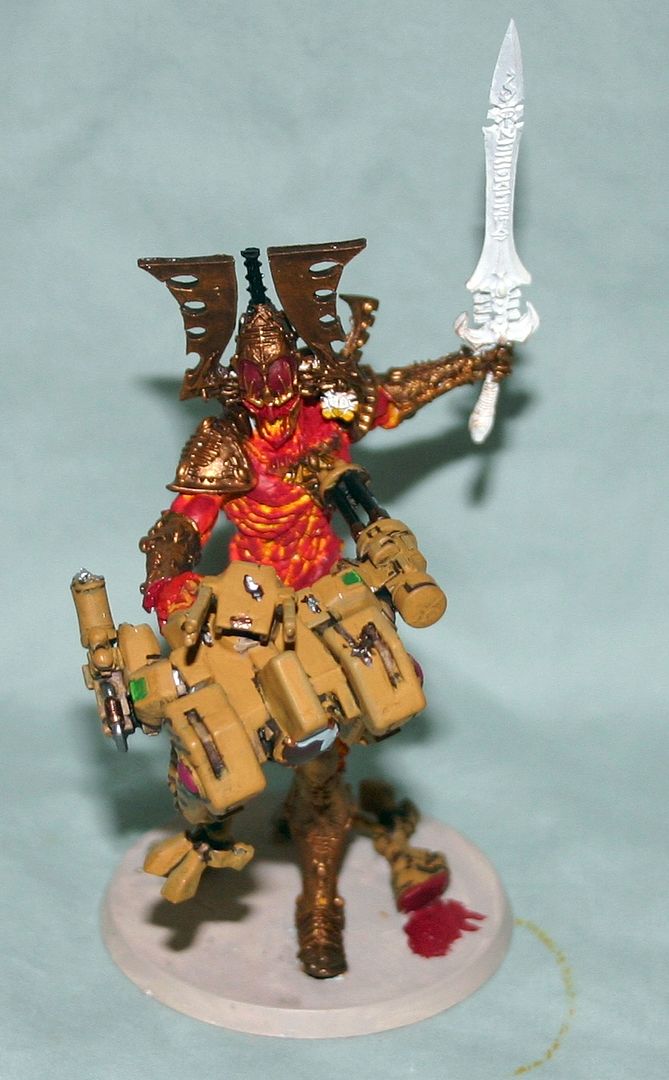
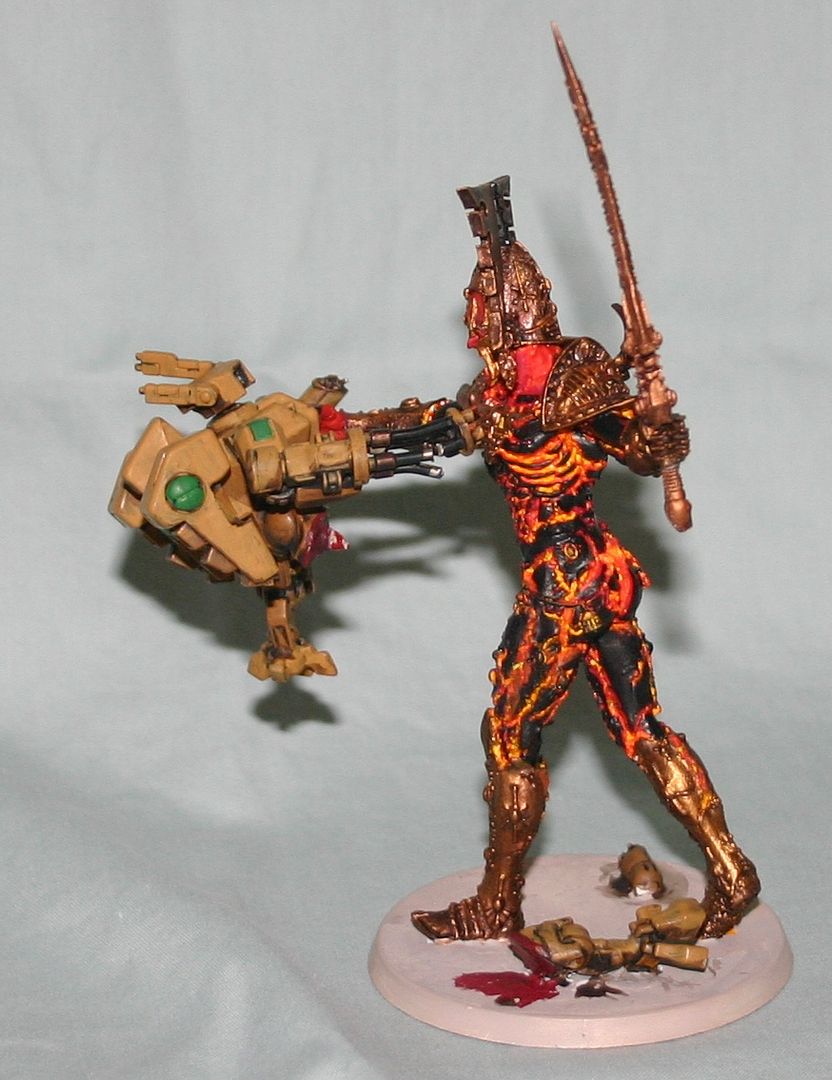
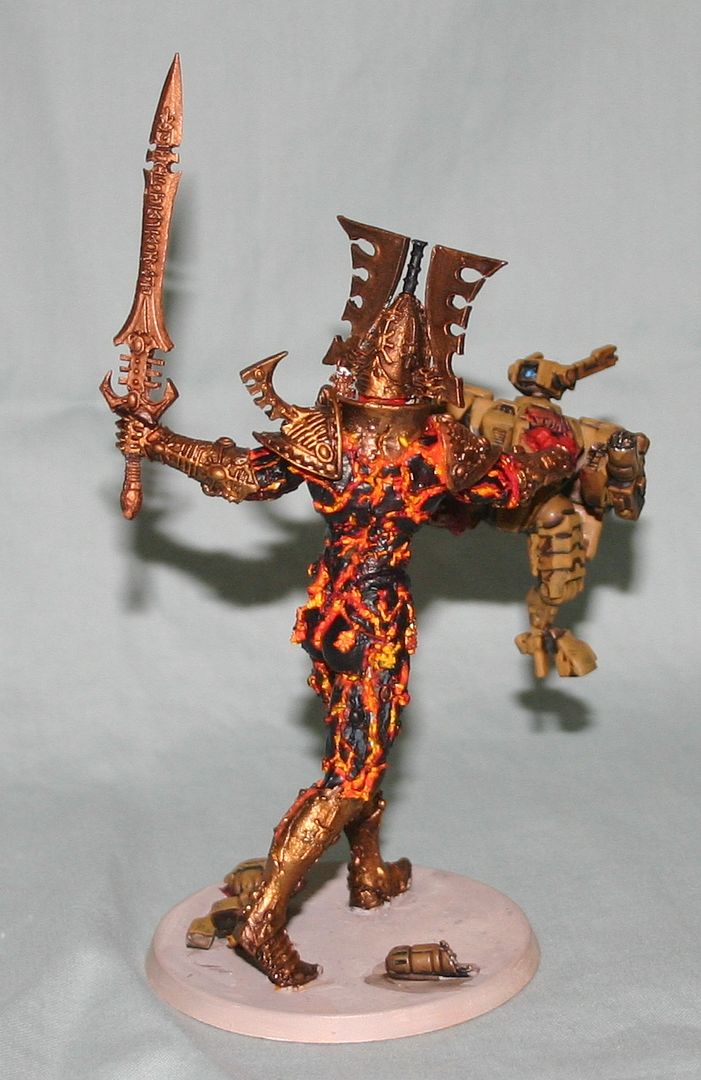
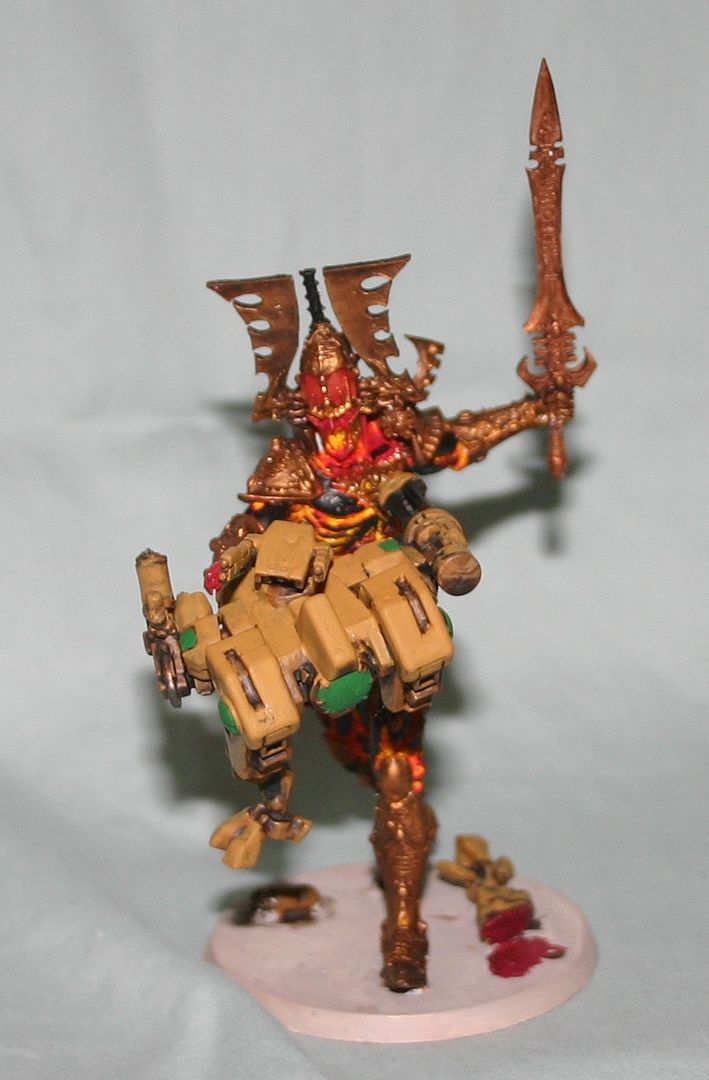
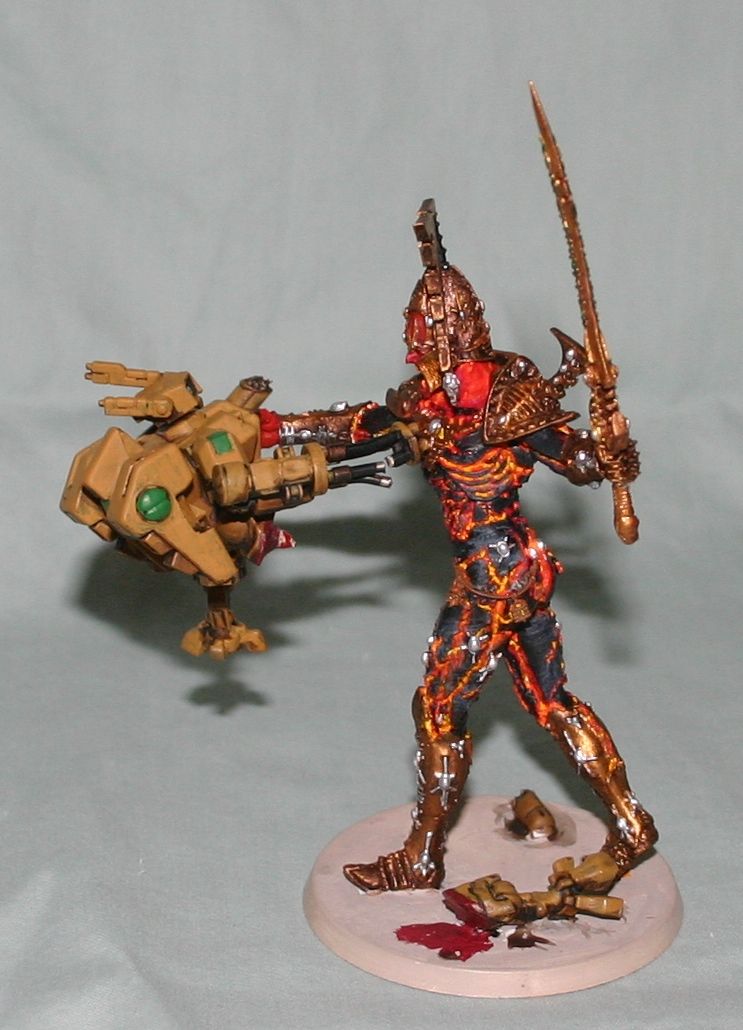
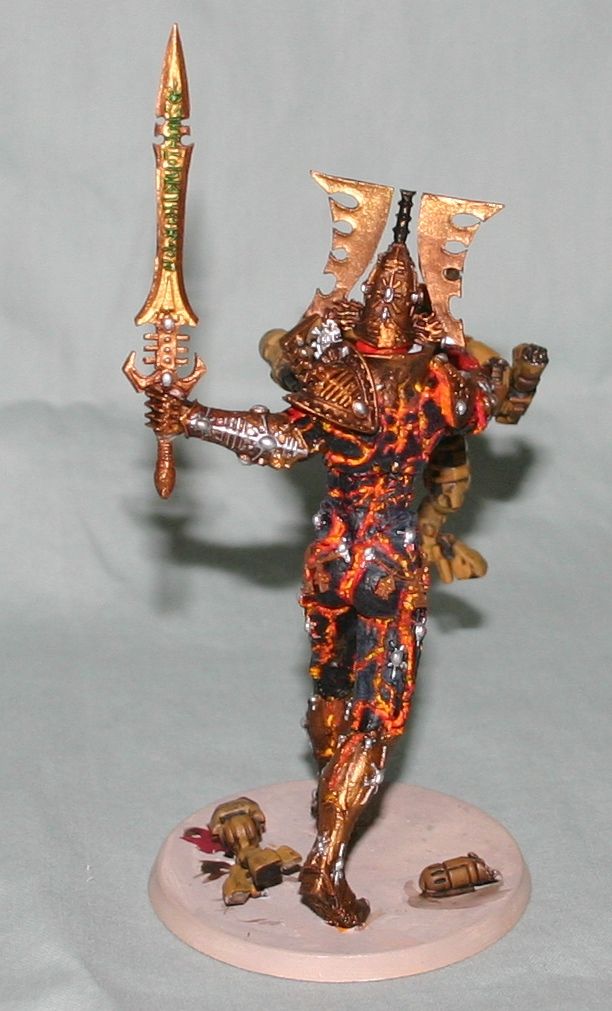
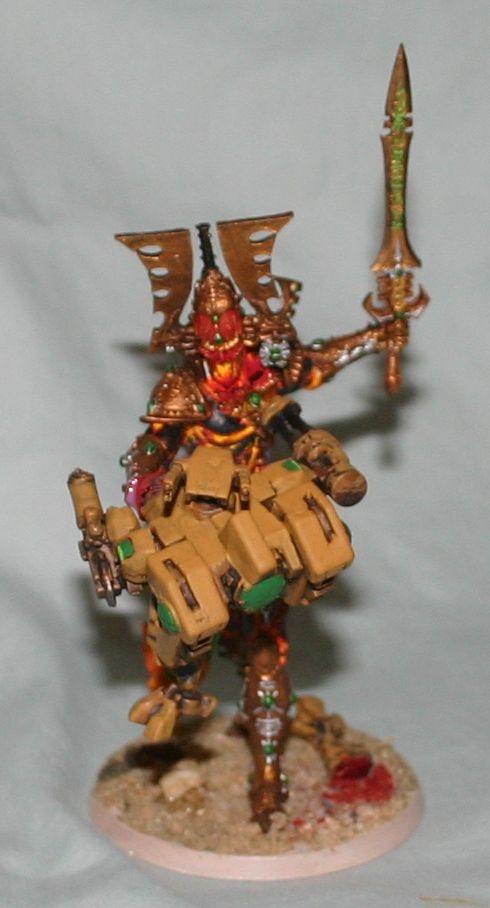
Forgeworld Avatar of Khaine - Painting Tutorial

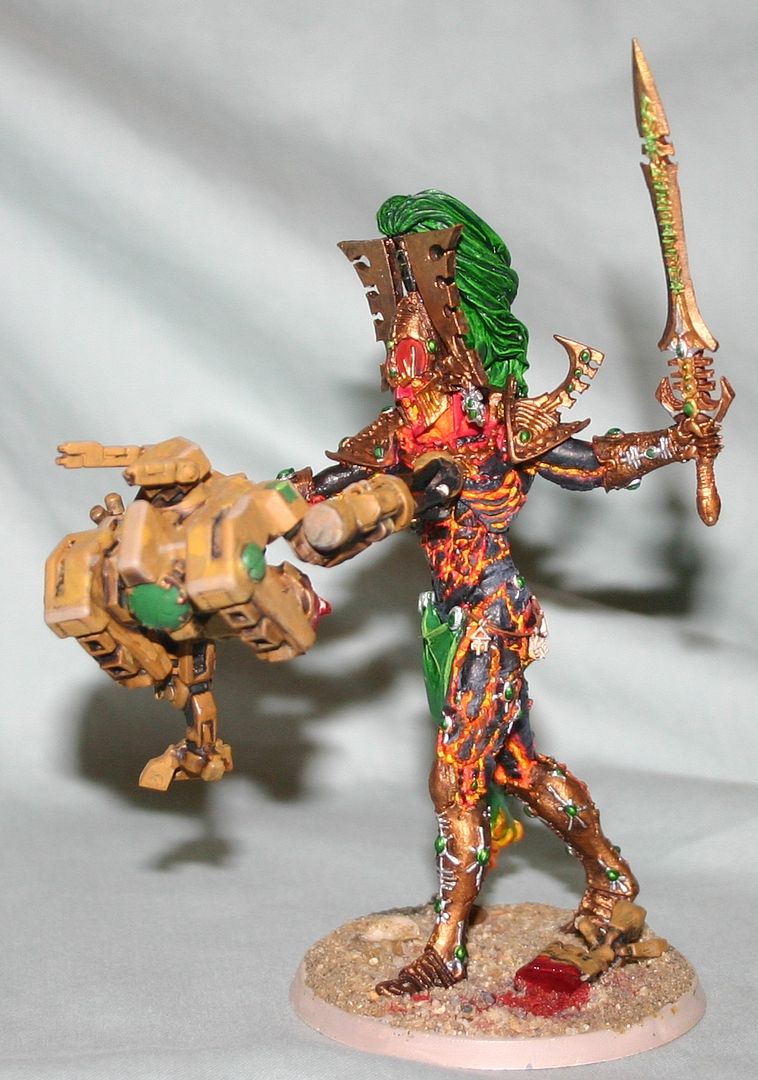
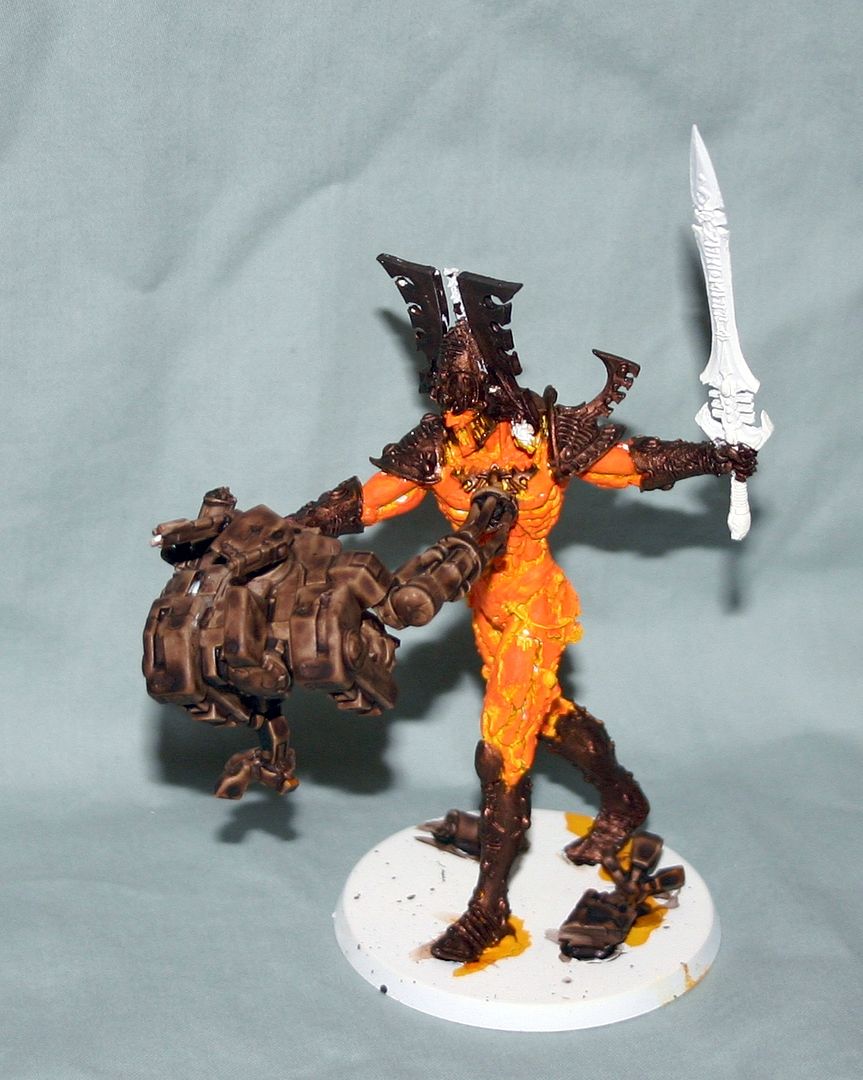
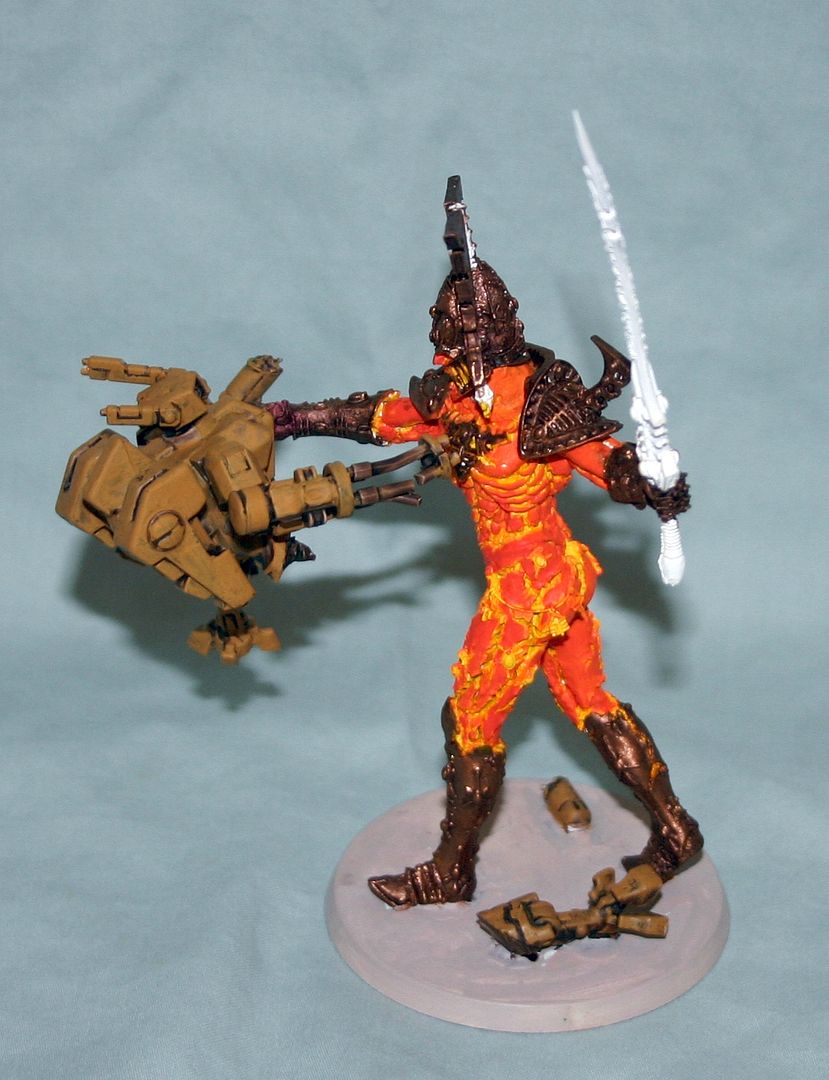
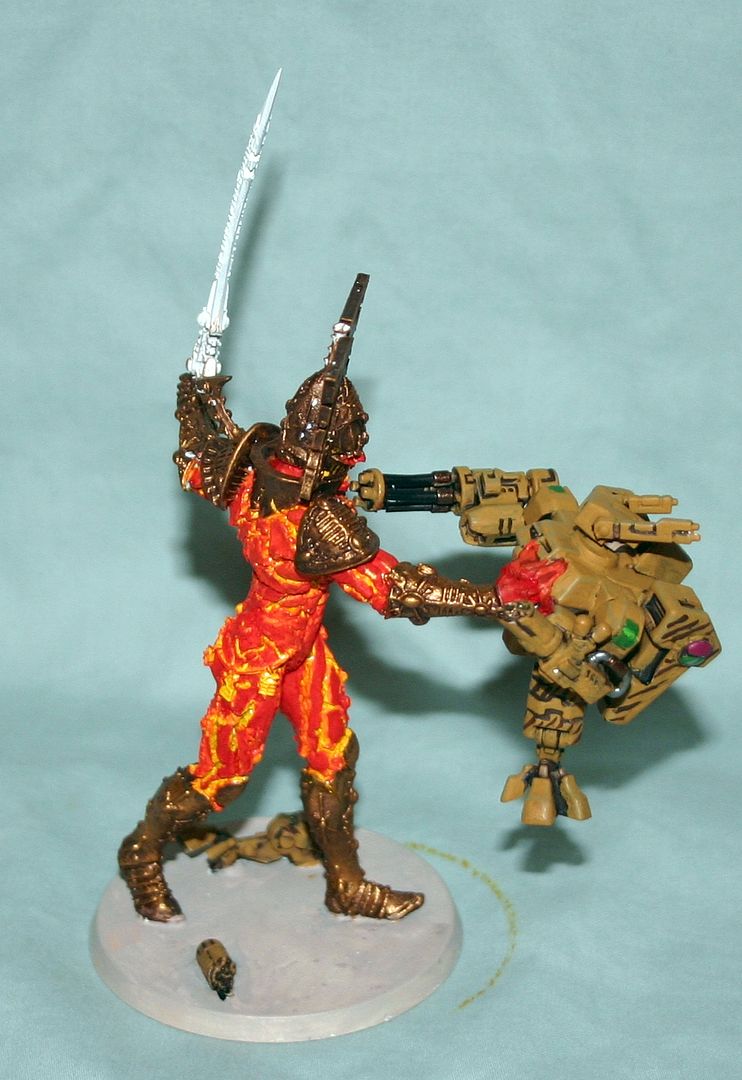
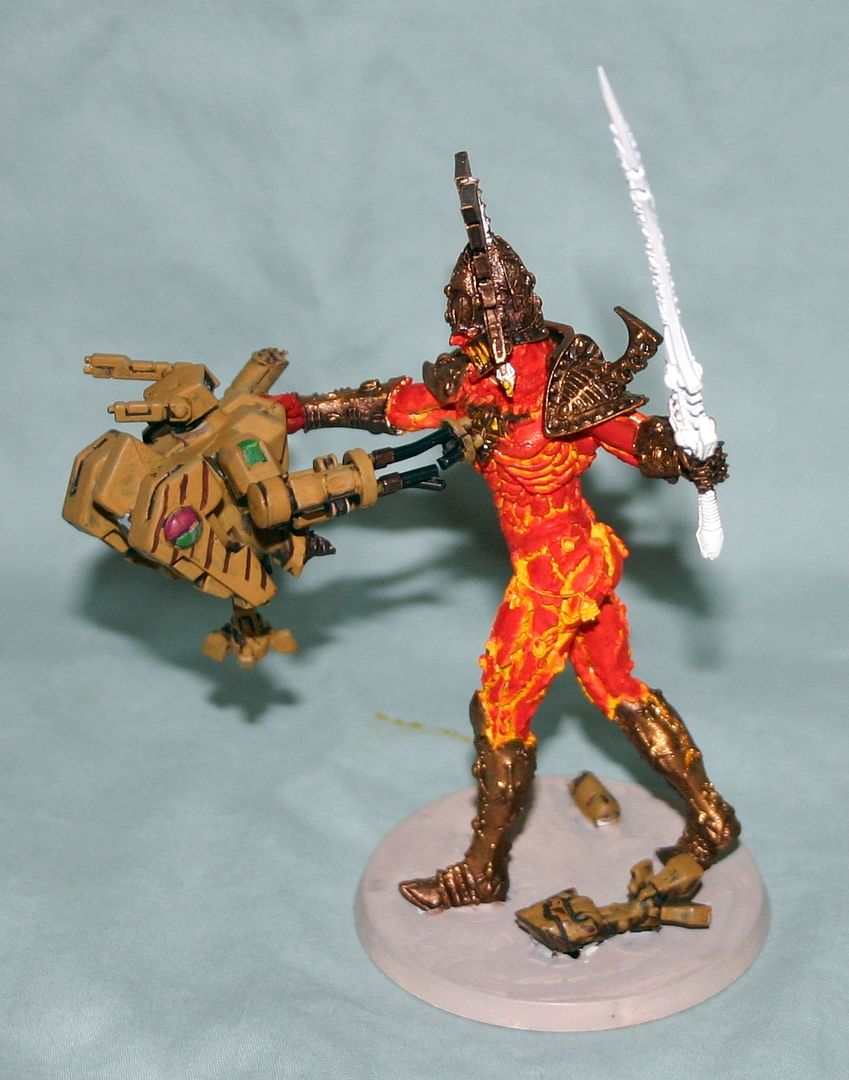
Welcome back to our regularly scheduled posts. As promised, here is the follow-up to the recent Forgeworld Avatar of Khaine - Assembly Tutorial article. When starting this project I decided that I would work through in stages, taking pictures in between each stage. This would eventually be turned into the tutorial you have and are now reading. Many online tutorials I have seen give very brief glimpses of intermediate stages and explanations of colors used to achieve the end result. This is something that has frustrated me, as I am never sure if my intermediate stages are on track. I hope this tutorial helps with that process for the incredible Forge World model. Let me state, however, that a better result can be achieved by blending each of the intermediate color steps instead of following the step-by-step process I used to provide a gradient of color. At the end of the day, I am happy with the results I achieved, and the model will fit nicely into my collection. With only a quick stop to look at our final goal, lets get started:


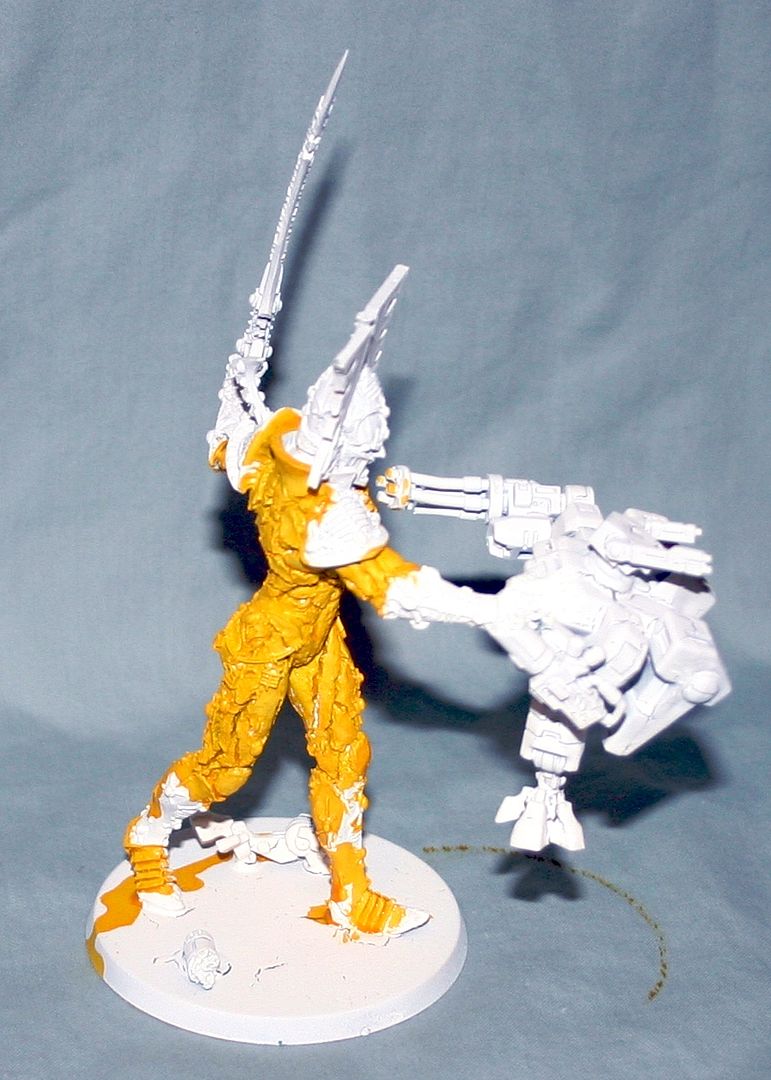
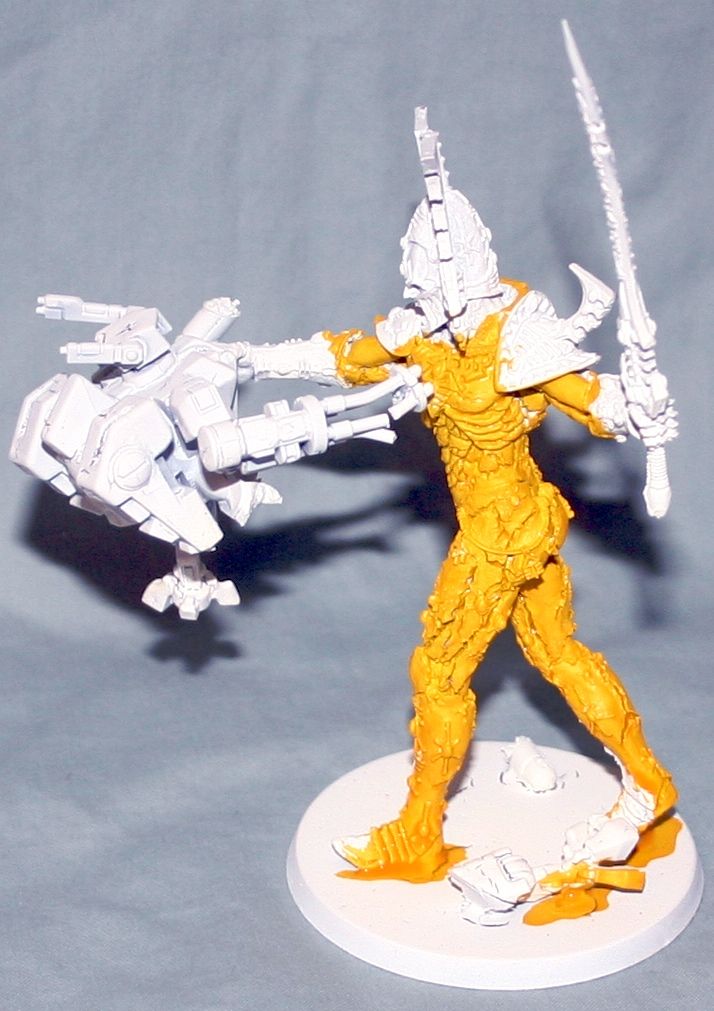
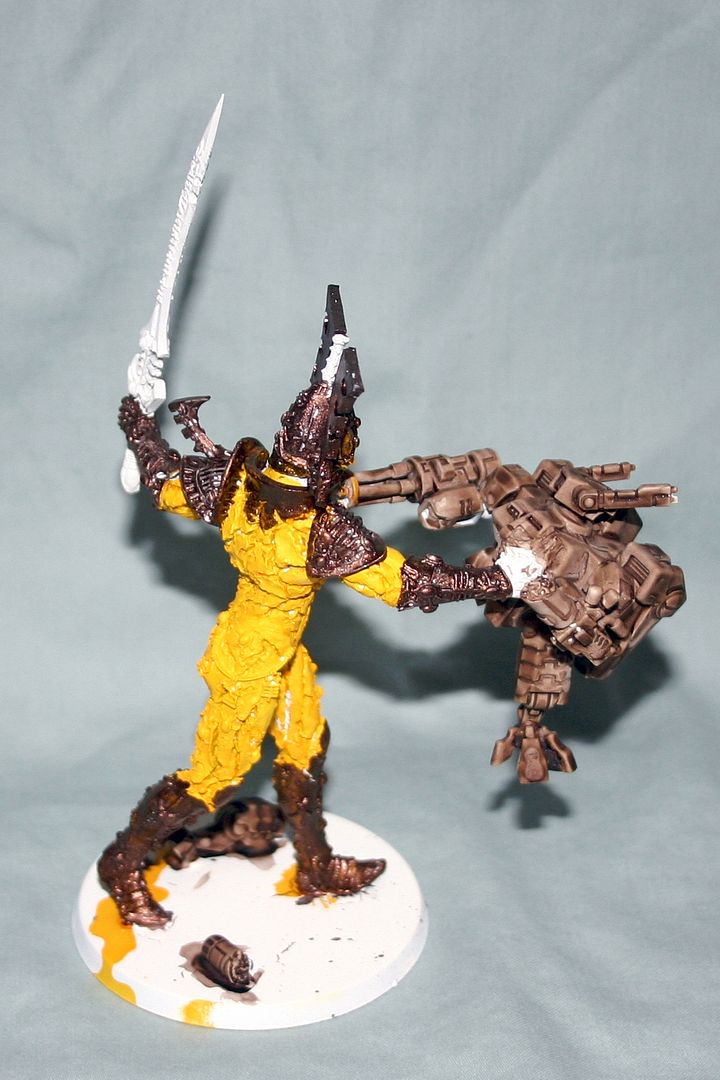
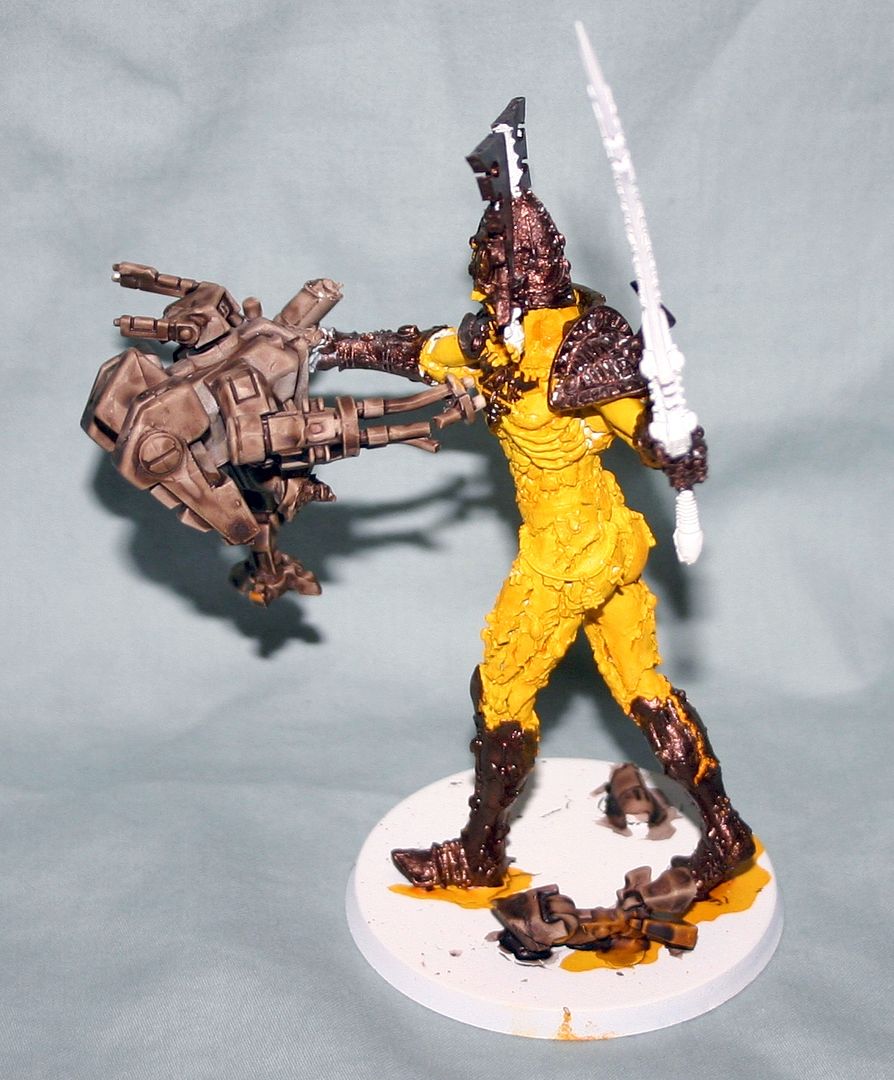
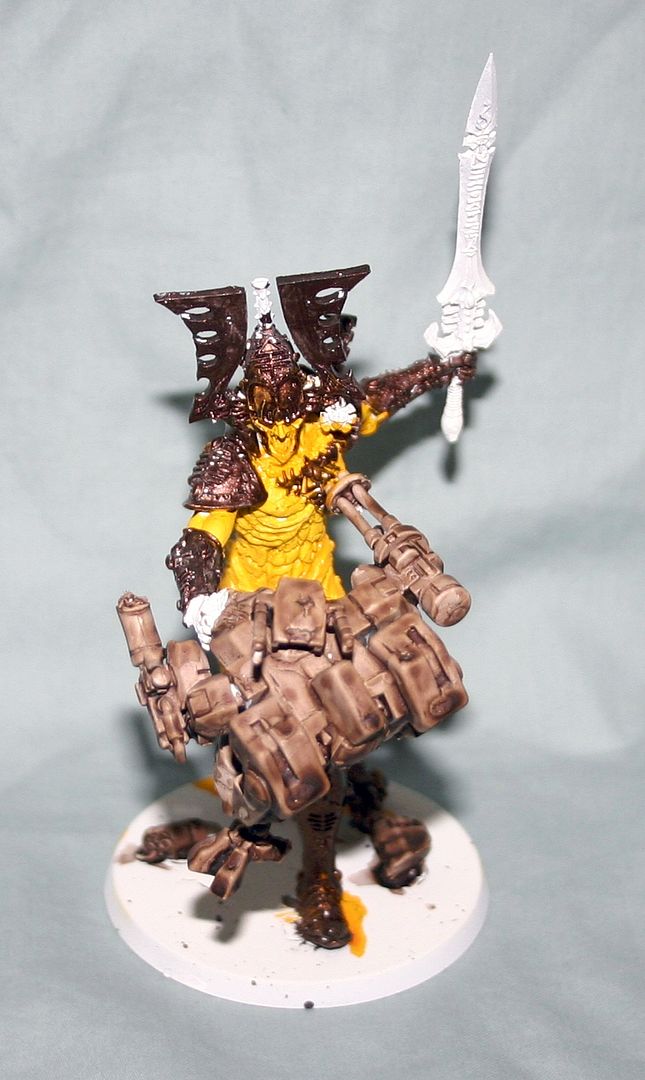
Now lets get going with the initial steps. I started the project by priming the entire model with white primer. This allows for the bright yellow to push through from underneath and makes it easier to work up to the dark colors. After the primer dried I started with a heavy coat of Yellow Ink from the old GW paint set. I still have pots of ink around and this provides a vibrant yellow to start with. For those without access to the old inks, this affect should be achievable through 2-3 coats of heavily thinned Golden Yellow from the GW paint range. Pay special attention to get the yellow into each of the cracks and crevasse, as this is where the yellow will live in the final model. Note in the pictures that I have not touched many of the metal pieces outside of the feet and legs.

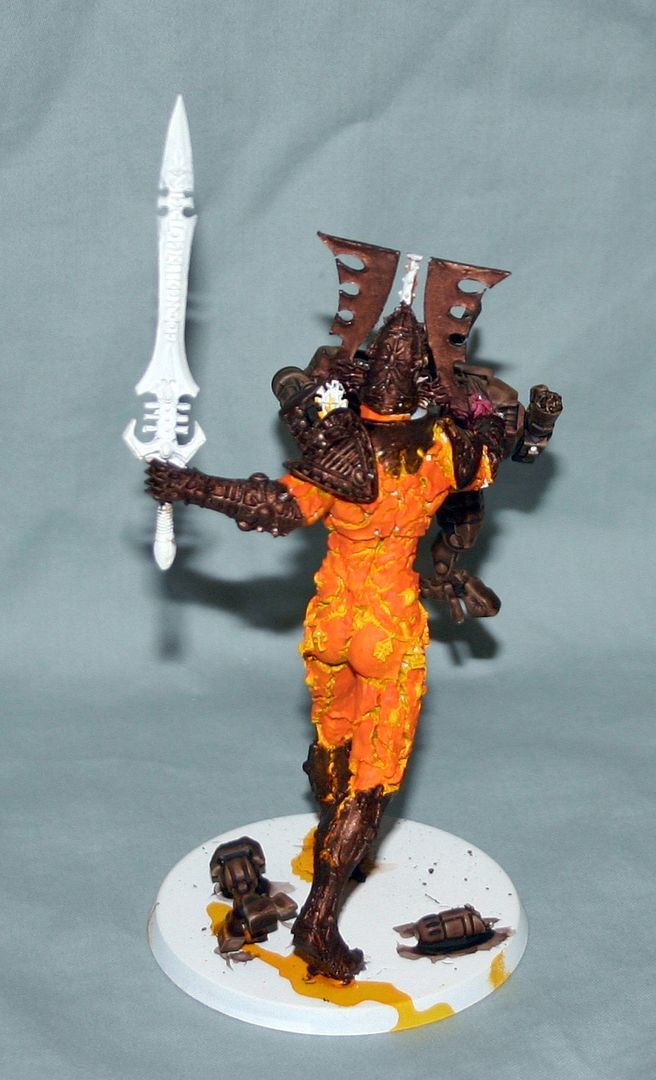
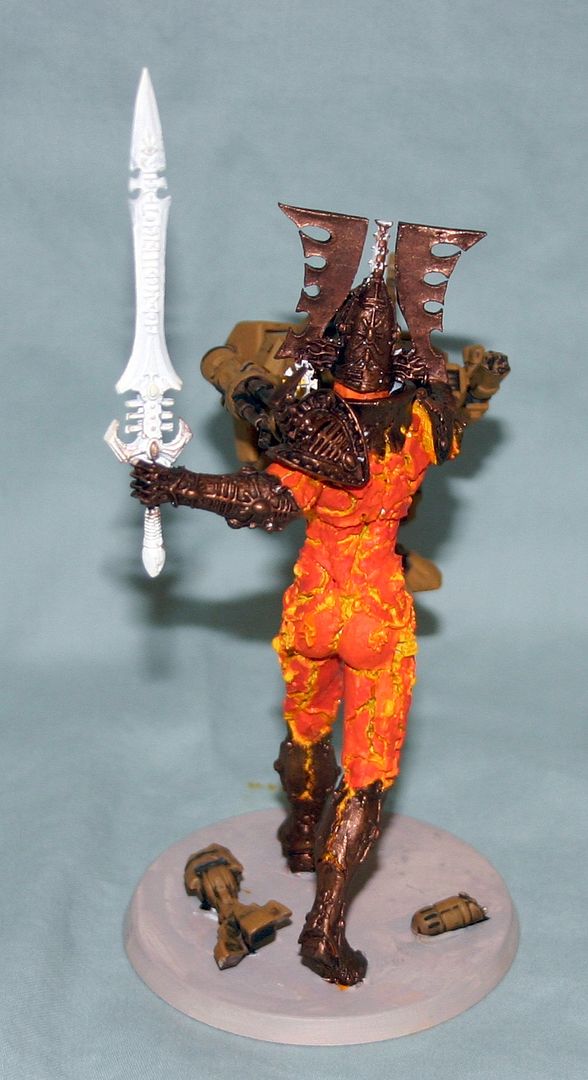
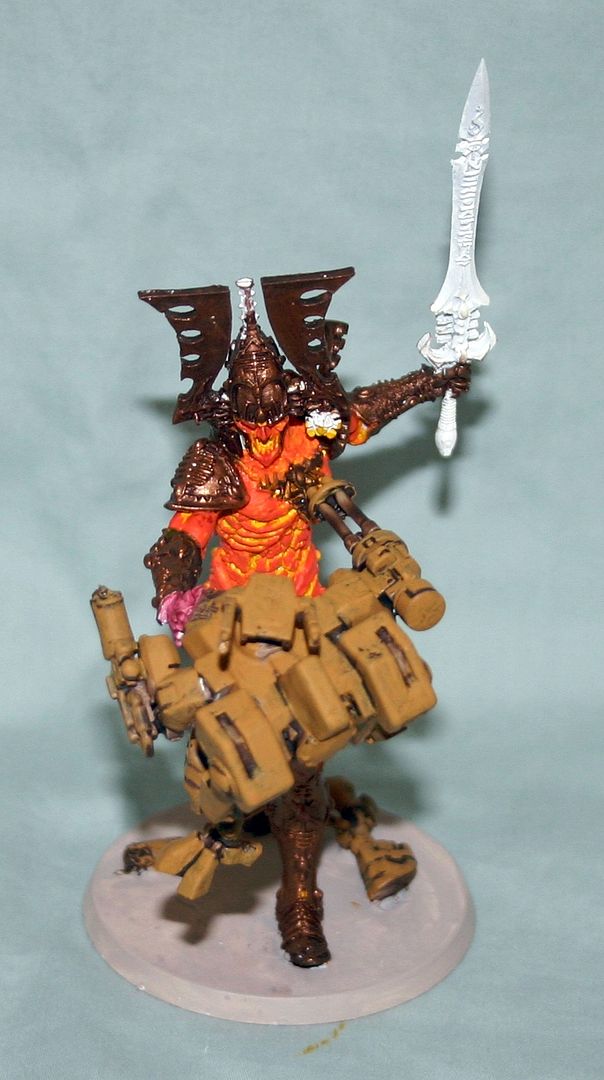
Once the yellow has dried we have what I referred to as our "Pissed on" avatar to start working our pallet up from. Next we need to put down a layer of color on the metal parts, along with the Tau Crisis suit. For the initial color on the metal, I chose Tin Bitz, as these will eventually be brought up to a bronze finish. Tin Bitz is a great dark base color for this. I make a choice here to leave the "stem" on the helmet, the Sword, and the "Bloody Hand" thrust into the crisis suit white, as these will eventually take on different colors. For the Crisis suit, I apply a heavy wash of Devlan mud. This will begin the process to darken the model. Make sure you do not forget the Tau pieces on the base.


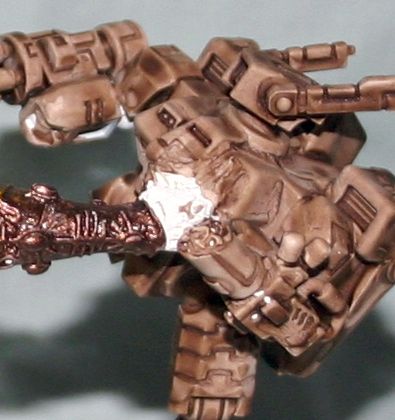
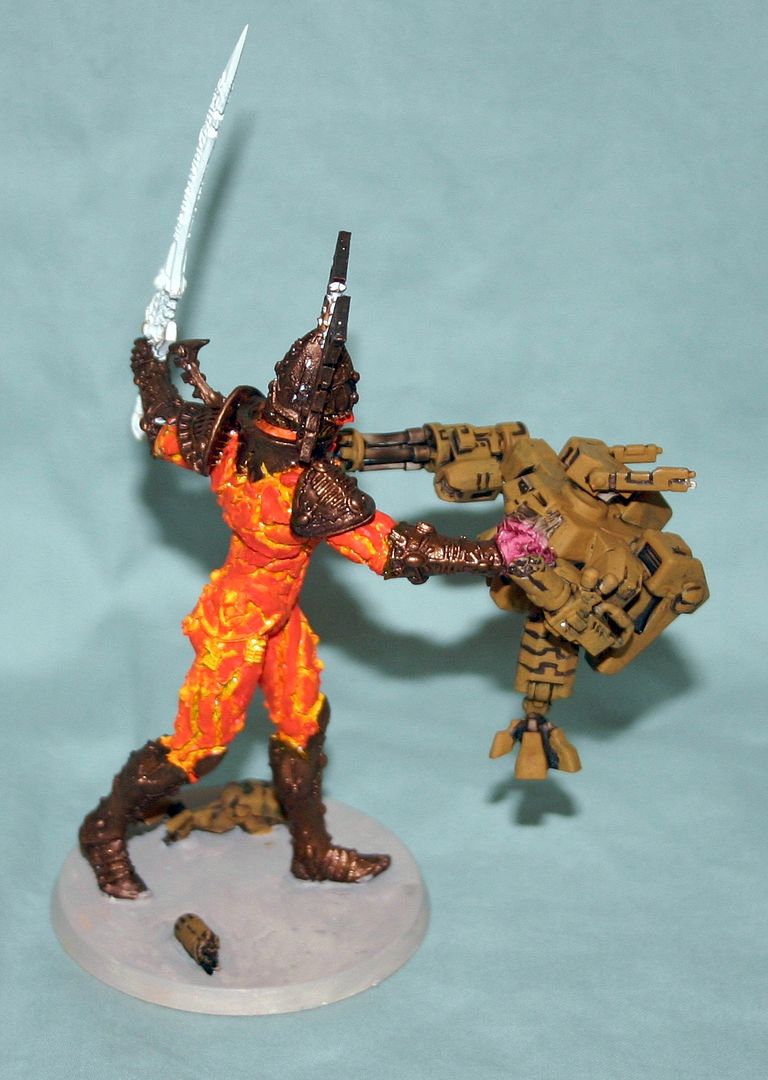
And here is a close-up of the Tau Crisis suit post wash. You can see the Avatar hand is still white, waiting for later stages where it will become red for the blood. You can also see how the Devlen Mud has settled onto the model providing highlights and shadows.

The next step starts to work up the color spectrum on the Avatar. On the Yellow sections I applied Citidel paint color Fiery Orange, leaving the yellow showing through in the depths of the cracks and especially within the mouth. Over the metal sections I apply a wash of Gryphon Sepia, and I apply a second heavy Devlen Mud wash on the crisis suit. This will darken the suit dramatically, creating a "dirty" base and providing very deep shadows. The last step was to use a Baal Red wash on the "Bloody Hand".


Now we start working up the scale of orange by applying Blazing Orange over the body. It is key to apply this next level of orange carefully, leaving an edge of the lighter orange to create a transition from the yellow. For the metal at this stage I started dry-brushing Dwarf Bronze carefully on all the metal areas. The effect will not be dramatic, but it will begin to create a shade gradient to brighten the metals. The most dramatic change at this stage will be the application of Tausept Ochre to the crisis suit. I do this covering the majority of the model, but still leaving the dark color of the wash in the crevasse and recesses for shading.
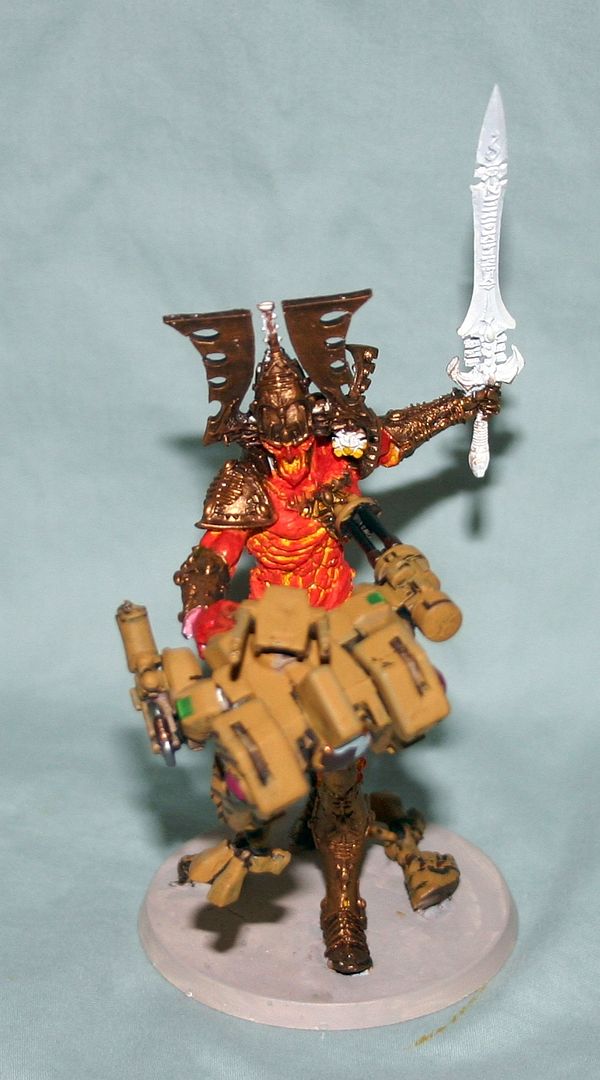


Its time to let our Avatar emerge from his "Prison Jumpsuit Orange" stage and start picking up that bloody and violent red he is known for. We will start our red stages with the next step up the Citidel color line by applying Blood Red to the body. This is done in the same manner as the previous colors, painting the large spaces but leaving a "trim" of previous oranges around the model. Following this stage you should begin to notice the "inner fiery glow" of the model with the transition from yellow to red. For the crisis suit, I begin to pick out details and tried my hand at some designs on the suit. As you will see on the final model, the designs did not survive through to the end, but are cleaned up at a later stage. The fine details on the guns and suit markings do push through to the end. For the metal parts of the armor, I apply a very fine dry-brush of Shining Gold to bring up the metal color.


Below is a close look at the "bloody hand" and its progresss. Blood red is still used here to solidify the color of the hand and I begin to pick out the melted portions of the suit around the hand.
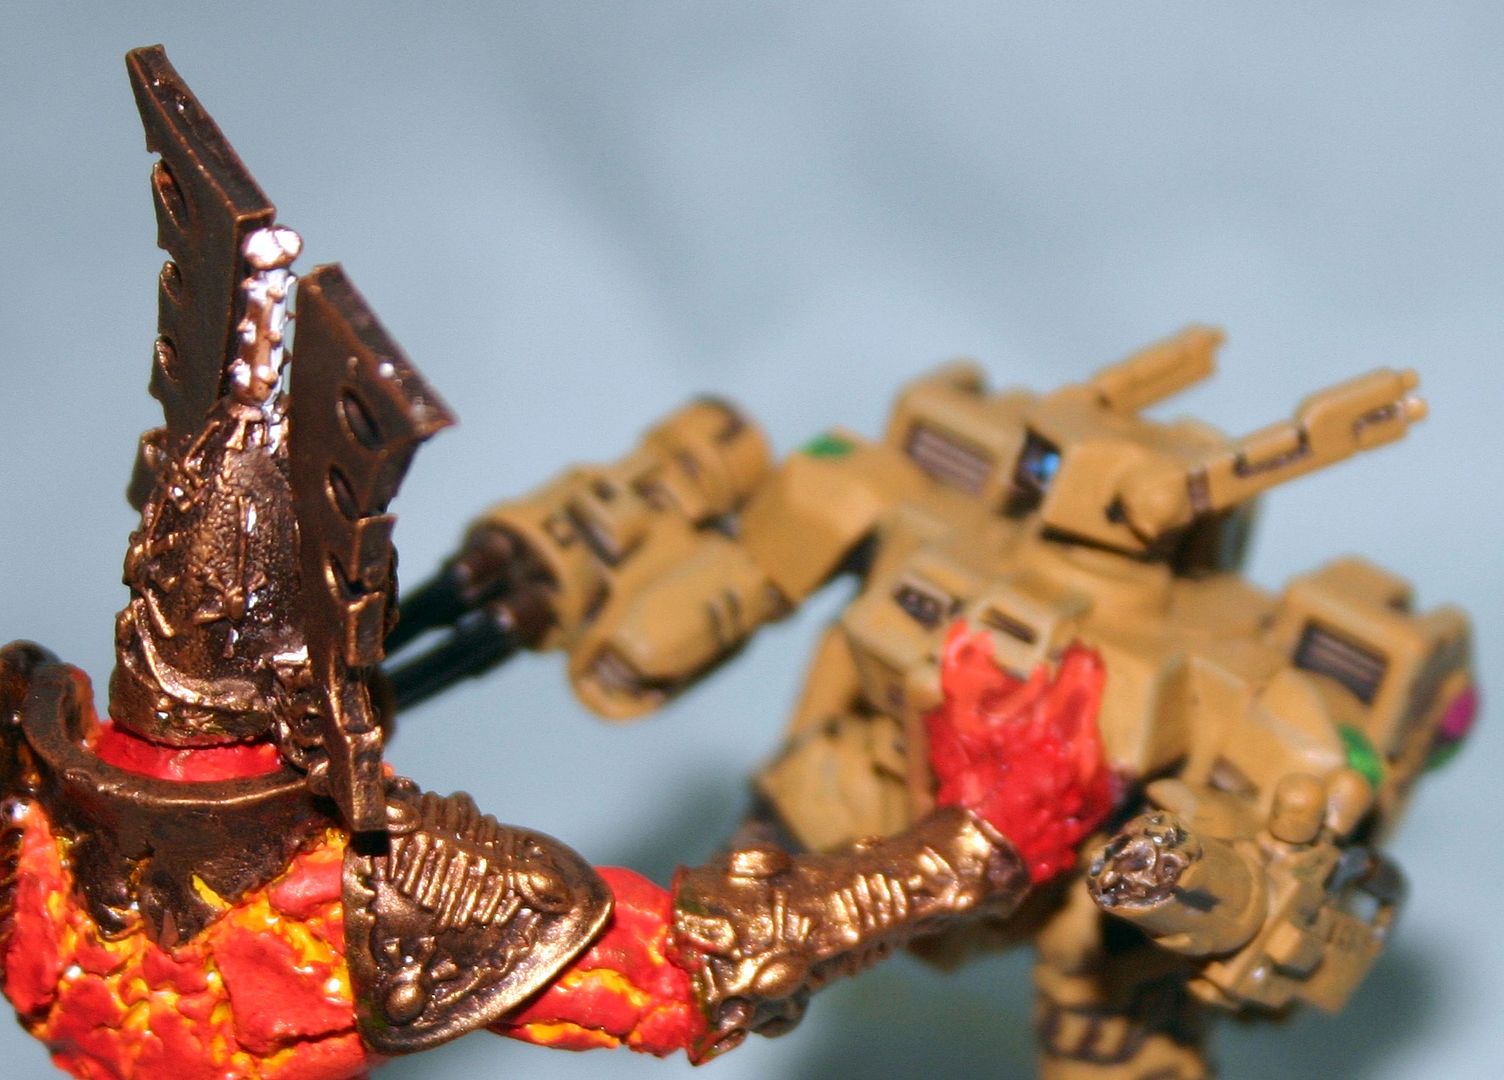
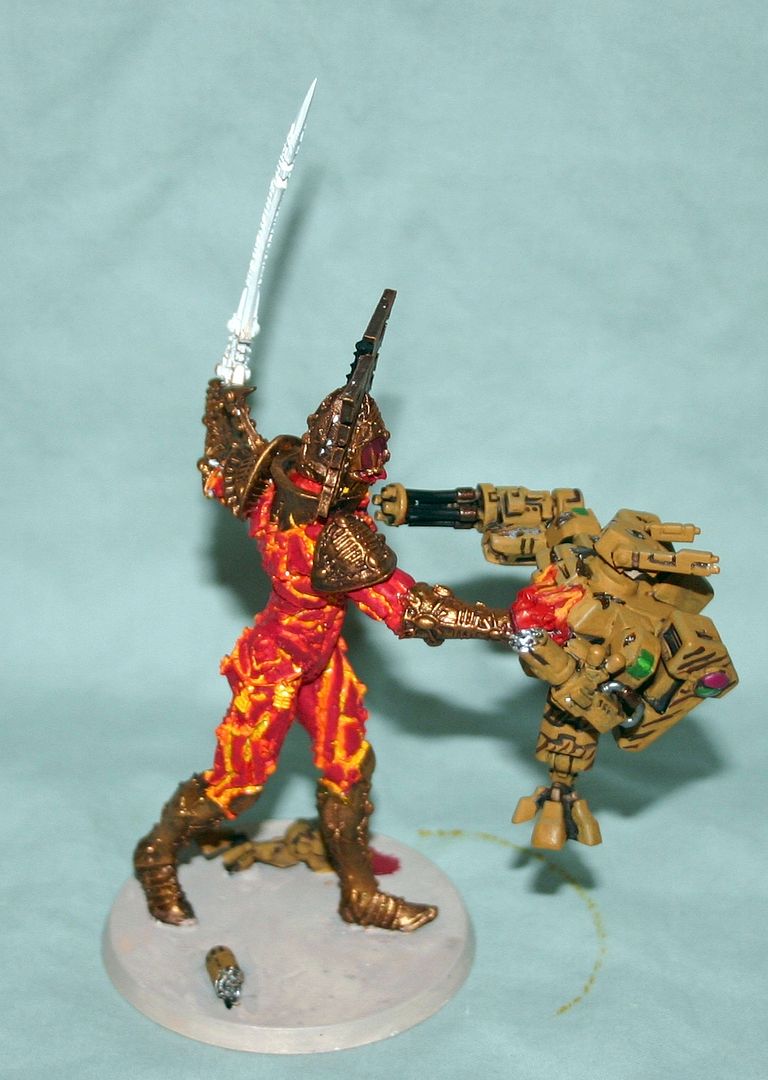

Our red phase is coming to a conclusion as we apply the next and final red gradient to the model. For this stage, we go through and use Red Gore to bring the color of the body up. Red gore is also used on the hand with a more drastic transition from orange to red. The metal is dry-brushed (liberal dry brush) with Burnished gold. I find that with my burnished gold, it is useful to do 2 dry-brush steps to get the right level of "brightness" for my eye. I also apply some additional light highlights of watered down Tausept Ochre to smooth out the painting on the flat areas of the crisis suit. Based on your tastes, if you wish to leave your Avatar with red shades this would be where you would stop painting on the body and move to completing the neglected areas of the model. Toward that end, I also apply chaos black to the "helmet stem" at this point, touch up the "leg bone" of the crisis suit with some red gore. For the "Bloody hand" I apply a layer of red ink to the hand itself, and then mark out on the base where the blood will be leaking from the leg.


This next stage made me the most nervous of all the stages painting this model. It also took the longest to get used to, as I had been working on gradient colors to this point. At this stage I applied the most drastic color jump, painting Chaos Black on all the plates. I still leave the gradient colors on the edges but there is very little transition to black. Taking this step will likely show places where you will need to go back into the crevasse of the model and apply some blazing orange where the yellow is a bit to bright. Do not cover up all the yellow, but its helpful to "dim it down" some. This is also the stage where we go address those areas we have been neglecting, such as the sword and jewelry bits around the body. I start on the sword with Dwarf Bronze, as my intention is to have the sword be a "level" brighter than the rest of the body. I also touch-up the bone on the crisis suit leg, along with going over the entire crisis suit to remove the designs I placed there. Using thinned down Tausept Ochre works well, just hitting the "top" areas of the model and leaving the darker shadows underneath. I also clean up the crisis suit markings with green, as green will be the accent color for the model.


Now the progress is speeding up and we are in the home stretch. Other than little areas of touch-up, we have nothing really to do to the body of the model at this stage. Go through with Mithril Silver and line out all the runes and soul-stones on the model. The silver on the soul-stones will provide a good base for the green we will apply to the stones in our final steps. Apply a Gryphon Sepia wash to the sword, then once that dries apply a liberal dry-brush (2 layers) of shining gold on the sword. Address the edges of the crisis suit and then let the paint dry, stepping back and preparing for your final step. This is also an excellent time to begin applying paint to the tabard and "hair" we have ignored until now. Once the sword has dried, go and apply the final double drybrush of Burnished Gold, then outline the runes. For my runes on the sword I used 3 green layers (Dark Angels Green, Snot Green, Scorpion Green). This is the same I use for highlighting my tabard and my gems.


The last steps is final assembly of the model. I recommend using a pin-vice and placing a pin in the middle of the helmet stem to provide an anchor for the hair flowing from the top of the helmet. I used tausept ochre followed by bleached bone and then skull white to paint the hanging runes around the avatars waist and the green colors listed above to paint my gems. I also made the choice to not seal my model yet, as I will wait 2 or 3 weeks and go back to touch-up anything I missed.


I hope this tutorial is helpful to anyone in the community who takes on a similar project. I know I have already received some great compliments for my model, which is nice to hear after putting the work in on it. While it is certainly not golden daemon quality, it delivers a fantastic table-top quality model, and works as a great "Center piece" for a table-top quality army such as mine.