Showing posts with label union. Show all posts

Monday, October 10, 2016

Minx the Maligned (Guild Ball)

The following article is a mix of opinion and tactics specifically centered on the Union player Minx. I was torn on which label I wanted to apply and decided it's best to go with both and leave it at that. It's not uncommon that outside my local guild ball group I hear disparaging comments about how Minx is not very useful. I specify outside my own play group as my local area has come to respect her through multiple games against my own teams where she is included. I particularly like her in my Captain Rage Union list, there she plays a key role "turning on" the team. I've also gotten good use from her in my Hunters teams, although she does not play as strong a role there as in Union. She's been available since the release of the Kickstarter but is not regularly used. I suspect that's going to change as more time passes and players realise the fantastic tech she brings to team. I'm going to do my part ahead of the curve and help explain where and how she plays best.

Minx - Looking at the Card

I think it's best to start out looking at her card and digging into the basic mechanics of what she does. Looking at the front of her card we are immediately struck my her exceptional movement stat of 7/9. Minx can swiftly move across the board and appears to threaten 10 inches for her attacks. We see a fairly basic TAC, Kick, and the "average" defence on her. Then we reach the second eye catching point on her stat line, which is the 2/2 influence. As a player when you see an influence stat that is equal such as 2/2, this should trigger a question and cause you to scan the card to see if there's a reason for the odd stat. In this case, we find on the back of her card that Minx is furious, charging for free. Overall this makes her a very efficient model, bringing 2 influence and able to charge a target 10 inches away for free without using that influence.

Moving to Minx's playbook and character plays we find she has evenly spread momentous damage on 1, 3, and 5 successes. This points toward her being a damage dealer with nicely placed momentous damage generation. It also means that on a charge, should she get enough results to wrap, she can easily take advantage of damage buffs such as commanding aura and tooled up. On her playbook, we find two interesting character plays, both of which can be triggered from her playbook non-momentously. Screeching Banshee applies a movement penalty to the target model along with delivering 2 points of damage. Marked Target is more interesting, being able to be triggered as well as paid for with 1 influence. This is an 8 inch ranged play which applies a movement bonus for models charging the target the play was applied to. This threat extender can be incredibly helpful to "known threat range" models who want to charge into combat.

Swapping over to the back of her card we catch sight of a couple more interesting tidbits. The first, Furious, I mentioned above and is part of the key nature for Minx in a team. Furious lets her charge a target without influence, getting at least one attack. The second eye-catching trait is Damaged Target. This ability increases Minx's charge range by 2 inches when she is targeting a damaged model for her charge. This increases her overall threat range to a very impressive 12 inches. The third trait is one that's often forgotten but can be useful in niche situations. Follow-Up allows Minx to utilize her 7-inch jog to stay engaged with a model that moves out of her melee range.

Reviewing all of the information and stats for Minx we find the ideal situation is one where she can charge someone 12 inches away, hit them for 3 - 4 momentous damage then bounce away using the double dodge at the top of her playbook. This makes her a finisher model, supporting the rest of the team with both 2 influence to be assigned elsewhere and the final 2 - 4 points of damage for a take out.  If looked at in those terms she is just ok, not an amazing model at all.

One wonders why I would be writing this if that were all?

The Union team led by Captain Rage

Minx can be played with multiple teams but I feel she truly shines in a Captain Rage led union team. She brings some incredible utility to that team which increases the overall effectiveness and threat of the team. My current favorite team roster for Capt. Rage includes Minx, Coin, Gutter, Avarisse & Greed, and Mist. This team brings a total of 12 influence to be allocated turn 1, plus the Bag of Coffers influence allocated during the turn. Often turn 2 will see a desire to allocate 4 influence to Rage, 4 to Gutter, and 3 or 4 to Mist, draining the base pool of allocatable influence. This means that the other models, in this case Minx and A&G, are left with no influence. This is not a problem for Minx as she can still charge for free, adding some additional damage to a select combat. Almost more important, Minx can charge from "seemingly nowhere" to set up a gang-up bonus for a targeted combat. This becomes very beneficial for Capt. Rage when using Bloody Coin.

The second, and somewhat more important, value Minx brings to the team is Marked Target. Minx is able to extend Capt. Rage and Gutter's threat range. Of these two models, Capt. Rage has the more important threat range to extend. Typical opponents will be accutely aware of Capt. Rage's 7 inch charge / 8 inch threat range and endeavor to stay outside of it. Savvy opponents will often consider "Quick time" on Rage, extending that threat to 10 inches and will stay out side that. Minx can often charge into that range, hitting to trigger marked target and adding an additional 2 inches to increase Capt. Rage's threat to 12 inches. Even when she cannot charge, such as during turn 1, giving her a single influence gives a 1 dice chance to land Marked Target on an opposing model within 15 inches of Minx's starting point. It's especially useful to use Coin to give Bag of Coffers to Minx, giving her the influence and a bonus time for the character play when activation is not an issue.

Lastly and least important is her actual damage. Minx being able to charge an engaged target, attacking in range of Capt. Rage's legendary play can deliver some reliably good damage. In this situation she should be rolling 11 dice, averaging 5 hits for a momentous 4 damage plus a 2 inch dodge. Often she will spike this roll to 6, 7, or 8 hits and escalate that to 7 damage, 2 momentum, and a 2 inch dodge. It's a fairly nice finisher to a turn where she was not allocated any influence.

Minx vs Gutter with Blackheart

I've been fairly vocal about my disapointment with Gutter after the April errata, specifically when played with Blackheart. On Guild Ball Tonight I commented that I have switched to using Minx in place of Gutter because I felt she was better. This is a good place to discuss this comparison and where my preference comes from.

Following the April 2016 errata Gutter moved from a reliable control player to a damage focused player, specifically utilizing Scything Blow for her damage. Many people point out that Gutter still have a 4 inch chain grab along with reliable momentous damage. I always hear the stories about Gutter getting multiple scything blows off on models that get grouped up, thus delivering amazing results and incredible take-out's to generate points.

I'll point out that this is not untrue, in specific situations. Gutter when is an amazingly dangerous player when used to focus on maximising damage via scything blow. I'll go further and say that in specific teams (Butchers and Capt. Rage) she is a top choice among players, almost critical for a Capt. Rage team in my opinion. That said, she's not as good with Blackheart.

Blackheart benefits Gutter in two ways, via crowding out her target and via Commanding Aura. Commanding aura will grant +1 damage to playbook damage results and +1 TAC while attacking a target within the aura. In these situations, where Gutter can position appropriately to not endanger Blackheart or another friendly model, Gutter generates moderate results. She will be attacking with TAC 7 (base 5, +1 for gang-up, +1 for commanding aura) which only reliably generates 4 successes. This means that Gutter can choose momentous 2 (becomes 3 damage) or momentous scything blow (3 damage to everyone in 2 inches). Not bad damage, especially if she positions to get multiple people in range. Maximising this attack to get 12 damage by using all 4 influence on attacking means Gutter had to start within 8 inches of the target model and be able to walk to a position where she is not within 2 inches of any friendly models. She'll aim to pick this position to also have 2 or more enemy models in range.

Let's lay that out as a list:
  1. Must be within 8 inches of 2 enemy models
  2. Cannot end within 2 inches of a friendly model
  3. Blackheart is already engaging the target model she'll be attacking
That's the "ideal" situation that can be reasonably expected to scything blow and put 12 damage on 2 models.

Looking at Minx in a similar situation we can start by making a couple assumptions. The basic one is we assume Commanding Aura and engagement, but that the target model has not taken any damage yet. In this case Minx can charge the model from 10 inches across the board and will be making her first attack with 11 dice (base 5, +4 charge, +1 gang-up, +1 for commanding aura) and reliably generating 5 successes on the hit. This will do 4 damage, followed up by 2 attacks at TAC 7 doing an additional 3 per attack. Let's compare with the following list:
  1. Must be within 10 inches of the target
  2. Blackheart is already engaging the target model she'll be attacking
The comparable damage is 12 damage to the single target (possibly 12 to 2 targets in an ideal situation) vs 10 damage to a single target. Gutter took 4 influence and had to be closer to the target. Minx was further away and only required 2 influence. Gutter generated 4 momentum while Minx generated 3 momentum.

I have found that the more often I play savvy opponents, both locally and at the top tiers of tournaments, those opponents know how to counter Gutter. They watch for her and since she's a threat they focus on removing her or mitigating her threat. Minx tends to slip under the radar more and is not considered as much of a threat, or considered out of range to get into combat. When I combine this with her Marked Target being useful for Decimate and Blackheart charging, extending both their threat ranges, she is far more useful to me. Gutter can still chain grab, but in a team that cannot boost her number of attacks or drastically increase her damage on character playes, every chain grab is less effective damage she delivers.

As such, Minx is better with Blackheart. Spelling it out here are my reasons:
  1. Greater threat range
  2. Similar damage range (10 - 12), same threat if her charge spikes to 1 additional success.
  3. Only 1 less momentum generation (which becomes same if Gutter has to chain grab)
  4. Better team enablement with Marked Target

Conclusion .... for now

This should give you a good handle on how to start including Minx into your lists. I think she works very well with both Union captains, as you can see above. Minx also plays for Masons, Butchers, Hunters, and Morticians. I will write a future article about how she works with the Hunters, suffice it to say I think she's very useful in that influence constrained team. I think she fits well with Butchers as well, enabling the build of a team that's almost completely furious. I don't think she brings as much use to Morticians nor Masons, not really filling a necessary niche in those teams.


Monday, August 1, 2016

Rumble Cup tournament report

On July 24th I attended a Sunday tournament, the Rumble Cup, at The Island Games in Chantilly VA. I don't prefer Sunday tournaments as my Sundays are already pretty crazy with family and church activities. I had missed out on a recent tournament and a couple Guild Ball game nights so decided to attend this one. I really wanted to get in 3 solid competitive games with an eye toward additional practice for Gencon. I knew this would be attended by my local scene and I was expecting some of the stronger players, although I also knew it would be a smaller tournament. Additionally, it was the first tournament run at The Island Games and first for the pundit, Sheridan. I wanted to support both the pundit and the store by attending.

I'll take a moment to say a little about the store, as it's a nice venue for events and general gaming. On first entering it is pretty clear the store focuses on card games (MtG, Pokemon, etc), although this should not be a surprise for anyone who frequents game stores in the US. This is only a first impression however, it only takes a look deeper into the store to see the tremendous support for board games and miniature games at near equal level to card games. The retail area of the store fills the front 1/3, with a small table in the middle of the front for some card games to be played. Large racks of board games and miniature games fill the spacious front of the store, surprisingly not feeling crowded at all for the amount of stock. Moving past the opening racks opens up a vista of 12 long tables filling the back 2/3 of the store. These tables are prefect size for board games, and can be pushed together to make space for typical miniature games. Along the back wall is a large shelf system filled with terrain for use by miniature gamers.

Overall, The Island Games is a very nice store and a great place for gamers. Anyone in the area should definitely check it out!

Matches

We had 8 people attending the event, meaning 8 rounds for the day. We started a little late but tings picked up quickly and the whole event was completed by 6:00pm. The mix in the field was both interesting and challenging, including Josh (ranked 12th in the US), Dutch (19th in the US), Dan (15th in the US), Dixon (3rd in the US), Ben (124th in the US), and 2 new players. Although these are all from my local scene, I knew I was in for a challenging day as 3 of us are practicing for the Gencon National Championship and Dan is a top player whenever he plays at a tournament.

**rankings mentioned above are per Black Orifice Guild Ball rankings updated after the tournament.

In deference to the new players the clocks were set to 50 minute clocks with 2 minutes of clocked-out time. This was good for the new players and you'll see in the round reports that I was typically playing with a 45 minute/1 minute clock.  

Round 1 - Josh's Hunters

Josh and I have played a lot of games since he's gotten into Guild Ball. Even with the return of MkIII Warmachine, Josh is still getting in 2 - 4 games of Guild Ball a week. He's coming on pretty strong in the Tournament scene, starting with Engineers, moving to Hammer led Masons (and doing really well), and now getting the Hunters on the table. His Hunters are a work in progress and he has not settled into a streamlined team yet, but he's worked out a lot of their tricks and plays a strong game.

Josh and I agreed to play on a 45 minute / 1 minute clock despite knowing the round was 50 minutes / 2 minutes. We expected we'd end the game prior to the normal round time and wanted to see how it played out. Overall this was a casual agreement as you'll see below.

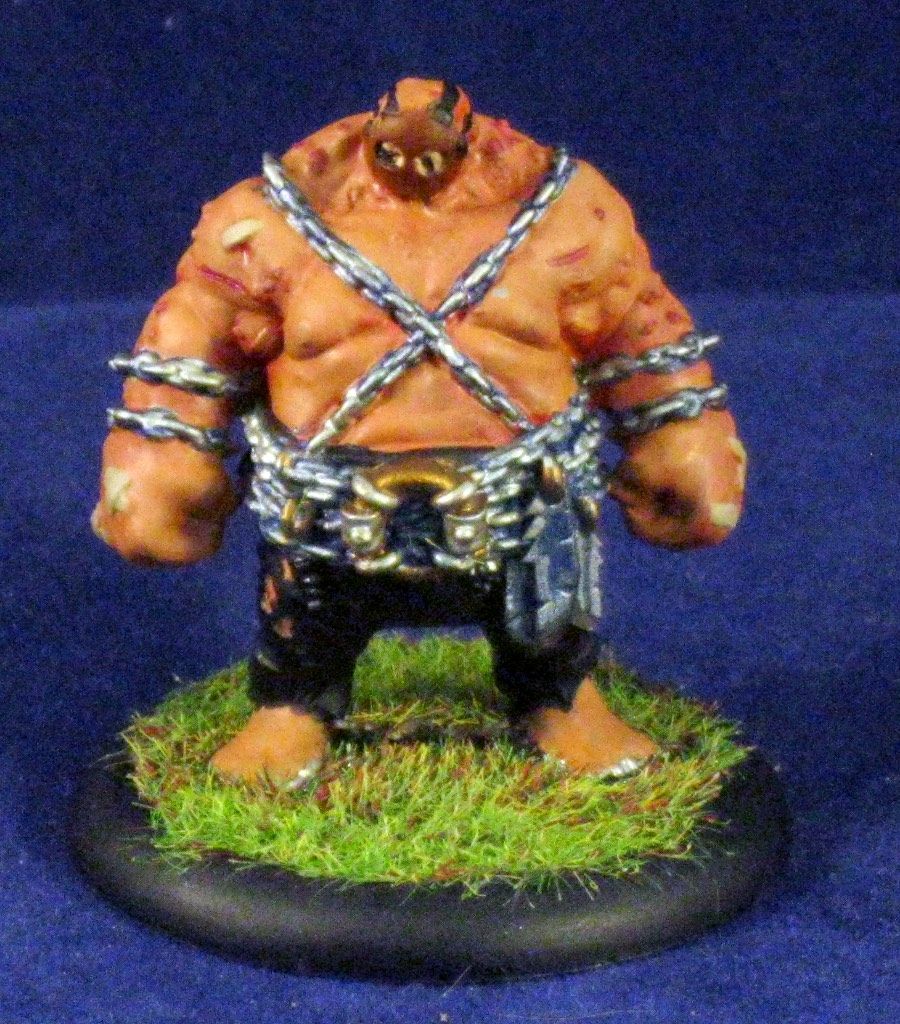
He was running Theron, Fahad, Jaecar, Zarola, Seena, and Chaska facing my Capt. Rage, Coin, Gutter, Avarisse & Greede, Mist, and Hemlocke. Josh's strategy seemed to focus on grinding out the clock against me and trying to pick off players at a steady pace with Jaecar. If he could get in with Seena for a charge and Bear Hug he would but was more reliant on Seena as a threat and tar pit (21 wounds, tough hide, 2 inch reach).

We had a couple highlights and surprises during this game which are worth noting. Josh made excellent use of traps and positioning during the game to control Rage and Gutters charges, limiting what I was able to attack. Even when he grouped up I was rarely able to get into range for the flurry of scything blows I aim for with this team. During the first Turn Josh grouped up Zarola, Theron, and Chaska in a forest for cover, which nicely setup the spacing for Hemlock to drop poison on all of them. Josh also had issues early game with missing most of his character plays. At one point during the late game we were both surprised when Capt Rage charged a full health Seena and successfully killed him during the activation.

We hit a point in the game where I was on 8 points, Josh was on 4, Fahad had the ball in cover and was engaged by Hemlock and Mist. Hemlock and Mist were engaged by Theron, Chaska, and Zarola with Rage and Gutter out of range to get into the fight in 1 round. This was important as my clock ran out (45 minutes) and he had less than 3 minutes left on his clock. We paused to discuss what to do and agreed we'd keep playing as if we had 50 minute clocks, but track the 1 minute point's that would roll over. I also personally decided I'd play my turns within the 1 minute to see how to pull the game out. I had become a bit "tilted" shortly before this point in the game, growing frustrated with some bad dice results on my side along with an inability to untangle the situation Josh had set up.

Although the game officially ended with a score of 12 to 8, win to me, this was the most frustrating series of activation's I've played to date in Guild Ball.  Over the next several activation I was able to spring Hemlock from the tangle, with the ball, move and make a shot on goal. Unfortunately she missed the shot and the ball landed snuggled up to his goal, 6 inches away from Hemlock. In future attempts to generate momentum to move Hemlock up and grabbing the goal Josh positioned well and kept me at range, frustrating my attempts to win the game and grinding out activation. Overall I would have given up 10 points to clock out before being able to make the final points and win the game. This means had we been on regular tournament clocks Josh would have won 12 to 10  three activation prior to my finally winning.

On this day with how we agreed to play, I was able to extract a win from a very frustrating game. Kudo's to Josh for an excellent game, although I was incredibly frustrated at the end of the game. Win to me, 12 to 8.

Round 2 - Alex's Morticians


Round two saw me matched up against one of the new players in the tournament, Alex. I had given Alex a demo game two weeks prior to the tournament and found out that this round would be his fourth game of Guild Ball. I had a moment of feeling bad over this, as I was still mentally tweaked from my first game vs Josh, my brain in a hyper-competitive mode and still moderately frustrated from the game. I made an effort to tone my competitive view back and calm down on the frustration side, hoping to give Alex an enjoyable game.

Alex is starting his Morticians team playing Scalpel as captain. This tournament he was swapping out two of his "regular" models (Casket and Cosset) for Mist and Rage. His lineup was Scalpel, Dirge, Ghast, Rage, Mist, Silence facing Capt. Rage, Coin, Gutter, A & G, Mist, Minx. He was not really ready for this game and was surprised in a couple places despite my trying to keep him abreast of what my models did. He played really well for a new player, taking out Capt Rage and making a goal with his Mist. Overall I was able to recover from my "Tilt" and make this a fun game overall. Alex said he'd learned even more about the Guild Ball and enjoyed the match after our game.

This game put me on the top table going into the final round with a 12 to 6 win.

Round 3 - Dixon's Alchemists


Dixon is a top player in every miniature game I've seen him play, highly competitive, and always a challenge when I face him. He has earned a reputation as a negative play experience to face, but he and I have been friends for years and I enjoy gaming with him as much as I get frustrated playing against him. Dixon was coming out of a strange round 2 where half-way through the game his opponent conceded and then dropped from the tournament. Although it was on the table next to me I am not sure exactly what happened. I do know that both Dixon and his opponent in that game tend to frustrate each other simply based on their personalities during a competitive game, and they also suffer from becoming detrimentally frustrated when dice or plans do not go their way.

I knew Dixon was playing Midas led Alchemists for this game, one of his strongest teams. I also knew that he had recently decided he was not enjoying dice based games and currently feels that dice are too random for his liking and cause him undue frustration. Knowing this, my own earlier frustration, and that he was coming out of a game where his opponent conceded, I was expecting a fairly contentious game. My aim was to keep my cool, say as little as possible, and just play out the game trying to win as quickly as possible.

Dixon brought Midas, Flask, Mist, Vitriol, Decimate, Compound facing Capt. Rage, Coin, Gutter, A&G, Mist, Minx. I am currently struggling between the desire to drop Gutter when facing Midas and my belief that Gutter is crucial to a successful Capt. Rage lineup. If I can figure out how to mitigate the Gutter/Midas interaction I'll be dramatically stronger facing Alchemists in tournaments.

The game opened with Dixon winning the roll for Kick/Receive and choosing to receive. I kicked with Avarisse, not moving too far forward but getting a decent kick. Dixon loaded up Mist and Midas, with a token amount of influence on Vitriol, and Compound. He retrieved the ball and passed a couple times before activating Midas and successfully grabbing Scything Blow. I had considered moving Gutter the activation before Midas went, but then thought that letting him come in for Scything blow and sitting 8 inches away from Gutter would be to my benefit to possibly hurting or killing Midas on turn 1. Via creative use of difficult terrain and ball passes he was able to position himself 12 inches away and keep Midas out of danger. Activations continued with his Decimate coming forward, staying just out of range of Capt. Rage. Minx moved forward and hit with Marked Target (on Decimate), putting Rage (3 inf) back in range. Rage charged Decimate, hitting twice and generating momentum.

This point in turn 1 left Dixon with a final activation of Mist (4 influence, 2 momentum) with the ball, and me with Gutter (3 inf) and my own Mist (4 inf + bag of coffers) remaining to activate. Dixon's Mist shot down the field, bouncing off Avarisse and generating 2 more momentum (putting him at 4) and successfully positioning to have a clear shot past Greede, then took a shot on goal with Bonus Time. 4 dice rolled and the results were 1, 2, 2, 3 for a missed goal. The ball parked itself next to Greede (who did not pick it up) and in front of my goal. I was surprised, readjusting my plans for Gutter to grab the ball and pass it to Mist. I started measuring to determine the best path for Gutter to grab the ball, Pass,  and still get attacks on Dixon's Mist when Dixon conceded the game.

Huh, he conceded at the bottom of round 1. I was surprised but decided there was no reason to dig for an explanation, but it was better to fill out my sheet and start picking up. Dixon started to comment that he conceded because the win meant more to me than to him and he would spend the game over-frustrated and he did not want to ruin the game for me. Overall, I would have preferred to play out a full game against a highly skilled and competitive player but c'est la vie. 

That put me at a 12 to 0 win in my favor, leaving me in first place for the tournament as a whole.

Tournament 8

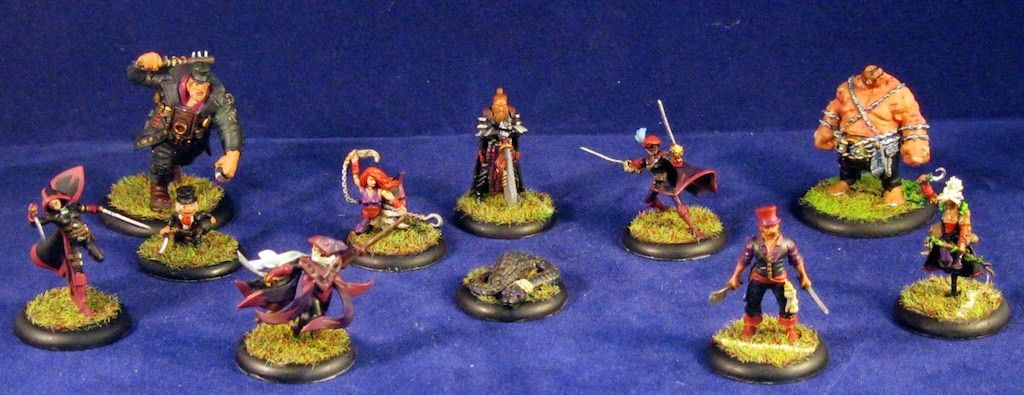
I've settled into a standard Tournament 8 selection for Captain Rage. I've discussed this before but I'll do another quick overview along with thoughts from this tournament. I'm struggling even now with comparing tournament strength of Capt. Rage and team vs Blackheart and team. The two teams use many of the same models, with the largest different being Gutter vs Rage or Fangtooth. I'm not using Fangtooth much in either line-up, which makes choosing a Tournament 9 for Championship events easier. (Blackheart, Capt. Rage, Coin, A&G, Gutter, Decimate, Mist, Hemlocke,  Minx) The trick will be which Captain I decide to bring to the Qualifiers.
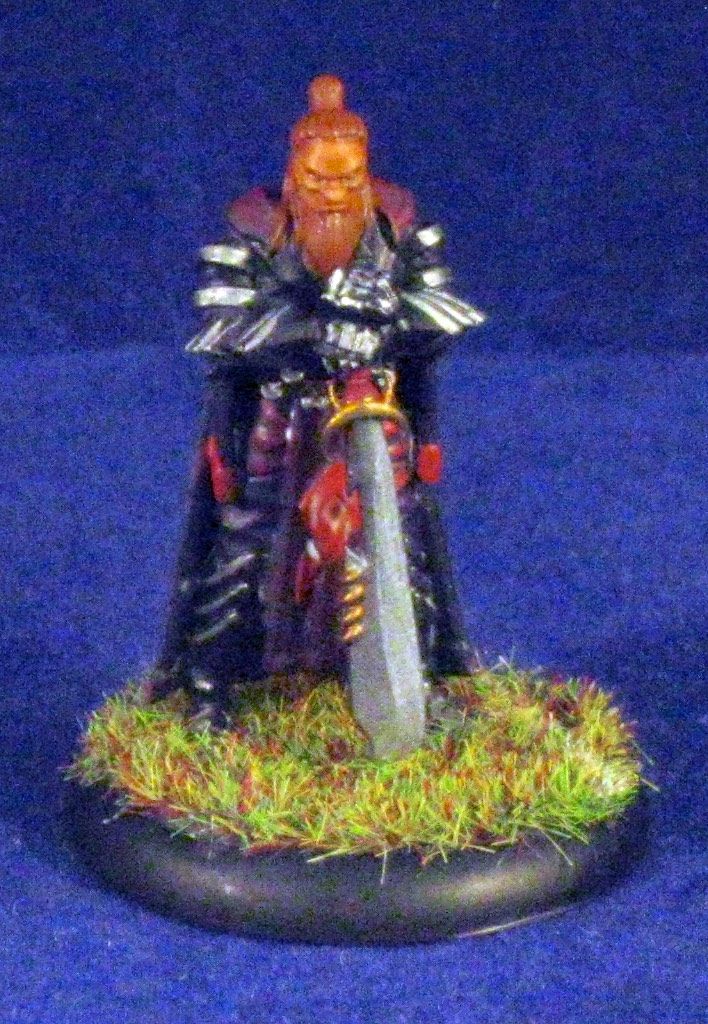
Captain Rage

Veteran Captain Rage has settled into my Union choices in a fabulous way, causing a difficult choice between team captains for me. I find Capt. Rage to be less flexible in his team choices when aiming for maximum impact on the table. He almost requires Gutter, A&G, and Minx to operate at maximum efficiency, leaving only a single swap-able choice on the team. A Capt. Rage led team is going to handily win games by delivering 4 take-outs and 1 goal or push through to a grinding 6 take outs for the win.

Although he and his team focus on take-outs, this doesn't mean he doesn't have tricks. Two things really set Capt. Rage apart from regular rage. First is his loss of "Maverick", allowing him to now gain benefits from other players. This means that Minx, Avarisse, and Decimate can all help him out, increasing his threat and total damage output. Second is gaining the character play "Quick Time". This ability to dodge 2 inches during his activation opens up a lot of opportunities for him.

Unfortunately, I feel a Capt. Rage team loses the ability to switch to a goal-scoring centric build and still benefit. The loss in utility from dropping combat focused players to movement and kicking players hurts Capt. Rage more than it hurts Blackheart. Simply removing the threat of 4 additional Scything blows or Unmaskings is enough to make Capt. Rage less overall.

Coin

Coin continues to do what Coin does, and continues to be one of the arguably best mascots in the game. I have not tried proxying the Strongbox on the table yet, I've only read it's card. I cannot see a time when I would take Strongbox over Coin in either a Blackheart or a Cap. Rage led team. I'm still using Coin on turn 1 to fuel up Mist with Bag of Coffers, then he moves forward to assist later in the turn. I've begun to see opportunities to give the Bag of Coffers to Avarisse and to Minx with more regularity during mid and late game turns.
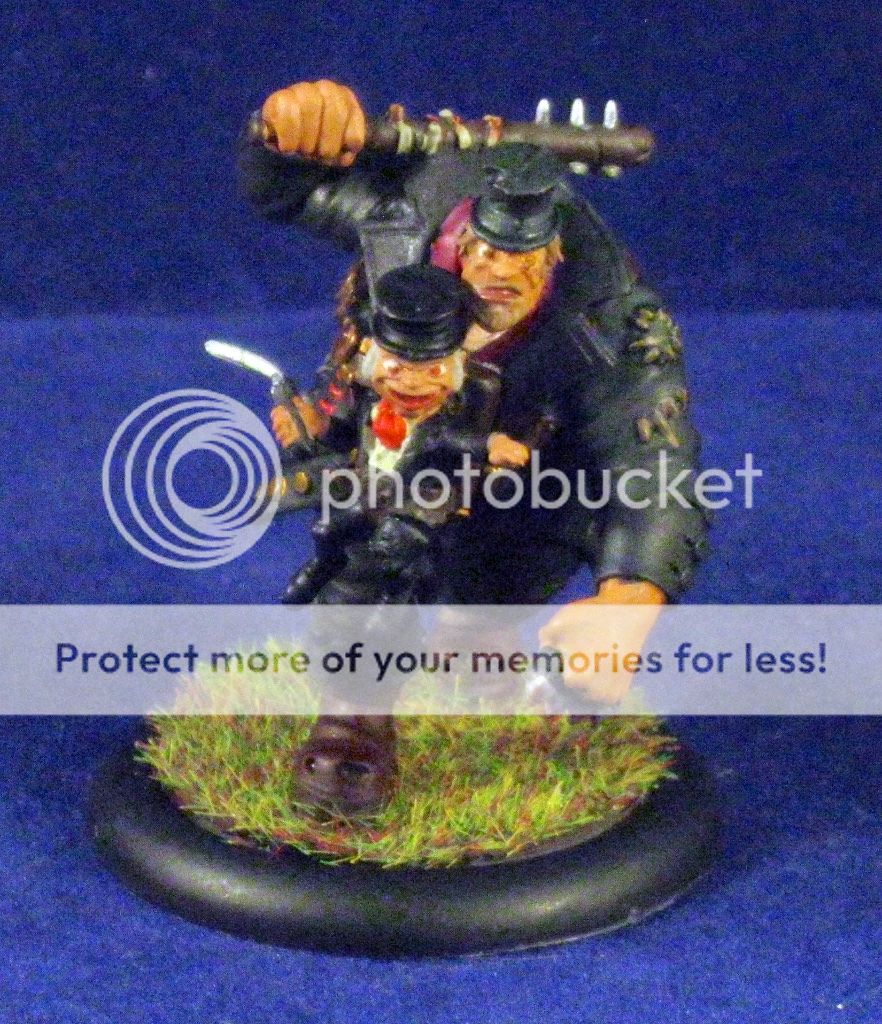
Gutter

Gutter is a staple in my Capt. Rage teams, and I cannot see this changing. The simple threat of 7-8 scything blows in a turn is enough to scare the majority of my opponents. This works well with my Shock & Awe tactics, especially if I can get off a good set of scything blows early in the game. I've done well with my opponent leaving enough models in a group that I can often find 2 or 3 models to jump on creating a SB threat.

A note is the effectiveness of Chain Grab vs other methods of moving models around. This is part of what makes her more effective in a Capt. Rage team vs a Blackheart team. Capt. Rage has easy access pushes combined with damage on his playbook. These are also momentous, meaning there is no reason not to choose the result. This means that between Capt. Rage and Avarisse, opponent models can effectively be moved into a Gutter Threat Grouping ("GTG") reliably. Blackheart does not have pushes on his playbook, forcing Gutter to rely on Avarisse and her Chain Grab to create a GTG.

Avarisse & Greede

I've recently written about my thoughts that A&G are becoming cornerstone "must take" players on competitive teams. The extra activation for a Capt. Rage team is very important to force the opponent to burn out their activation's and fix models in place before Capt. Rage moves in for attacks. In those instances when Avarisse has influence and lands singled out or knockdown on an opponent in range of Capt. Rage, this becomes even worse.

One key point of interest is the fact Rage tends to want to go first starting turn 2. The extra activation for those later turns becomes useful in pushing the opponent who should already be short on model activation's to bring returning players further onto the board or force unfavorable activation's.

This tournament uncovered one of the liabilities with bringing A&G to a tournament. Once a clocked out state has been reached, extra activation's are not useful but give up points to the opponent. Clocking out near the end of the turn after the bulk of your useful players have activated forces non-useful Greede activation's to still cycle prior to the start of the new turn.

Mist

Mist is still in my line-up and is a primary choice for me, but I'm finding I swap him out more often than not. He has become my swap for Hemlock when facing Hunters. I'm still unsure if I need hemlock vs Smoke led Alchemists or if I can keep Mist in the team instead. Overall, Mist plays the same role he always has playing for a 1st turn goal, looking to retrieve the ball, and looking to score as often as possible. I'm looking more at end of turn scores where possible to open up as much threat as possible for my opponents. It's helpful to keep my opponent worrying about a goal at the same time they are worried about Gutter or Capt. Rage taking out a player or two.

I tried kicking off with Mist for the first time during this tournament. I can see the benefit although I need to practice the play more. The aim (for those who are unaware) is to move Mist up the field into cover to kick, putting him into range of the opponents deployment line. This allows Mist to rush out during turn 1 and retrieve the ball, hopefully combined with generating momentum and taking a shot on goal as well. It's an aggressive play but I can see I'll be using it more once I've practiced it.

Minx

Early on I wanted to fit Minx into my Capt. Rage team but was struggling to find a place for her. After a number of games this has switched to I struggle to figure out when I should not take her. The trick is her Marked Target extending both Capt. Rage and Gutter's threat ranges. Most players look at Capt. Rage and consider his 7 inch sprint and 1 inch reach, measuring to stay out of an 8 inch threat range. Really good players add in his 2 inch "Quick Time" and calculate a 10 inch threat they need to worry about. Often times even very good player forget about or count on Minx failing a "Marked Target" play granting 2 additional inches of charge.

An additional nice to have benefit is Minx's free charge when Capt. Rage uses his legendary play. That free charge onto an already engaged target reliably delivers 11 dice statistically landing 5 hits for 4 damage and a double dodge away from the combat. Often I've had this spike to wrap 2 or 3 more hits, turning that 4 damage/double dodge into 7/double dodge, double momentum.

Hemlock

Hemlock has delivered some reliable plays for me in numerous games. She is a staple choice when I am facing Hunters, replacing Mist and becoming my striker and healer. She dropped a nicely placed Poison cloud in this tournament and has dished out Blind a couple times here and there. I struggle with her as a striker even though she has a momentous tackle on 1 success and a 3/6+ kick. More often than not I'm finding her not in position to make a kick or as my fail-safe backup if things are not going well.

I also struggle with the short range on her healing. Healing and condition removal is incredibly important when facing Hunters, Butchers, and Smoke led Alchemists. That said, I constantly forget that her range on the heal is only 4 inches. On the bright side, it is a 3 inch AOE of healing, which means that it's not too touch to get it onto 2 or 3 models at a time with how the team plays.

Decimate

I'm sad to say this, but Decimate is as big of a difference between my Blackheart and Capt. Rage led teams as Gutter. Decimate has not found her way into my Capt. Rage led teams recently. She brings some amazing abilities to the table but needs too much influence to make them work. Minx does better with 0 influence, and even Avarisse brings Greed when he is assigned 0 influence. I've considered adding Decimate into the line-up in place of Gutter when facing Midas, but I'm not sure that will be as good. I need to look at my other choices and see if I like something else better.

Monday, July 18, 2016

Guild Ball - Must Take Players?

I struggled to determine how to classify and tag this post. On the one hand I'll be talking about tournament strategy a bit. It'll be a look a Guild Ball player who is quickly becoming a key choice for tournament players. On the other hand I'll be discussing how the idea of a "must take" player annoys me. After everything I decided to jump in and start writing, then made the decision after reading what came out. It ended up as I suspected, more ramble than either tactics or soap-box.


Don't those two look familiar?

I've been playing in a number of Guild Ball tournaments this year. I've tucked a total of 8 under my belt since January, averaging a bit more than 1 per month. In between those events I've also run 3 tournaments including the (to date) largest tournament in the US. The Guild Ball tournament scene is maturing in a very short time and trends are starting to emerge. One of those trends I've found myself partaking in, despite my annoyance. Avarisse and Greede have been showing up in more tournament teams with each passing event. This has to make one wonder what this player (these players?) do so well that they make it in so many lists.

Avarisse & Greede

Avarisse & Greede are a single player choice for a team roster who bring potential two players to the table. Through a unique ability called Detach on Avarisse a second player can be put on the table during a maintenance phase, making this player into two different models. Once detached Greede acts on his own and generates his own influence. Should you want to recombine them Greede has the Attach ability to combine the two players back together.

Starting with Avarisse we look at his card and see a typical big guy stat line with 20 health and a 3+/1 defense and armor combined with Tough Hide on the back of his card. We also see a single influence, but this is off set by detaching Greede for a second influence (while detached). A movement of 4 inches is not overly impressive, but the jump to 7 inches on the sprint/charge becomes respectable. Combined with his TAC of 6 we see a model that really wants to be charging.

Avarisse shines when you look closely at his playbook. The majority of his playbook is momentous and it's easy to focus on the top end results with both damage and double pushes. Considering he has a short playbook (TAC 6 playbook 5 long) this seems really good, but it's not the strength of the playbook. Non-momentous knockdown on 2 successes is really good when it comes to counter-attacks. Momentous Singled-Out is the gem of this playbook though. Adding 2 additional TAC to other models who attack the target is an amazing ability. This can really increase the effectiveness of other playbook plays and triggered character plays.

Switching to the smaller of the pair we take a look at Greede. First we should focus on the very impressive 5+ natural defense on his card. This spikes up to 6+ when he is within 4 inches of Avarisse. Overall Greede is slow with a relatively low TAC, a very low health of 4, and Crazy to increase his TAC. This means that his playbook is very long to match his Crazy triggered TAC of 8. Greede, who is already vulnerable to taking a hit during a counter attack, becomes even more fragile if you use Crazy to get decent attacks. It's unfortunate that there are so few decent momentous results on his playbook, making the choice to attack with him not one of the better choices. Along with his defense Greede's kick stat really stands out on his card. A 4/4" kick makes him very reliable kicking, but only over a short distance.

What's the big deal?

Sure, knockdown, pushes, and Singled Out are all good plays. Sure, Avarisse is a big guy with lots of health and tough hide. Is that enough to see them showing up in most tournament lists? Are people truly making incredible use of a 4/4" kick to get those crazy snap-shots? I'm fairly certain that none of this is the reason. The reason these are being added into so many lists is for the extra activation. Activation control in Guild Ball may not be as important as other games, but it can be critical in the early turns for specific game plans.

Typically use for Avarisse & Greede runs in a similar fashion regardless of the team they are playing on. During the first maintenance phase Avarisse uses Detatch to offload Greede onto the table behind him, typically in range of the friendly goal.  Avarisse may get an influence or not, and at some point during the turn he trundles up the board toward mid-field. During the turn Greede will move back within an inch of the friendly goal and hide there for the bulk of the game.

The usefulness here is to force use the extra activation to force your opponent to commit to their game plan and move up the board before you have to commit. This can give an advantage to any team who's plan benefits from taking the last activation or an uninterrupted final activation. Any Shock & Awe style game plan almost requires A&G on the team to assure maximum effectiveness.

Condition play focused teams such as Smoke led Alchemists, Alchemists teams with Venin, Hunters, and Fillet led butchers all make use of out-activating their opponents. Forcing conditions that cannot be removed before the end of the turn converts immediately to near guaranteed damage. Combining this with heavy momentum generation can deliver a devastating combo hit to a team as the conditions wear them down lining up multiple early turn take-outs.

First turn aggressive scoring focus teams such as Fishermen, Pin Vice led engineers, Masons, and Union or Mortician teams including Mist benefit from the final turn activation. These teams tend to aim for scoring late turn 1 to minimize the ability of an opponent returning a goal during the turn using the goal kick to get the ball down the field. If these teams can capitalize on the goal with initiative on the following turn they can retrieve the ball and possibly convert a second fast goal early on turn 2.

Aggressive take-out focused teams such as Butchers, Brewers, Masons, Morticians, and Union have a trickier time making the most out of the last activation. These teams typically need a way to increase their own threat range or to pull a target model toward them. Gutter and Minx can be great for this, as can Puppet Master (Obulus), Lure (Cosset), and Times Called (Spigot). Take-out plays can be particularly effective utilizing a final activation due to the amount of momentum typically generated. The momentum typically results in grabbing initiative on turn 2, allowing the team to do more damage or complete a take-out in the first activation of turn 2.


Thoughts

I don't like the whole philosophy behind must take characters. Aside from taking Masons I'm seeing A&G being added to lists partly to counter other lists taking A&G. I'm adding A&G to specific lists to compliment my strategies in the early turns. Once I'm into late turn 2 or later I'm using Avarisse to deliver Singled Out onto key targets along with an occasional knockdown. A&G activation control and Singled Out really compliments a Captain Rage led union team just as nicely as any Union team containing Mist.

I believe other people are starting to figure out how to use these two, specifically the strength that Avarisse brings with a single success momentous Singled Out. I've talked on Guild Ball Tonight about how I was having trouble figuring out how to use them well. Early on I was not getting a lot of value from the dynamic duo but have begun to learn how to use them over the past couple months. It's entirely feasible that others are following along the same track I am, learning how to use them well in similar timing. I hope this is the case as I'm sometimes seeing A&G in teams I'm not sure are the best fit. I'm still unsure if the extra activation is so strong in play that it needs to be countered. If this is the case it's a sad day for Guild Ball as A&G become must-take models and we'll start seeing team diversity decreases throughout competitive events.


Monday, July 11, 2016

Guild Ball - Captain Veteran Rage

I'm a bit surprised to find this article unfinished in my draft folder. I've been playing Captain Rage for a while now, although I cannot put my finger on how many games I've gotten in with him. I know I've used him at the "Get Over Here" tournament in April, which I won. I played him a couple games before that and have played him a fair bit since then. I also wrote a bit of an overview to my experience on the Guild Ball forums shortly after the GoH tournament.

Rage continues to be among my favorite Guild Ball characters, both in fluff and on the table play experience. Captain Rage delivers the same feeling and utility which Player Rage brings, but in a just different enough form to make him feel like a captain. Let's take a deeper look at him.

The Team

Captain Rage has the entire Union team to choose from, minus two characters in Blackheart and Player Rage. We can pretty easily remove Harry the Hat from the line-up due to how abysmal he is in the game. Even Captain Rage cannot redeem Harry into a viable spot on the field.

This leaves us with a mascot (Coin) and 8 players to choose from (Gutter, Decimate, Hemlocke, Minx, Mist, Snakeskin, Avarisse & Greede, and Fangtooth) to construct our tournament line-up. Although Strongbox will be added for a second mascot eventually, at the time of this writing he was not released yet. Looking at our choices I have settled into the following list for tournament play:
  • Captain Rage
  • Coin
  • Gutter 
  • Avarisse & Greede
  • Minx
  • Mist
  • Decimate
  • Hemlocke
Recent competitive games have developed my go to list as Rage, Coin, Gutter, A&G, Minx, with a single slot to be swapped between Mist, Decimate, and Hemlocke. Mist brings his very strong goal scoring to the field, along with a 2 inch reach which is helpful for Captain Rage. Decimate brings condition removal, which is especially helpful when facing Hunters and Smoke led Alchemists. Decimate brings additional damage to the team which is particularly nice against some opponents.

I'll point out that there is a community wide love affair with 2-inch reach. It's rated very highly by many members of the Guild Ball competitive community, beyond it's actual value in my opinion. 2-inch melee zone is useful, but the challenges it overcomes are not insurmountable. Savvy play can counteract the lack of wide-spread 2-inch melee zones on a team.

Readers will notice that there are 3 players who essentially fill must-take positions on my Captain Rage team. Gutter is the easiest of these to explain due to Cap. Rage reinforcing a primary role she was left with post-errata's. Gutter shines on this team through the use of Scything Blow combined with Cap. Rage's abilities. A&G are also becoming critical choices due to their ability to control activation. Additionally, Avarisse bringing "Singled Out" can add a tremendous bonus to both Cap. Rage and Gutter in terms of attacks and damage dealing.

The last "must take" of Minx is a bit more controversial for me. I originally was of the opinion that while she should be good on the team I could not find a space for her in my line-up. Mist and Decimate filled the remaining two slots (after A&G and Gutter), and Minx spent time sitting on the sidelines wanting to play. After a fair bit of theory and on the table play, Minx showed her value and truly shone as a key component to a Cap. Rage strategy. Minx brings two influence which she contributes to the team most turns, still using her Furious Charge to get into the fight and do some damage. More importantly, especially for 1st and 2nd turn, she brings "Marked Target". This ability to extend the charge ranges of the rest of the team by 2 inches dramatically increases the hitting power of the team. It also creates more challenges for the opponent, especially when they've carefully avoided the transitional threat ranges Gutter and Cap. Rage have.

Captain Rage Overview

Taking a look at Captain Rage's card we see the evolution from a player to a veteran player. His movement stayed the same but we see an increase to his TAC, additional armor, and a player level INF stat. This influence stat is particularly interesting because you'd expect to see it on a strong player, but it appears weak on a captain model. It's important to consider Furious when evaluating Cap. Rage's influence stat, giving him a no cost charge in addition to his influence.

Rage's playbook continue to impress, with momentous results in nearly every selection to be made. We see the addition of pushes to the third and fifth selections of the playbook, combined with the momentous damage. Cap. Rage becomes an even more impressive damage dealer when he can trigger his "Bloody Coin" ability, raising all his playbook damage by an additional point. This means he's regularly delivering 16 damage in a non-charge turn and statistically 20 damage on a charge turn. All of this comes with momentum generation each swing.

A discussion of Cap. Rage would be criminally incomplete without talking about his Character Plays. We see Concussion carried over as a playbook generated character play. This is potentially his least useful and least used character play overall. Cap. Rage has gained "Quick Time" giving him a 2 cost 2" dodge. This is very useful for a couple key situations which often arise. First, QT gives Cap. Rage the ability to extend his threat range or shift prior to charging, clearing a charge path or opening up a previously unavailable charge. Second, it allows Cap. Rage to deal with Clone and Unpredictable Movement.

Finally we come to one of the defining plays on Cap. Rage's card, Red Fury. This play gives Cap. Rage the ability to force a friendly model in 3 inches to make an attack without spending influence. This is particularly nice to use for triggering other models special playbook results such as Avarisse's "Singled Out", Fangtooths easy "Knockdown", and especially Gutter's "Scything Blow". It also gives Cap. Rage the ability to circumvent defensive abilities such as Fear by reducing the cost of the actual Attack to 0, despite Red Fury costing 1 influence.

I feel fairly safe in stating that all of this is not enough to put Veteran Rage at Captain level. Looking at the back of his card we see some additional abilities that bring him up to an expected level of impact on the game. I've already mentioned Furious, giving Cap. Rage a free charge in the same style as player Rage. He also brings Rising Anger to the table, potentially the most forgotten ability among Cap. Rage players. Lastly we see a unique ability, Usurper, which let's Cap. Rage prey on Union players brought to the table on opposing teams. Usurper gives Cap. Rage +1 TAC when making an attack against opposing Union models, bringing him to TAC 8 base.

We also have Cap. Rage's Heroic and Legendary plays, which are fairly well linked. His Heroic Play, "Bloody Coin" grants additional TAC and playbook damage when he is attacking a target engaged by another friendly model. This bonus is in addition to the "gang up" bonus already conferred to the attack. His Legendary play, "My Gang", confers the bonus of "Bloody Coin" to all friendly models within 6 inches of Rage. The application of this to Gutter in the ideal situation is particularly brutal, raising her TAC for each Red Fury attack to a 7 base (TAC 5 + 1 for gang up + 1 for bloody coin) and increases her playbook damage by 1. 

Opinion


I've really enjoyed my games with Cap. Rage. He brings a game of unadulterated violence to the table, typically ending a game on 6 take-outs opposed to 4 take-outs and a goal. His mix of abilities solves some of the typical problems faced by combat teams and he has abilities to mitigate opponent strategies for locking down furious models. He continues to act as a highly effective combat model in the vein with his player version, removing the limitations brought by Maverick and a single influence. He's player Rage with more Rage included to the game, which is just fun.

An additional facet Cap. Rage brings as a season 2 captain is increasing the involvement of his team. Although he appears as, and in fact is, a super-solo style spotlight captain he still increases the team play aspect. He can hold a maximum of 4 influence, typically leaving 7-8 influence to be shared among the remainder of his team. He also thrives on attacking models who are already engaged by a friendly model, increasing the importance and play of his team as a whole.

Monday, May 23, 2016

Guild Ball - Get Over Here! tournament report

Recently I attended "Get Over Here!", a small tournament in LaVale MD run by Duane. It was a 2 hour drive up for me but Duane has come out to many of our local tournaments and I wanted to support his first event. In addition to supporting him I was able to see some players from the WV Mountaineers guild ball group which was fun. Unfortunately things did not line up during the day and I ended up not being matched against Brad Mooreland. This is amusing as he and I have been to 4 tournaments together and not played each other, although we are often at close tables. One of these days I'll get a game against him and his Butchers.

Matches

Although I think I can remember the lists that my opponents played, I'm going to stick to my previous format for this article. I'll add the lists in the start of each round recap, but still plan to just write a synopsis of the key moments in each game. 

Round 1 - Michael's Morticians

Michael appeared to be a new player, mentioning that his local group brought him up and told him he was going to play in the tournament. He was a great sport and I had a lot of fun in our game.

He was running Obulus, Dirge, Bonesaw, Silence, Ghast, Casket. I won the roll and chose to receive the ball. Overall the game went well but it was fairly quick and went to my favor fairly heavily. Michael was not prepared for the damage that Rage and team can dish out, surprised when Ghast could not soak the incoming attacks from Capt. Rage and Gutter. Additionally his dice truly hated him in this game, with showcase being 5 rolls of 6 dice by Obulus, each rolling a single 4 and five 1's, 2's, and 3's. Michael was only able to pull 2 points out of the game with Obulus killing coin after 2 turns of attacks. The game ended 12 to 2 in my favor, moving me to the top table for round 2.

Round 2 - Jason's (Steve) Hunters

Jason has played in one of my tournaments previously and we had a great time playing against each other this game. He was a great opponent and we were joking with each other through the whole match. Strangely, I had it stuck in my head his name was Steve for the whole day and he kept (nicely) correcting me when I got his name wrong.

Jason brought the Hunters to the tournament, switching from Mason's to try the new team. He brought the starter box line-up of Theron, Fahad, Zarola, Egret, Hearne, Jaecar. He didn't have a bench at all, running those 6 all day. I was really looking forward to facing Hunters due to having a great time playing them in a couple games prior to their release. I was excited to see how much fun they were across the table.

There were a couple key plays in the game which stick out in my memory. The first was Egret moving up on turn 1 to take a flurry shot at coin. Jason was expecting to hit the shot and then dodge Egret back an inch, pulling her out of Gutter's range. He ended up missing the shot which let Gutter move up and pull Egret into the death zone, giving Capt. Rage the ability to kill a model turn 1. This set the tempo for the game with Capt. Rage, gutter, and Coin pushing into his team and unleashing a beating.

The second memorable point of the game was the final play. Unintentionally I had left Rage unengaged when Gutter pulled Zarola into a murder-ball position on the field. Gutter was engaging both Zarola and Jaecar and I won initiative on the turn. Rage, being unengaged, charged across to engage and attack Jaecar and put him down to 2 life remaining. He then used 2 influence to dodge onto Zarola, staying outside Gutter's 2 inch reach. He then attacked Zarola, hitting her and putting her down to 3 health. I then used Red Fury to get Gutter to attack, landing a scything blow on Jaecar and killing he and Zarola for 4 points to win the game.

This game put me on the top table going into round 3 with +20 on my differential.

Round 3 - Dutch's Brewers

Round 3 we had 3 undefeated players lined up for pairings. Based on differential I was sitting at 1st, Dutch was at 2nd, and Brad was at 3rd and facing a "play down" against an opponent who was only 1&1. The top ranked 1&1 was Dixon, who had already faced Brad, raising a pairings question for the TO. At the end of the day, Dixon and Sheridan were swapped (basically swapping the top 1&1 players) and the undefeated matches moved forward with the original pairings.

Dutch is a newer player to Guild Ball, having only played in 1 tournament prior to this one. He is one of my locals and we've played a couple casual games together. This was our first time facing each other competitively, and it was a fantastic game. He was running Esters, Scum, Friday, Spigot, Hooper, Gutter.I was happy to see Gutter in his line-up as I had not faced a player using union so far during the day. I was happy to finally get a chance to use Usurper on Rage's card.

Our game was a long and drawn out punch fest, trading blows on both sides of the table. I ended up landing 2 goals during the game then missing my 3 and game winning goal with Capt. Rage. Dutch landed 1 goal after the mid-point of the game and racked up 3 take-outs during the game. After Cap. Rage missed his goal we played 2 more turns, both dealing damage and looking for a take-out to close out a 10/10 game. I described it on Gamers Lounge as being similar to a Heavy Weight boxing match where both fighters are in round 8 and just throwing body blows until their opponent drops. It was a great match, with me winning initiative on a turn and closing out the game by Capt. Rage killing Spigot.

Brad lost his game to Sheridan on table 2, leaving me as the only undefeated player through the day and the tournament champion.

Tournament 8

I had a fairly straight forward lineup in mind for Capt. Rage. I'm a bit concerned that the Union team led by rage becomes very one dimensional and struggles to switch to a scoring game when necessary. There are core models that want to be played with Capt. Rage as he ramps up their utility and capabilities a great deal. Some models which are already considered good become drastically better when you can effectively give them an additional TAC and 4 additional influence. Here was my tournament 8 and my thoughts on why I had them in my list.

Captain Rage

Veteran Captain Rage is here and I slotted him into Blackhearts slot to lead my team. I decided on him for this tournament based on a couple reasons. First, it was a smaller tournament and a good place to bring him out for a trial run. I was not expecting the same level of competition I see at 4 and 5 round larger tournaments. Second, I feel Capt. Rage really "turns on" Gutter, and the chance to play her with him would be enjoyable, especially in the face of how much worse I feel she is with Blackheart. Lastly, I was expecting one of the other top-table competitors to also run Rage led Union, and the match-up would have been fun but he ended up not using them.

Capt. Rage is Rage ramped up to the next level. He still charges for free and hits really hard. He generates momentum on essentially every hit, and has lots of ways to wrap his playbook by adding in extra TAC. He's lost the ability to make people bleed, but adds a new ability to make his teammates attack on his turn. One of the tricks with Capt. Rage that needs to be adapted to is his need to attack models who are already engaged by other friendly models. This means most fights are being tied up 2 to 1 from your team. It ends with opposing models being taken out, but still ties up 2 of your players per fight.

I also found that Capt. Rage moves the team into a fairly singular fighting and take-out build. This is where they are most efficient and it almost feels like the team starts to fight you when you try to switch to a goal scoring tempo. It's much harder to get the ball back from the opposing team or even line up favorable goals with your team while maintaining efficient play and damage dealing tempo that Rage wants.

Coin

Coin is a trooper and I don't have much to add over what I've said previously about him. He's still our only mascot for the time being, but he is one of the best mascots in the game. I find that in a Capt. Rage led team I end up with a bit less use from Coin, but mostly due to positioning. He's giving Bag of Coffers to Mist in the early game, then opportunistically handing it out when Mist takes off to score goals. Where possible I drop it on Gutter, not as much for the free bonus time but more for an extra influence for her to attack with. I also see Coin moving to engage more often, especially considering how much Rage wants gang-up opportunities on the field.

Gutter

Post-nerf Gutters role in my game has changed drastically. No longer am I looking for her to be able to re-position models for others to kill. Now I'm simply looking to her as a damage dealer. Although I no longer see her as a valuable member of my Blackheart teams, she will always roll out with Capt. Rage. Gutter and Capt. Rage were made for each other, and she's critical to his play style. Gutter is now in a constant hunt for places where she can get 2 or 3 models into her range and manufacture excuses to Scything Blow. This becomes a bit easier when Rage can charge in late in the turn, after opponents have discounted Gutter doing anything else, and then use Red Fury to make Gutter attack out-of-sequence. Although the Bloody Coin on Rage's legendary play does not buff up Scything Blow, if you have multiple models in range it's the play to do.

Overall I'm disappointed that Gutter's control element has been heavily reduced and further disappointed that the team effectively centers on manufacturing favorable combats for her. It's going to get easier for opponents to realize what a lynch-pin player she is in a Rage led team and start to take her out early and often.

Avarisse & Greede

A&G bring two important things to the table for a Capt. Rage led union team. The most important of these is the 7th activation. Detaching Greede for the second influence and extra activation brings a tremendous benefit to Capt. Rage, giving him the ability to pick critical fights each turn. This is especially important when you consider how necessary it is to line up favorable combats for Gutter. Often these two do not even get influence, simply walking during their turn and hoping to engage opposing models to set up targets for Rage to attack.

On the rare situations Avarisse is given an influence or Rage uses Red Fury to make him attack, his second benefit to the team comes in. Singled Out being dropped onto a target opponent is a fantastic gift to building those key fights during the turn. Singled Out will almost guarantee Gutter her scything blows, and that starts to show where she'll be targeting on the turn. Additionally, Rage no longer has Maverick so can take advantage of the extra TAC as well.

Mist

Mist is still a core selection on my team, and has moved to a must-take in my core 6 since playing at Snowball earlier this year. Arguably the second best or best striker in the game, Mist is where we get goals from on Union. He fills the same role with Rage as he did with Blackheart.

I'm starting to set-up first turn goals with him and then hoping to either receive the ball or  find a way to get the ball through tackling it away or goal-kicking in return to an opponents first turn goal. A Rage led team can put that extra goal influence to use very effectively, necessitating landing a goal early in the game.

Decimate

Decimate continues to place among my favorite players in the game. She is incredibly versatile and simply loses out on the Capt. Rage team to Gutter. Decimate is an amazing damage dealer under Capt. Rage's legendary play but loses out on the consistent +Damage she gets with Blackheart. I tend to use her more for harassment, grabbing the ball, and second wind for when she's near Mist. Occasionally I'll use Coin to toss her an extra influence and she'll swoop in to finish off an opposing player who I might need to clean up with 1-3 more damage for the take out.

On the Rage led team she becomes one of my swap out positions on the team, being the easiest to replace among the primary line-up.

Hemlocke

I'm including Hemlocke into my union line-ups due to the increased condition play in Season 2. Her original role of bringing Blind to the game to combat Butchers and other heavy hitters is no longer as useful following the nerfs to blind. Hemlocke was also directly nerfed across the two errata's, making her easier to hit and reducing her reach overall. She dropped from my 8-player lineup for a while due to those changes, but has returned due to her healing abilities. Being able to drop a 3-inch AOE heal that also drops conditions has become very important with the new S2 players. Hemlocke only made my game versus Hunters in this tournament, and didn't actually do a lot during that game. I pushed so hard against the Hunters that my opponent didn't have many chances to put Snared out on the field. Regardless I still feel she has a spot on the team, especially facing Filet, Smoke, and Hunters.

Snakeskin

I want to like Snakeskin and have been regularly putting her in my 8-player lineups. Unfortunately she's just not leaving my tray for the table. Snakeskin is really good at getting and holdling onto the ball. She also has a good enough kick to work as a back-up striker. This role is not served well when facing Obulus, so taking her out in round 1 would not have served me well. Against Hunters it's more important to have Hemlocke on the field. Against Brewers I could have taken her, but instead chose Decimate for the Second Wind and armor piercing. I still think there's a play for her with Capt. Rage as a place to park the ball and potentially switch over to goal scoring. Perhaps in a future tournament she'll win the whole thing for me.

Monday, October 19, 2015

Guildball - Union Team Review

I've been playing with the Union team for several weeks now and feel I have a good handle on them and how they work together. I thought this was a good time to review my second Guild Ball team and share what I've learned. I'll again refer people over to Docbungle at Miniature Musing's of the Bear and his character write-ups, found using the Team Talk tag. He has also handled Union already, without the overall team review.

Union Team Overview

The Union has been billed as the "Dirty Tricks" team from early in the kickstarter, and earns that reputation in the story of the game. On the table I can see how they live up to that reputation, although I think they obtain it in a unique fashion. I find that the Union is similar to the Masons, where the team functions as a machine built upon the player components used to build it. Union teams can be built to operate in a number of different ways, each of which approach winning a game of guild ball in thier own way.

The variety of choices within the Union combined with the large number of players makes the Union one of the more difficult teams to fully grasp on the table. It's possible to put together a Union team that can dish out nearly as much damage as the Butchers, then play a different union lineup in your next game which scores goals and maneuvers nearly as fast as the Fishermen. It's possible to play a game with a lineup that dishes out up to 3 different conditions in a turn (Bleed, Poison, Knockdown), and also leaves clouds of smoke on the table to provide cover. The magic to the Union comes with deciding which tactic to take then insert the requisite team members to build out a team to deliver.

One of the largest differences I see between the Union and other guild teams is how it approaches synergy. On other teams the players tend to have abilities that combine together to strengthen one or two players on the team. This creates strong combo's across a whole team, where each team's player combined to form a greater than the sum result. The union is exactly the sum of it's parts (players). I find combinations of plays within the union are fairly straight forward additions of each individual player to reach a desired result. On most teams there are lynch pin players who can be taken out to break apart a strong combo, but those players are often tough to get to, or tough to take out. The Union suffers from a situation where each player contributes exactly what they contribute, minimizing the risk of a lynch pin player, but reducing the overall team effectiveness as players are taken out. There is not really a quick drop of a set of plays stopping to work, but a gradual weakening of the entire teams play style.

This effect of an overall weakening vs lynch pin play can be a boon and a curse for union players. In a situation where the union player knows the roles of each of his models intricately it becomes very tough to stop that player from achieving his/her goals. There is not really a place to maximize efforts to reduce that players success in the game, but you have to wear them down over the whole game. In the converse situation where the player is not yet familiar with what their team does, the whole team will not work well. The Union team becomes clumsy and each of the model's can tend to get in the way of each other, hampering a final positive result of play combinations.

Let's take a look at the individual players and their roles on the field.

 Blackheart

The team captain for the Union is one nasty character to tangle with. Here we have a Pirate Captain turned Mercenary King turned Guild Ball captain, who holds his own with dirty tricks on the field. Blackheart has abilities that give him very good mobility while also bringing a great sword to play for beating down his opponents. His playbook is interesting, with very light contributions at low levels of success, and incredible momentous plays with 5 and 6 successes.  He can really dish out the damage if he can get the hits, with all of his 5 & 6 success plays combining damage with another effect such as Tackle, Knockdown, or dodges. Blackheart also have the Commanding Aura play, allowing him to raise an aura which buffs the damage and TAC of other players on his team. I spoke about his role in the Union Brute squad in an earlier article on this blog.

Coin

I can make the argument that Coin is functionally the best mascot in the game. He may not be the best sculpt or the most fun with his rules, but he makes the most significant contribution of any mascot in Season 1. Coin has a trait (Bag of Coffers) that allows him to give a model on the team (including himself) one additional influence plus a single free use of Bonus Time once per turn. He only needs to be within 4 inches of the target model, and can do this at no cost during his turn. This is an amazing ability that is only restricted from Blackheart and Rage within the team (due to Blackheart being a captain and Rage's Maverick). Additionally, Coin has a really good move stat along with a 2 inch reach, making him a real threat to players on the table.

Rage

Rage is arguably one of my favorite players in the game, not just on the Union team. I started out liking his sculpt but favoring other models in the game. The more I use Rage in the Union and other teams the more I like him overall. Here I will discuss his play's in relation to the Union team as a whole. Rage is incredibly influence efficient, combining free charges with furious and free attacks with berserk.  This means Rage can use his single influence to reliably pump out 4 attacks a turn, most of which will produce momentum when used. Berserk only gives a free attack upon damage, so the first and third hit Rage does will always include some sort of damage in order to maximize his abilities, and most of his damage plays produce momentum. Added in, Rage causes the bleed condition on models, leaving behind a reminder why he is a nasty character to deal with. Check out the previously linked Union Brute Squad article for a discussion on how he works best.

Decimate

Decimate is a lot of fun to use, finding her way into two different Union play styles overall. Decimate has some really good movement stats and abilities (Second Wind) which combine with her mid-field (3/6") kick stat to make her a contributor to a Union scoring team. She also has a playbook which becomes downright scary when combined with abilities that increase damage, such as Blackheart's Commanding Aura. Decimate truly shines as a momentum generator, easily producing one momentum per influence and occasionally able to produce 2 per influence spent. The only challenge I find with Decimate on a team is she needs a lot of influence to make her excel, often looking for 3 and 4 influence from the team pool. This influence is always well spent, but limits the activities the rest of the team will take. In this way Decimate moves the Union team to resemble other teams where multiple models are grouped together to super-buff a single model to achieve results. That tends to be counter to Union game success.

Gutter

Gutter seems to be the most hated player in Guild Ball currently. I am not sure she deserves the amount of bile she draws, but she is a very good player. In Gutter we have the third member of the Union Brute Squad, along with some very useful abilities. Gutter has a good move and kick, allowing her to contribute to a football scoring team, although she really shines for damage dealing. Scything Blow lets her trigger one of the very few plays that affect multiple models and push out at least 3 damage to all targets. Her high TAC plus ability to heal when damaging AND ignore armor make her a real threat on the field.  Finally she brings Chain Grab, an ability to reposition enemy models to locations that better suit the needs of the Union. All of this combined make her a high priority target for other teams to hate and take out.

Mist

 Mist is also climbing the charts as one of the more hated models in the game. Mist is the Union striker, along with clocking in as one of the best strikers in the game. I've written my soap-box stance on if Mist is overpowered in an earlier article, and will not rehash it here. Mist brings high movement and strong goal scoring to the table as any striker should. He can quickly reposition where he is and fills the role of striker exceptionally. This means that he only threatens on that axis of the game, bringing nothing useful for combat and damage dealing. Mist does his job well and only his job. I like to have Mist included on all my union teams, as he adds another threat component to my damage dealing Union which my opponent needs to contend with.

Hemlocke 

Hemlocke is the single player in Guild Ball that I could support an argument portraying her as "broken" or "not working as intended". Hemlocke is the only player with a natural 6 defense, making her incredibly resilient. She brings some intriguing and "out of the box" abilities to the team, applying conditions, hobbling the opposing models, and having a good movement and moderate kick for goal scoring.  Overall it appears that Hemlocke was a collection of moderate abilities which were all cool, that all grouped together to becomes far more than was intended. She looks like a behind the lines player who can buff/debuff/harass players. She ended up being a player who can sit inside a scrum nearly untouchable and move the ball to score while completely hamstringing opposing players. The only thing Hemlocke is clearly bad at is dealing damage, although even on this side her ability to dish out poison makes her a secondary threat.

Snakeskin

Snakeskin brings an intriguing "sideways" playstyle to the  Union, earning her a key place on the team. She is an overall defensive player, scaling her defense with abilities such as Charmed Male, Nimble, and Clone. She is another mid-range movement and ball handling player, contributing the the Union scoring team. She also brings along an easy application of poison to enemy players. These abilities combine to create a very versatile "swing" player on the field, able to withstand enemy focus and quickly disengage after dealing some damage.


Avarrisse & Greede

Avarrisse and Greede are the only player in the game who brings two players in a single model. This is not only unique from a modelling perspective, but also the particular play ability that you are going to include them on a team for. A&G are also the only Union player that can play for every guild in the game. At the start of every turn, A&G can choose to separate into 2 players who each bring influence and an activation to the team. This means that the Union could achieve 7 players to activate on the field, guaranteeing them the ability to out activate their opponent.  In the event that the two are separated and in base contact during a maintenance phase, they can choose to recombine to a single player and model and moving forward as a single choice. Avarrisse is a "big player", bringing a low defense but a load of wounds to the table. Conversely, Greede is a small model who's hard to hit but only has 4 total wounds before being taken out. Greede, once taken out, cannot be returned to play. Greede can only be taken out while separate from Avarrisse however, providing him protection from VP hunters. There are a number of tactics that can be employed with this player, none of which are direct or easy to walk through. Success in using A&G comes down to putting in a fair bit of time to learn how to use him and get the best use from them on the table.

Fangtooth

Big and ugly and the model I like least in the entire game of Guild Ball. I have read several comments from other players on how much they love the Fangtooth sculpt. Overall he has been my least favorite sculpt in the game, but that's personal taste for you. Fangtooth has earned a reputation of being a "not so good" choice for union teams. He brings an aura that creates slow terrain, but it affects his own team. He has the most wounds in the game but no armor and a low defense.  His heroic play buffs him but damages his own team. All of these make him a tough model to play with on the team. Fangtooth also brings some of the easiest Knockdown results to the Union, along with some real damage dealing potential. He is resilient along with being able to generate momentum on some key playbook plays only he has easy access to. Overall I believe Fangtooth is a very situationally good player, who is a moderate choice in some situations and a very good choice in others. I do not see where he is a bad choice once you learn how to avoid his "gotcha" plays. Considering that, he is one of the few "gotcha" choice players in the game.

Mynx

I'd like to be able to talk about Mynx, but I have not assembled or played her yet. She is in my queue of models to build and paint. Once that's done I'll be getting her on the table to try out.